Transplanting
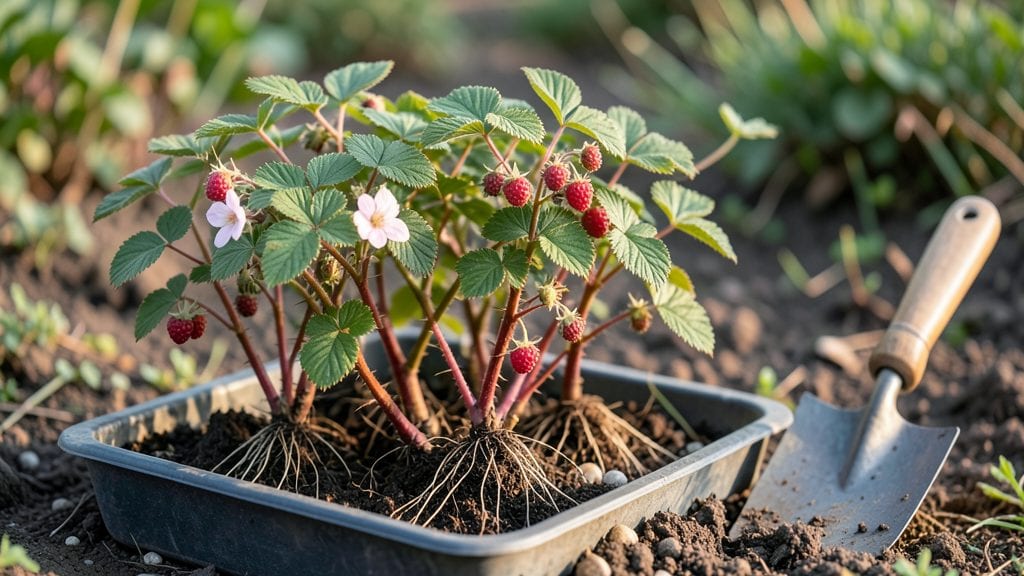
Planting Willamette raspberries in your yard means years of juicy harvests with minimal fuss—these vines handle winter like a champ. 🌱 I’ve grown them for five seasons now, and the secret to their success starts with the right spot and soil prep.
The Willamette variety thrives in cooler climates (USDA zones 4-8), so if you’re in the Pacific Northwest, you’re already in prime territory.
You’ll need a sunny patch with well-draining soil—raspberries hate soggy roots—and a sturdy trellis or wire support for those thorny canes. Bare-root plants are easiest to handle, but potted varieties work too if you plant them early in the season.
Space them 2-3 feet apart in rows 6 feet apart to give them room to spread without crowding.
Once planted, water deeply to settle the soil, then mulch heavily with straw or wood chips to keep roots cool and moisture locked in. The first year is all about establishing strong roots, so avoid heavy fruiting—you’ll get bigger, better berries next season.
By summer, you’ll see those signature red canes pushing out, and by late summer, you’ll be picking berries that taste like childhood.
Here’s the kicker: Willamette raspberries are one of the few varieties that produce fall and spring crops, so you’ll get two harvests a year with minimal extra work. Just keep an eye out for Japanese beetles and birds—they love these berries almost as much as you will.
📚 In This Guide
- What you need
- Instructions
- Tips and common mistakes
- Wrapping up and next steps
What you need
- ● Willamette raspberry plants – 3–5 bare-root or potted plants (check for disease-free canes with strong roots).
- ● Well-draining soil – Aim for a pH of 5.5–6.5 (amend with compost or peat moss if needed).
- ● Compost or aged manure – 2–3 gallons per planting hole (boosts fertility!).
- ● Balanced fertilizer – 10-10-10 or organic options (follow package rates).
- ● Mulch (straw or wood chips) – 2–3 inches to retain moisture and suppress weeds.
- ● Drip irrigation or hose – For consistent watering (raspberries hate soggy roots!).
- ● Garden gloves & pruners – Sterilized tools prevent disease spread.
- ● Trellis or wire support – 6–8 feet tall (essential for upright growth!).
- ● Planting stakes or labels – To mark varieties and spacing (keep rows 6 feet apart).
- ● Epsom salt – Sprinkle lightly around plants for magnesium boosts (especially in clay soil).
- ● Row covers – Protects from late frosts or pests.
- ● Soil moisture meter – Ensures you’re watering just right (raspberries prefer consistent dampness, not soggy soil).
- ● Organic pest control – Neem oil or insecticidal soap for aphids/spider mites.
Step-by-Step guide to planting Willamette raspberries
Here's how to get your winter-hardy raspberries thriving—from site prep to first harvest.
🌱 Step 1: Choose the Perfect Planting Spot
Willamette raspberries need 6-8 hours of sunlight daily and shelter from strong winds. I always pick a location with morning sun and afternoon shade in hotter climates—this prevents fruit from scorching. The soil should drain well but retain moisture; if yours is heavy clay, amend with 2-3 inches of compost mixed into the top 12 inches.
Test your spot by digging a hole 12 inches deep—if water pools after 30 minutes, you’ll need to raise the bed or improve drainage. Raspberries hate soggy roots, and Willamettes are no exception. A slightly elevated area or berm works well for heavy soils.
🪴 Step 2: Plant Bare-Root Canes at the Right Time
Plant dormant bare-root canes in early spring, about 2-4 weeks before your last frost date. This gives roots time to establish before summer heat arrives. Soak the canes in lukewarm water for 2-3 hours before planting to revive them—you’ll see the buds plump up slightly.
Dig a trench 6 inches deep and 12 inches wide, spacing canes 2 feet apart in rows 6 feet apart. This gives them room to spread and prevents overcrowding. Place each cane so the crown (where roots meet stem) sits just above soil level—burying it too deep causes rot, while leaving it exposed risks drying.
💧 Step 3: Water and Mulch for Strong Establishment
Water deeply immediately after planting, then again every 2-3 days until new growth appears. Willamettes need 1-1.5 inches of water weekly once established, but young plants are thirsty. You’ll know they’re getting enough when the soil feels damp 2 inches down but not waterlogged.
Apply 3-4 inches of organic mulch (straw or wood chips) around the base, keeping it 6 inches away from the crown. This locks in moisture, suppresses weeds, and protects roots from winter freezes. Refresh mulch annually in early spring—it breaks down fast and loses effectiveness.
✂️ Step 4: Prune for Winter Hardiness and Summer Productivity
In late winter (before buds swell), remove all dead, diseased, or weak canes at ground level. Willamettes produce fruit on floricanes (second-year canes), so leave 6-8 of the strongest, healthiest canes per plant. Cut remaining canes back to 12 inches tall—this encourages bushier growth and easier harvests.
During the growing season, trim new primocanes (first-year canes) to 5-6 feet tall to prevent flopping. You’ll see new shoots emerging from the base in early summer—these are your future fruit-bearing canes. Thin them to 3-4 per plant for best results.
☀️ Step 5: Fertilize and Monitor for Pests
Feed your Willamettes in early spring with a balanced 10-10-10 fertilizer (about 1/2 cup per plant). Avoid high-nitrogen fertilizers—too much leaf growth weakens fruit production. In mid-summer, switch to a low-nitrogen, high-phosphorus fertilizer (like 5-10-10) to boost flowering and fruiting.
Watch for raspberry cane borers (tiny holes in stems) and Japanese beetles (skeletonized leaves). Remove infested canes immediately and treat with neem oil if needed. Healthy Willamettes rarely struggle with pests, but early intervention prevents spread. Harvest fruit as soon as it ripens—overripe berries attract birds and pests.
Tips & tricks for perfect Willamette raspberry planting
These game-changing tips will help you avoid common pitfalls and get your winter-hardy raspberries off to the best possible start.
Soil Test Tip: Before amending your soil with compost, do a quick drainage test in Step 1. Dig your 12-inch hole and fill it with water—if it drains completely within 30 minutes, you're good to go. If not, consider building a raised bed or adding sand to improve drainage. Willamettes hate soggy roots, so this simple test can save you from future problems.
Timing Secret: The 2-3 hour soak for bare-root canes in Step 2 is crucial, but don't skip the lukewarm water requirement. Cold water shocks the roots, while hot water can damage the buds. I like to use a bucket of water with a few drops of dish soap to help the roots absorb moisture more efficiently. This small detail makes a big difference in root establishment.
Pruning Strategy: When you're pruning in Step 4, focus on creating an open center in your plant. This improves air circulation and sunlight penetration, which reduces disease risk. I find it helpful to mark the canes I'm keeping with a bright ribbon before cutting—this prevents accidental removal of the good ones. Also, save your pruned canes for compost or mulch rather than throwing them away.
Fertilizer Timing: That 10-10-10 fertilizer in early spring (Step 5) should be applied when you see new growth emerging, not right after planting. Too much fertilizer too soon can burn tender new roots. I also recommend mixing it into the soil rather than applying it on top—this helps prevent runoff and ensures the plants get the full benefit. For the mid-summer switch to 5-10-10, time it with your first flowering to support fruit development.
Pro Tips for Willamette Raspberry Planting
- These game-changing tips will help you avoid common pitfalls and get your winter-hardy raspberries off to the best possible start.
- Soil Test Tip: Before amending your soil with compost, do a quick drainage test in Step 1.
- Timing Secret: The 2-3 hour soak for bare-root canes in Step 2 is crucial, but don't skip the lukewarm water requirement.
Frequently asked questions
When is the best time to plant Willamette raspberries?
The ideal time to plant Willamette raspberries is in early spring (March–April) or early fall (September–October). Planting in spring allows roots to establish before summer heat, while fall planting gives them time to root before winter dormancy. Avoid planting in extreme heat or freezing conditions for best success!
How cold-hardy are Willamette raspberries?
Willamette raspberries are exceptionally winter-hardy, thriving in USDA zones 3–8. They can tolerate temperatures as low as -20°F (-29°C), making them perfect for Oregon’s climate. Just ensure they’re planted in well-draining soil and mulched heavily in winter for extra protection.
Can I grow Willamette raspberries in containers?
Yes! Willamette raspberries adapt well to large containers (at least 18–24 inches deep) with good drainage. Use a high-quality potting mix and place them in a sunny spot. Keep containers mobile so you can move them to avoid frost or extreme heat. Just be prepared for slightly smaller yields than in-ground plants.
What pests or diseases should I watch for?
Common issues include spotted wing drosophila (a fruit fly), raspberry cane borers, and fungal diseases like powdery mildew. Monitor for holes in canes or yellowing leaves. Use row covers for pests and proper spacing (3–4 feet apart) to improve airflow, reducing disease risk.
How long does it take for Willamette raspberries to bear fruit?
Willamette raspberries typically take 1–2 years to produce fruit after planting. First-year plants focus on root and cane growth, while second-year plants may yield a light harvest. Patience pays off! With proper care, mature plants (3+ years old) produce heavy, flavorful crops from early summer to fall.
Wrapping up and next steps
Planting Willamette raspberries is a rewarding journey that leads to luscious, winter-hardy harvests—perfect for Pacific Northwest gardeners! 🌱 With the right site, soil prep, and care, these vines thrive and deliver sweet, flavorful berries year after year.
Whether you're a beginner or a seasoned gardener, your effort will pay off in delicious rewards.
Ready to take the next step? Start by marking your planting spot and gathering your supplies—then dig in! Soon, you’ll be savoring homegrown raspberries straight from your garden.