Pruning
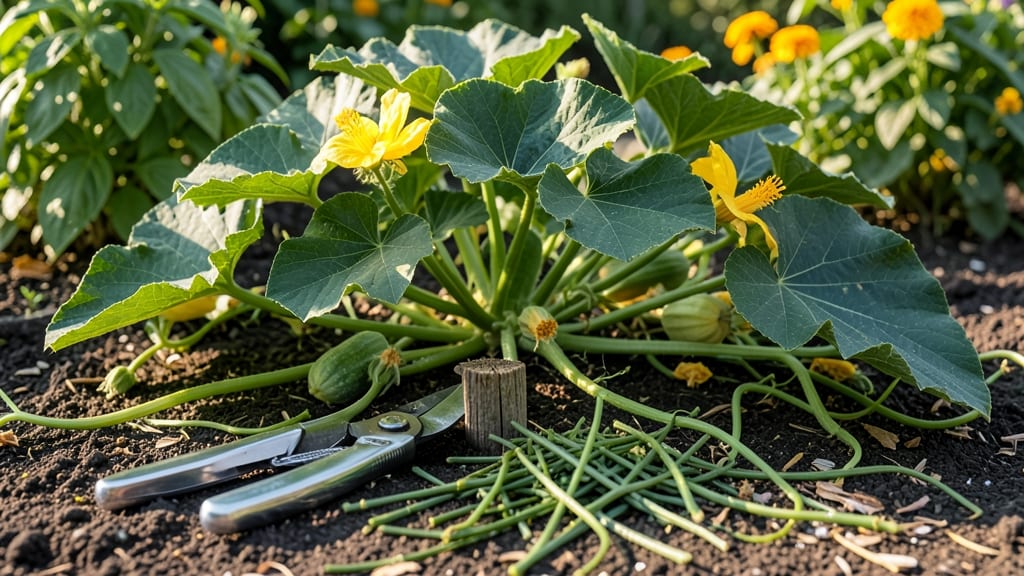
Pruning summer squash plants isn't just about tidying up—it’s the secret to doubling your harvest. 🌱 I learned this the hard way after my first season of ignoring those wild vines, only to watch my plants produce tiny, bitter squash instead of the plump, sweet ones I wanted.
The right cuts at the right time mean more fruit, less disease, and plants that keep producing all season.
You only need three basic cuts: removing suckers (those little side shoots), trimming yellowing leaves, and thinning crowded vines. Grab sharp pruners or clean scissors, and work on a dry morning when the plants are at their strongest.
The goal isn’t perfection—it’s directing the plant’s energy where you want it: into bigger, tastier squash instead of extra foliage.
After pruning, you’ll notice something magical—better air circulation means fewer pests and diseases, and the plant focuses on fruit production. Within weeks, you’ll see larger blooms and heavier squash hanging from the vines. It’s not about making the plant look pretty; it’s about making it work harder for you.
This method works for zucchini, yellow squash, and pattypan varieties, whether you’re growing in a raised bed or a backyard patch. Just remember: less is more. Over-pruning stresses the plant, so take it slow and watch your harvest grow.
📚 In This Guide
- What you need
- Instructions
- Tips and common mistakes
- Wrapping up and next steps
What you need
- ● Sharp pruning shears or bypass pruners – Choose bypass-style (not anvil) for cleaner cuts; opt for sterilized, stainless steel blades (4-6 inch blades work best).
- ● Clean, sharp garden knife or razor blade – For precise cuts on smaller stems (e.g., removing suckers).
- ● Rubbing alcohol (70% isopropyl) or bleach solution – 1 part bleach to 9 parts water to sterilize tools between cuts and prevent disease spread.
- ● Garden gloves – Nitrile or heavy-duty cotton to protect hands from thorns and sap.
- ● Compost or mulch – To cover pruned areas and retain moisture.
- ● Watering can or hose with a gentle spray nozzle – For post-pruning hydration.
- ○ Plant growth regulator (optional) – Such as hydrogen peroxide (3%) to disinfect cuts further.
- ● Markers or flags – To tag plants if you’re experimenting with different pruning techniques.
- ● Knee pad or small stool – For comfort if your squash plants are tall or sprawling.
- ● Disposable pruning bags – To collect and dispose of pruned suckers/shoots easily.
Step-by-Step instructions for pruning summer squash plants
Here's the straightforward method I use to maximize fruit production and keep plants healthy.
✂️ Step 1: Identify and Remove Suckers Early
Start by locating the main stem of your squash plant—the thick, central vine where most leaves and flowers grow. Look for smaller shoots growing from the base of the plant or from the leaf axils along the main stem. These are suckers, and they compete with your main plant for energy. Use sharp pruning shears to snip them off at the base, just above a leaf node.
Do this when suckers are still small—about 2-3 inches tall. Removing them early prevents them from draining energy from your main plant. I check for new suckers every 5-7 days during peak growth season. If you miss a sucker, it can grow large enough to produce its own fruit, but this will reduce your main harvest.
✂️ Step 2: Prune Lower Leaves to Improve Airflow
Focus on the bottom 6-12 inches of the plant where leaves touch the soil. These lower leaves create a damp, shaded environment that invites disease. Use your pruning shears to trim away any leaves that brush against the ground or block airflow. Cut them at the stem, leaving a small stub.
This step is especially important if your plants are crowded or in a humid climate. I like to do this on a dry morning so the cuts have time to dry before evening. You'll notice fewer yellowing leaves and better overall plant vigor within a week of pruning.
✂️ Step 3: Trim Overly Crowded Vines and Leaves
Once your plant starts producing fruit, focus on maintaining an open canopy. Look for areas where vines grow too densely, blocking sunlight from reaching the center of the plant. Use your pruning shears to thin out some of the smaller vines, leaving the strongest, most productive ones. Aim to create a balanced shape with good airflow throughout.
Pay special attention to leaves that shade developing fruits—remove about 20-30% of excess foliage to allow sunlight to reach the squash. This encourages faster growth and better flavor. I make these cuts gradually over time rather than all at once, which helps the plant adjust without shock.
🌱 Step 4: Maintain Pruning Through the Season
Pruning isn't a one-time task—keep checking your plants weekly for new suckers, crowded growth, or leaves touching the soil. Use your pruning shears to make clean cuts whenever you spot issues. Always cut just above a leaf node to encourage new growth from that point.
Stop pruning about 4-6 weeks before your first frost date, as the plant needs all its energy to harden off for winter. You'll see a noticeable difference in fruit production and plant health if you stay consistent with regular maintenance pruning.
Tips & tricks for pruning summer squash plants
A few key strategies that'll make all the difference in your squash harvest this season.
The Timing Secret: In Step 1, when you're removing suckers that are about 2-3 inches tall, don't wait until they're larger. I've seen gardeners miss this window and end up with multiple smaller squash instead of a few large, healthy ones. Those early suckers can steal up to 30% of your plant's energy if left unchecked. Check your plants every 5-7 days during peak growth—morning is best when plants are turgid and easier to inspect.
Pruning Technique: When you're making those clean cuts in Step 2 and Step 3, always cut just above a leaf node—not in the middle of a stem. This simple technique encourages new growth from that exact point, which helps maintain your plant's vigor. I've ruined several plants by cutting too close to the main stem, which created larger wounds that took forever to heal. Think of it like making a clean surgical cut rather than a jagged tear.
Seasonal Strategy: The 4-6 week rule before your first frost date in Step 4 is crucial for northern gardeners. If you're in a warmer climate where frost isn't a concern, you can continue light pruning throughout the season to maintain plant health. Just remember that once squash start maturing, the plant's priority shifts from growth to fruit production, so scale back your pruning efforts accordingly. This balance is what gives you that perfect window between harvest and plant shutdown.
Pro Tips for Prune Summer Squash Plants
- A few key strategies that'll make all the difference in your squash harvest this season.
- The Timing Secret: In Step 1, when you're removing suckers that are about 2-3 inches tall, don't wait until they're l...
- Pruning Technique: When you're making those clean cuts in Step 2 and Step 3, always cut just above a leaf node—not in...
Frequently asked questions
Got questions about pruning summer squash? You’re not alone!
Here are answers to the most common concerns—from timing to troubleshooting—so you can prune like a pro and enjoy a bountiful harvest.
When is the best time to prune summer squash?
Prune summer squash early and often—start when plants are 12–18 inches tall and continue every 1–2 weeks. Focus on removing suckers (side shoots) in the morning when humidity is low to prevent disease. Avoid pruning late in the day, as wounds take longer to heal overnight.
How often should I prune my squash plants?
Check your plants weekly for new suckers (those tiny shoots growing from the main stem or leaf axils). Remove them immediately—they drain energy from fruit production. Overgrown plants may need biweekly pruning, but consistency matters more than frequency!
What if I prune too much? Will my plant die?
Summer squash are resilient, but never remove more than 1/3 of the plant’s foliage at once. Heavy pruning can stress the plant, reducing yield or inviting pests. Think of it like a haircut—trim strategically, not drastically! If you’ve overdone it, focus on watering and fertilizing to help recovery.
Can I prune summer squash the same way as zucchini?
Yes! Summer squash (like zucchini) follow the same pruning rules: prioritize removing suckers and encouraging vertical growth. However, bush varieties (e.g., ‘Patio Star’) need less pruning than vining types. Always tailor pruning to your plant’s growth habit—don’t assume one-size-fits-all!
My pruned squash leaves look yellow. Is this normal?
Yellowing leaves after pruning can signal stress, but it’s usually temporary. If paired with wilting or spots, check for powdery mildew (common in humid climates) or pests like squash bugs. Improve airflow by spacing plants 2–3 feet apart and avoid overhead watering. A light dose of neem oil can help prevent fungal issues.
Wrapping up and next steps
Pruning your summer squash plants might feel like extra work at first, but with just three strategic cuts, you’ll unlock a bountiful harvest and healthier vines! 🌱 Focus on removing suckers, thinning overcrowded fruit, and trimming leggy growth—each step works together to redirect energy where it matters most.
The best part? You’ll enjoy more squash, fewer pests, and stronger plants all season long.
Ready to put your new skills to the test? Grab your pruners and head to the garden—your future zucchini and pattypan squash are waiting! For extra tips, bookmark this guide or share it with fellow gardeners. Happy pruning! ✂️🌿