Planting
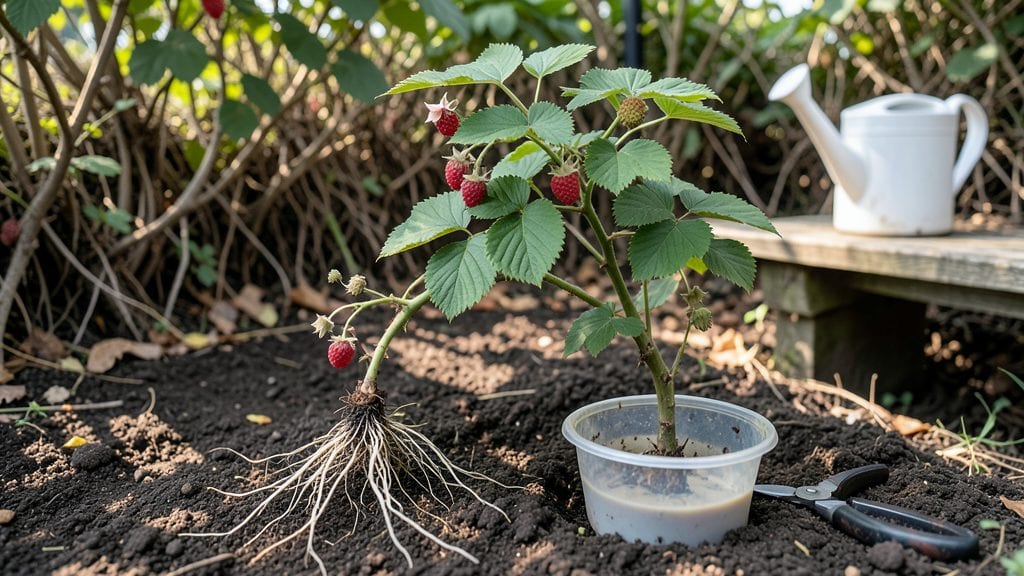
Transplanting raspberry plants in early spring can double your harvest next year—if you do it right. 🌱 I’ve moved raspberries twice myself, and the difference between a thriving patch and a struggling one comes down to timing, soil prep, and how you handle the roots.
The key isn’t just digging and dropping; it’s giving those canes the best possible start in their new home.
First, pick a spot with full sun and well-draining soil—raspberries hate soggy feet. Amend heavy clay with compost, and space plants 3–4 feet apart for airflow. For young plants, dig a hole twice as wide as the root ball; established plants need extra care to keep their roots intact.
Water deeply the day before moving to reduce shock, and trim any damaged canes before transplanting.
After planting, mulch heavily to retain moisture and keep roots cool. Water consistently for the first two weeks—deep soaks, not light sprinkles—and avoid heavy pruning until new growth appears. With the right approach, your plants will focus on establishing roots instead of struggling to survive.
The payoff? Bigger canes, more fruiting laterals, and berries that taste like summer in every bite.
This method works for both summer-bearing and fall-bearing varieties, though fall transplants need extra protection in cold climates. Whether you’re relocating a struggling patch or expanding your berry garden, these steps make the difference between success and disappointment.
Let’s get those roots settled for a harvest you’ll talk about at the farmers’ market.
📚 In This Guide
- What you need
- Instructions
- Tips and common mistakes
- Wrapping up and next steps
What you need
- ● Healthy raspberry plants: 2–5 plants (depending on space), with well-developed roots and canes (1–2 years old). Choose bare-root or potted varieties.
- ● Shovel or trowel: A garden fork (for breaking up soil) or a transplant spade (for precision digging).
- ● Pruners: Bypass pruners (sharp and clean) to trim damaged canes or roots.
- ● Gloves: Heavy-duty gardening gloves to protect hands from thorns and soil.
- ● Watering can or hose: With a gentle spray nozzle for post-transplant hydration.
- ● Mulch: Straw, wood chips, or pine needles (2–3 inches thick) to retain moisture and suppress weeds.
- ● Fertilizer: Balanced organic fertilizer (10-10-10 or compost) or a raspberry-specific slow-release granular (follow package rates).
- ● Root stimulator: A mycorrhizal fungi powder or seaweed extract to boost root growth.
- ● Soil amendments: Compost or well-rotted manure to enrich planting holes (if soil is poor).
- ● Support system: T-posts and twine (if planting along a fence/trellis).
- ● Plant tags: To label varieties and track transplant dates.
- ● Rain barrier: A clear plastic sheet (for 1–2 weeks post-transplant) if your area lacks consistent rain.
Step-by-Step instructions for transplanting raspberry plants
Here’s how I move raspberry canes without shocking the roots—so they bounce back stronger and fruit heavier next season.
🌱 Step 1: Pick the Right Time and Spot
Transplant raspberries in early spring, when soil is workable but before new growth starts. I aim for 2-3 weeks before your last frost date—this gives roots time to establish before summer heat. Choose a site with full sun (6+ hours daily) and at least 6 feet between rows for airflow (raspberries hate crowded roots).
Test the soil first—raspberries thrive in slightly acidic soil (pH 5.5-6.5). If your soil is heavy clay, amend with 2 inches of compost mixed into the top 12 inches of soil. Avoid low spots where water pools—root rot is the #1 killer of transplanted canes.
✂️ Step 2: Prune and Prepare the Canes
Before digging, prune back last year’s canes by 1/3 to reduce stress. Cut at a 45-degree angle just above a bud, and remove any dead or damaged canes entirely. I also trim the new canes (primocanes) down to 12 inches tall—this encourages a bushier root system before they focus on fruiting.
Water the plants 2-3 days before transplanting to keep roots supple. Dig a trench around the canes, 12 inches from the center, and gently loosen the soil with a spade. The goal is to minimize root damage—raspberries have shallow roots that bruise easily. If the soil is dry, water again right before digging.
🪴 Step 3: Dig and Move the Plants
Dig a hole twice as wide as the root ball and 6 inches deeper than the plant’s current depth. Raspberry roots spread horizontally, so don’t bury them too deep—this causes rot. Gently lift the plant, keeping as much soil attached to the roots as possible. If roots dry out while working, soak them in a bucket of water for 10-15 minutes before planting.
Place the plant in the hole so the crown (where stems meet roots) sits 1 inch below soil level. Backfill with the native soil (no amendments here—you already prepped the site). Firm the soil gently around the base to eliminate air pockets, then water deeply to settle everything. Mulch with 2-3 inches of straw or wood chips, keeping it 6 inches away from the crown to prevent rot.
☀️ Step 4: Support and Care for Recovery
Install T-posts or sturdy stakes immediately—raspberries need support, and freshly transplanted canes are wobbly. Use soft ties (like old T-shirts) to attach canes to the posts, leaving 6-8 inches of slack for growth. Avoid wire or anything that can cut into the stems as they thicken.
Water every 2-3 days for the first 2 weeks, keeping the soil evenly moist but not soggy. You’ll know you’re doing it right when the soil feels damp 2 inches down but doesn’t puddle. After that, water deeply once a week, increasing to twice a week in hot weather. Fertilize lightly with a balanced 10-10-10 formula 6 weeks after transplanting—raspberries don’t need heavy feeding right away.
⏰ Step 5: Monitor and Protect New Growth
Watch for new leaves in 3-4 weeks—this is your sign the roots are settling in. If leaves yellow or wilt, it’s usually underwatering (raspberries hate dry spells). If they blacken or droop suddenly, overwatering or root rot is likely. In that case, reduce watering and improve drainage by adding sand or perlite to the soil.
Protect young canes from deer and rabbits with chicken wire fencing (they love tender new growth). You’ll also see suckers (shoots from the base) appear—remove them immediately. These drain energy from the main plant while it’s still recovering. By mid-summer, your raspberries should look like they’ve been there for years, with strong canes and lush foliage.
Tips & tricks for transplanting raspberry plants
A few simple tricks will help your raspberry canes recover faster and produce bigger harvests next season.
Timing Secret: The 2-3 weeks before your last frost date is your sweet spot for transplanting. I learned this the hard way—planting too early means roots can still freeze, while planting too late gives them no time to establish before summer heat. Check your local frost dates and mark your calendar!
Pruning Strategy: When you prune last year’s canes by 1/3 in Step 2, make those cuts at a 45-degree angle just above a bud. This prevents water from pooling on the cut and reduces disease risk. For the new canes (primocanes), trimming them to 12 inches encourages stronger root growth before they focus on fruiting—don’t skip this step if you want next year’s harvest to be stellar.
Root Care: In Step 3, that 10-15 minute root soak is non-negotiable if roots look dry. I’ve seen plants revive completely after this simple step—it’s like giving them a drink of water before their big move. Also, keep as much of that original soil attached to the roots as possible; raspberry roots are shallow and sensitive to disturbance.
Post-Transplant Support: The 6-8 inches of slack you leave in your ties (Step 4) is crucial—it gives canes room to grow without strangling them. I use old T-shirts because they’re soft and stretch as the canes thicken. Avoid wire or anything that can cut into the stems as they grow thicker during the season.
Pro Tips for Transplanting Raspberry Plants
- A few simple tricks will help your raspberry canes recover faster and produce bigger harvests next season.
- Timing Secret: The 2-3 weeks before your last frost date is your sweet spot for transplanting. I learned this the har...
- Pruning Strategy: When you prune last year’s canes by 1/3 in Step 2, make those cuts at a 45-degree angle just above ...
Frequently asked questions
Got questions about transplanting raspberry plants? You’re not alone! Here are answers to the most common concerns—so you can tackle your move with confidence.
When is the best time to transplant raspberries?
Transplant raspberries in early spring (before new growth starts) or late fall (6–8 weeks before frost). Avoid summer heat or winter dormancy—these times stress plants. If you must move them in summer, do it on a cool, cloudy day and keep soil moist for 2 weeks afterward.
How do I prepare the new planting spot?
Choose a site with full sun (6+ hours/day) and well-draining soil. Amend the soil with compost or aged manure (2–3 inches mixed in) and ensure it’s slightly acidic (pH 5.5–6.5). Space plants 3–4 feet apart (6 feet for fall-bearing varieties) to allow airflow and reduce disease risk.
Can I transplant raspberries from a neighbor’s yard or wild patch?
Technically yes, but check local laws first—many areas regulate plant propagation. If legal, dig up the entire root system (including all roots) and replant immediately. Warning: Wild raspberries may carry pests/diseases. Inspect plants thoroughly and quarantine them for 2 weeks before transplanting.
Why are my raspberry plants dying after transplanting?
Common culprits: root damage (trim ragged roots, not healthy ones), drought stress (water deeply 2–3x/week for 4 weeks), or shock (avoid transplanting during extreme temps). If leaves wilt or yellow, prune damaged foliage and mulch heavily to retain moisture. Pro tip: A rooting hormone can boost survival rates!
Do I need to prune raspberries before or after transplanting?
Light pruning is key! Before transplanting: Trim back canes by ⅓ to reduce stress. After transplanting: Wait until spring to prune old canes (cut to ground level) and shape the plant. Avoid heavy pruning in the first year—focus on root establishment. Bonus: Remove any suckers growing from the base to direct energy to new growth.
Wrapping up and next steps
Transplanting raspberry plants in spring can transform your garden into a bountiful harvest hub—just follow the right steps! By choosing the perfect timing, preparing the soil, and handling the roots with care, you’ll set your berries up for explosive growth and sweet rewards.
Remember, patience and prep work pay off in juicy, plump raspberries by summer.
Ready to dig in? Start by marking your new spot and gathering your tools—then roll up your sleeves and give your raspberries the fresh start they deserve! 🌱✨