Pruning
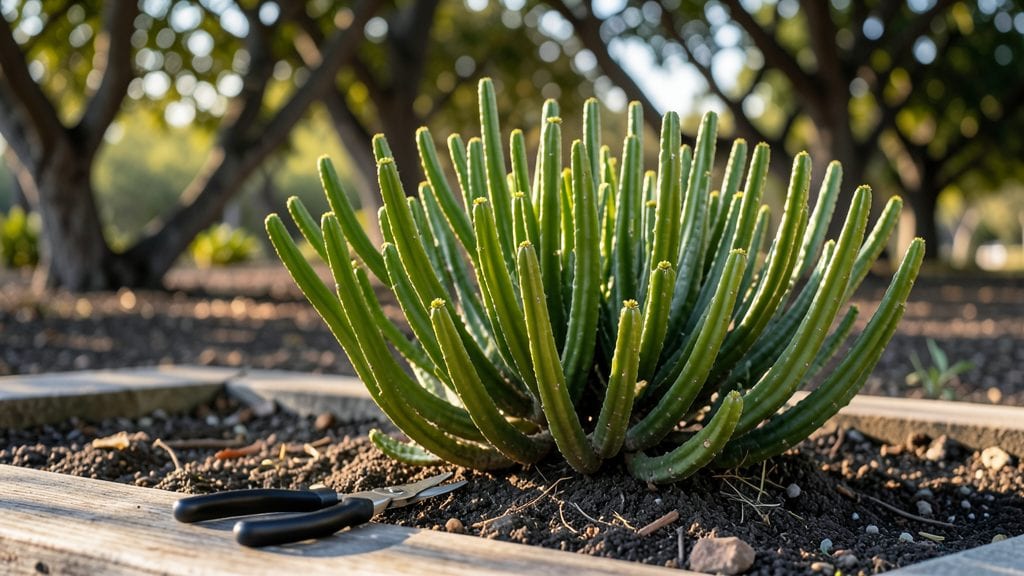
Pruning euphorbia plants isn’t just about shaping—it’s about unlocking their full potential. 🌿 I’ve learned the hard way that skipping this step leads to leggy, sparse growth, but when done right, your euphorbias reward you with bushier foliage and even more dramatic blooms.
The key is timing, technique, and respecting their sap—because one wrong cut can leave your hands itchy for days.
You’ll need sharp bypass pruners (dull blades crush stems and spread sap), rubber gloves (trust me on this), and a clean cutting surface. Work in late spring or early summer when new growth is pushing, and always cut just above a leaf node at a 45-degree angle.
For poinsettias, hold off until after flowering; for succulent euphorbias like Euphorbia tirucalli, prune aggressively in early spring to encourage dense branching.
After pruning, your plants will bounce back faster than you think—new shoots emerge within weeks, and the structure becomes fuller. The secret is consistency: a little maintenance every few months keeps euphorbias looking their best.
Just remember, their milky sap is toxic, so always wash your hands thoroughly and avoid touching your face.
This method works for both indoor poinsettias and outdoor succulent varieties, though desert-dwelling euphorbias handle pruning better in cooler months. Let’s get those shears ready—your plants are about to transform.
📚 In This Guide
- What you need
- Instructions
- Tips and common mistakes
- Wrapping up and next steps
What you need
- ● Pruning shears or bypass pruners: Choose sharp, high-quality tools with bypass blades (avoid anvil pruners—they can crush stems). Size: 5-7 inches for medium to large plants.
- ● Sterilized pruning saw: For thicker stems (1 inch or larger). Type: Curved blade for clean cuts.
- ● Rubbing alcohol (70% isopropyl) or bleach solution: 1 part bleach to 9 parts water for sterilizing tools between cuts.
- ● Disposable gloves: Latex or nitrile to protect your hands from Euphorbia's milky sap (toxic if ingested).
- ● Newspaper or cardboard: Lay down a protective layer to catch sap and debris.
- ● Sharpie or permanent marker: For labeling cuttings if propagating.
- ● Rooting hormone: Speeds up root growth for cuttings (gel or powder form).
- ● Small pots or trays: For propagating new plants from cuttings.
- ● Horticultural sealant: Like Tree Top or Tanglefoot to seal larger cuts and prevent disease.
- ● Pruning spray (fungicide): A copper-based spray to treat cuts if your plant shows signs of infection.
- ● Apron or old shirt: To protect your clothes from sticky sap.
Step-by-Step guide to pruning Euphorbia for lush, healthy growth
Euphorbias thrive when pruned with precision—here’s how to encourage bold stems and vibrant blooms.
✂️ Step 1: Time Your Pruning for Maximum Impact
Prune euphorbias in early spring just as new growth begins, or after flowering to redirect energy into stronger stems. Avoid cutting back in fall or winter—this plant stores energy in its thick stems, and late pruning stresses it. You’ll know it’s time when you see fresh green shoots emerging from the base or when spent blooms wilt.
If you’re shaping a mature plant, do it gradually over 2-3 sessions spaced 2-3 weeks apart. This prevents shock and lets the plant recover between cuts. Euphorbias are resilient, but sudden heavy pruning can leave them vulnerable to pests or rot.
✂️ Step 2: Sterilize Tools and Assess the Plant
Use sharp, sterilized pruning shears—wipe blades with rubbing alcohol between cuts to prevent bacterial spread. Euphorbias exude a milky sap when cut; this sap is toxic, so wear gloves and avoid touching your face or eyes. Inspect the plant for dead, diseased, or crossing branches—these are your first targets.
Look for yellowing leaves, soft stems, or blackened tips—these indicate overwatering or fungal issues. Snip these off at the base with a clean cut at a 45-degree angle, leaving ¼ inch of healthy tissue. Healthy euphorbia stems are firm, green, and free of blemishes.
✂️ Step 3: Shape for Structure and Airflow
Euphorbias grow best with open, airy shapes—this prevents humidity buildup and reduces pest risks. Start by removing up to ⅓ of the plant’s total volume in one session. Focus on thinning out crowded stems rather than just trimming tips; this improves airflow and sunlight penetration.
For bushier growth, cut just above a leaf node (the bump where leaves or branches emerge). Avoid leaving stubs—these can rot. If pruning for propagation, select healthy, mature stems and cut 6 inches below a node for rooting. The sap will seal the cut quickly, so you can work without immediate concern for bleeding.
☀️ Step 4: Post-Pruning Care for Rapid Recovery
After pruning, reduce watering by half for 2 weeks—euphorbias store moisture in their stems, and overwatering post-cut can cause rot. Place the plant in bright, indirect light for a week to minimize stress. You’ll see new growth within 3-4 weeks if conditions are right.
Apply a balanced, water-soluble fertilizer (10-10-10) at half strength two weeks after pruning to support regrowth. Avoid heavy fertilizers immediately—the plant needs time to redirect energy into healing. If you notice wilting or yellowing, it’s a sign of overwatering or fertilizer burn; adjust immediately.
⏰ Step 5: Monitor and Maintain Year-Round
Check euphorbias monthly for new growth or pests. Remove any weak, leggy stems as they appear to maintain shape. In late summer, give the plant a light trim to encourage compact growth before winter. Euphorbias are drought-tolerant, but consistent moisture (not soggy soil) keeps them thriving.
If your euphorbia flowers, deadhead spent blooms right after they fade—this prevents seed production and encourages more blooms next season. The key to healthy euphorbias is balance: prune strategically, water wisely, and give them light. With sharp cuts and attentive care, your plant will reward you with bold, vibrant growth for years.
Tips & tricks for pruning Euphorbia plants
Precision cuts make all the difference with euphorbias—here’s how to avoid common mistakes and maximize recovery.
Timing Secret: The early spring timing in Step 1 is critical because euphorbias store energy in their stems. If you prune too late in the season, the plant won't have enough time to regenerate before winter dormancy. I've seen euphorbias completely fail to rebound after fall pruning—don't make that mistake! Look for those fresh green shoots as your cue, and resist the urge to prune in late summer when the plant is already preparing for dormancy.
Cutting Technique: When shaping in Step 3, focus on creating an open, airy structure rather than just trimming tips. I learned this the hard way after pruning a mature euphorbia too aggressively in one session—it took months to recover. The key is removing up to ⅓ of the plant's volume while maintaining that airflow. For bushier growth, always cut just above a leaf node, never at a node itself. This ensures new growth will emerge from the right spot.
Post-Pruning Care: The 2-week water reduction in Step 4 is non-negotiable—euphorbias store moisture in their thick stems, and overwatering after pruning is a fast track to rot. I've seen beautiful euphorbias turn mushy within days of being overwatered post-prune. Place your plant in bright, indirect light for that first week, and resist the temptation to fertilize immediately. The plant needs time to redirect its energy into healing before you add nutrients.
Safety First: That milky sap is no joke—it's toxic and can cause skin irritation. I've had clients ignore this warning and end up with red, itchy skin for days. Always wear gloves when pruning, and consider wearing safety glasses too. Sterilizing your tools between cuts prevents bacterial spread that could lead to infections. The ¼-inch healthy tissue you leave behind in Step 2 isn't just about aesthetics—it's about giving the plant the best chance to heal properly.
Pro Tips for Pruning Euphorbia Plants
- Precision cuts make all the difference with euphorbias—here’s how to avoid common mistakes and maximize recovery.
- Timing Secret: The early spring timing in Step 1 is critical because euphorbias store energy in their stems. If you p...
- Cutting Technique: When shaping in Step 3, focus on creating an open, airy structure rather than just trimming tips. ...
Frequently asked questions
Got questions about pruning your Euphorbia plants? You’re not alone! Here are answers to the most common concerns—so you can keep your plants thriving without the guesswork.
When is the best time of year to prune Euphorbia?
Prune Euphorbia in early spring (just as new growth begins) or late winter for container plants. Avoid pruning in summer heat or winter frost, as the plant may struggle to recover. If you spot leggy growth mid-season, a light trim is fine—but prioritize major pruning during dormancy.
How do I safely remove dead or damaged branches?
Use sterilized pruners or shears to cut just above a leaf node (the bump where leaves grow). For dead branches, trim back to healthy tissue. Always wear gloves—Euphorbia sap is toxic! Dispose of clippings carefully (don’t compost them) to avoid skin irritation or pet hazards.
Can I propagate Euphorbia from cuttings?
After pruning, let cuttings dry for 1–2 days to seal the wound. Plant them in well-draining soil, keeping them slightly moist (not soggy). Root growth takes 4–6 weeks. Pro tip: Use a rooting hormone for faster success with finicky varieties like Euphorbia tirucalli.
What should I do if my Euphorbia bleeds sap after pruning?
Sap bleeding (latex) is normal but messy! Wear gloves and work in a well-ventilated area. Wipe tools with rubbing alcohol between cuts. If sap touches your skin, wash immediately with soap and water. Never burn pruned Euphorbia—sap fumes are toxic!
Do I need to fertilize after pruning?
Wait 4–6 weeks before fertilizing to let the plant recover. Use a balanced, water-soluble fertilizer (like 10-10-10) in spring. For potted Euphorbia, dilute fertilizer to half-strength to avoid root burn. Over-fertilizing can stress newly pruned plants—go easy!
Wrapping up and next steps
Pruning your Euphorbia plants doesn’t have to be intimidating—with the right tools, timing, and technique, you’ll encourage vibrant blooms and lush foliage for seasons to come! 🌿 Whether you’re trimming for shape, health, or propagation, remember that confidence and patience are your best allies.
Start small, observe your plant’s response, and soon you’ll master the art of sharp cuts.
Ready to take the next step? Experiment with propagation—those pruned cuttings could become stunning new additions to your garden or a gift for fellow plant lovers. Happy pruning!