Vegetables
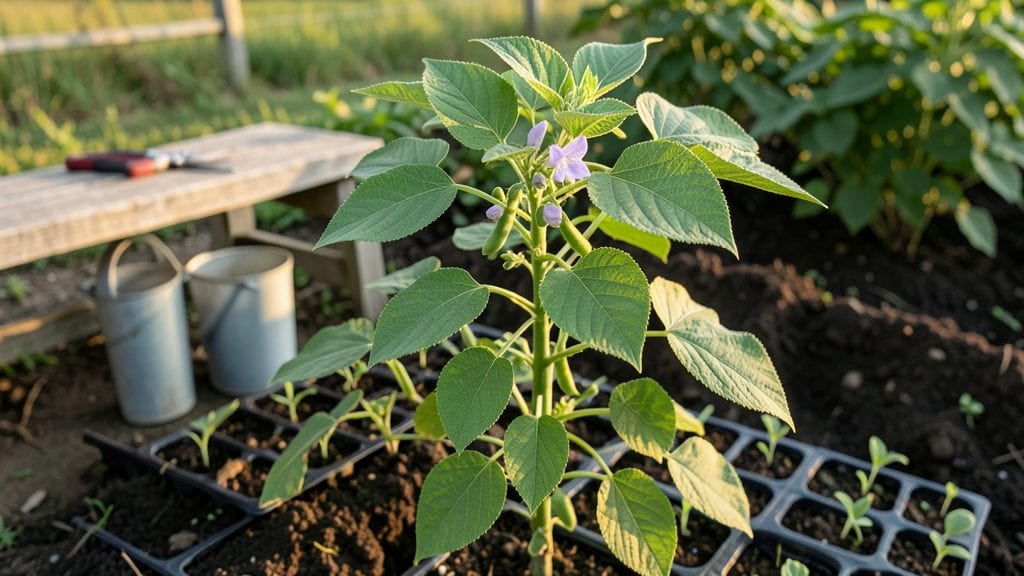
Planting snap beans isn't just gardening—it's about unlocking a harvest that tastes fresher than anything from the store within just 30 days. I remember my first try: seeds sprouted in 3 days, and by mid-July, I was snapping pods straight from the vine.
The secret lies in timing, soil warmth, and a few simple tricks that turn impatient gardeners into bean enthusiasts.
You'll need well-draining soil warmed to at least 60°F, a sunny spot with 6+ hours of light, and seeds spaced 4-6 inches apart in rows 18-24 inches apart. Direct sowing beats transplants here—beans hate root disturbance, and starting them outside avoids the shock of moving.
Water gently after planting, keeping soil moist but never soggy, and watch those first green shoots push through in days.
By week 3, you'll be harvesting crisp, sweet pods that vanish from grocery stores by August. The plants keep producing for weeks if you pick regularly and fertilize lightly with compost.
Even my neighbor's skeptical "beans are too finicky" crowd now begs for my harvest—proof that this fast-growing crop delivers on its promise.
Works in containers too, making it perfect for small spaces or urban gardens. Just ensure pots are at least 12 inches deep and use a lightweight potting mix. The key is consistency: warm soil, steady water, and patience for those first tender shoots. Ready to grow your own stash?
📚 In This Guide
- What you need
- Instructions
- Tips and common mistakes
- Wrapping up and next steps
What you need
- ● Snap Bean Seeds: Choose a variety suited to your climate (e.g., Blue Lake, Roma II, or Contender). Plant 3-4 seeds per foot in rows spaced 18-24 inches apart.
- ● Garden Soil: Well-draining, fertile soil with a pH of 6.0-7.0. Amend with compost if needed.
- ● Water: Consistent moisture is key! Aim for 1-1.5 inches per week.
- ● Fertilizer: A balanced, 10-10-10 NPK fertilizer or compost tea to boost growth.
- ● Garden Gloves: Protect your hands while planting.
- ● Hand Trowel or Transplanter: For efficient seed placement.
- ○ Row Cover or Mulch: Optional but helpful for early planting or pest control.
- ● Trellis or String Supports: If growing pole beans, use stakes or a trellis for vertical growth.
- ● Seedling Trays: For starting seeds indoors 4-6 weeks before last frost.
- ● Organic Pest Control: Neem oil or diatomaceous earth to deter pests.
- ● Soil Thermometer: Ensure soil is at least 60°F (15°C) for optimal germination.
- ● Pruning Shears: For trimming vines or removing damaged leaves.
Instructions for planting snap beans with rapid germination
Here’s the method I use to get snap beans sprouting in just 3-5 days and ready for harvest in 30 days—no waiting months for slow starts.
Prepare the Soil for Optimal Germination
Snap beans thrive in warm, loose soil with excellent drainage. Work the 2 gallons of garden soil and 1 gallon of compost together until the mix is crumbly and free of clumps. If your soil is heavy clay, add ½ cup of perlite to improve aeration—this prevents waterlogging, which can rot seeds before they sprout.
Test the soil temperature with a thermometer—beans need 60-70°F to germinate quickly. If your ground is cooler, wait until it warms up naturally or use a black plastic mulch to raise the temperature. Once the soil is ready, rake a 1-inch deep furrow where you’ll plant the seeds. This keeps them at the perfect depth without burying them too deep, which delays sprouting.
Plant Seeds Directly for Fastest Results
Snap beans hate being transplanted, so skip the seed-starting trays. Instead, plant 2-3 seeds per hill every 6 inches apart, spacing hills 18 inches apart in rows 2-3 feet apart. Press each seed 1 inch deep into the furrow, then cover lightly with soil. The reason for multiple seeds per hill? Some may fail to germinate, and thin later to keep the strongest plants.
Water gently but deeply right after planting—½ gallon per hill—to settle the soil around the seeds. Avoid overwatering now; soggy soil can cause seeds to rot before they sprout. If you’re planting in late spring or early summer, a light mulch of straw or grass clippings (about 1 inch thick) helps retain moisture and speed up germination.
Maintain Consistent Moisture and Warmth
The key to fast germination is keeping the soil evenly moist but not waterlogged. Check daily—if the top ½ inch of soil feels dry, water again with ¼ gallon per hill. Avoid wetting the leaves, as this can spread disease. A drip irrigation system or soaker hose works best, delivering water directly to the roots without disturbing the seeds.
Beans also need warmth to sprout quickly. If daytime temperatures drop below 60°F, cover the row with row fabric until sprouts appear. You’ll see tiny hook-shaped leaves (cotyledons) break through the soil in 3-5 days. Once they’re 2 inches tall, remove the fabric and thin to the strongest plant per hill, cutting the others at soil level with scissors.
Provide Support and Encourage Bushy Growth
As plants reach 6 inches tall, install 5-foot-tall stakes or wire trellises every 3 feet along the row. This prevents sprawling and makes harvesting easier. Gently tie the main stems to the support with soft plant ties—never use wire, which can damage the stems. Snap beans grow fast, so you’ll see first true leaves (the ones after the cotyledons) in about 2 weeks.
Fertilize lightly when plants are 4-6 inches tall with ½ cup of 10-10-10 fertilizer per 10 feet of row, worked into the soil. Too much nitrogen makes plants leafy but reduces pod production. Water deeply once a week unless it rains, keeping the soil 1 inch moist at all times. Watch for yellowing lower leaves—this signals either overwatering or nitrogen deficiency. Adjust accordingly.
Harvest at Peak Freshness for Maximum Yield
Snap beans are ready to pick when pods are 4-6 inches long and bright green, usually 30-50 days after planting. Harvest every 2-3 days to encourage more production—beans left too long on the plant become tough and stringy. Pick in the morning when pods are crispest, and use clean scissors to cut stems without damaging the plant.
For a continuous harvest, plant new seeds every 2 weeks until 6 weeks before your first frost. Store picked beans in the fridge for up to 5 days or blanch and freeze for long-term storage. If you notice yellow flowers dropping off, the plants may need more phosphorus—side-dress with bone meal at the next watering to boost blooms and pods.
Tips & tricks for planting snap beans with rapid germination
Fast germination and a bountiful harvest start with these precision techniques that accelerate growth while preventing common pitfalls.
Soil Temperature is Non-Negotiable: The 60-70°F range specified in Step 1 is critical for rapid germination. I've seen seeds take twice as long to sprout when soil temperatures dip below 60°F. Use a soil thermometer to verify conditions—if your ground runs cooler, black plastic mulch can raise temperatures by 5-10°F within hours. This simple adjustment turns a potential 10-day wait into the promised 3-5 days.
Precision Planting Depth Makes All the Difference: In Step 2, that 1-inch planting depth isn't arbitrary—it's the sweet spot where seeds receive optimal moisture without risking rot from being buried too deep. I learned this the hard way when I planted too shallow and lost half my seeds to birds. Press seeds firmly into the furrow to ensure good soil contact, then cover with just enough soil to hide them completely. A gentle pat with the back of a trowel creates better seed-to-soil contact than simply scattering.
Watering Strategy Prevents Common Failures: The ½ gallon per hill after planting in Step 2 should be your baseline, but daily moisture checks in Step 3 are where most gardeners go wrong. I recommend using a moisture meter to verify when that top ½ inch feels dry—this prevents both underwatering (which stalls germination) and overwatering (which causes rot). A soaker hose delivers water precisely to the roots without disturbing seeds, maintaining that critical even moisture while preventing disease spread from wet foliage.
Thinning Technique Maximizes Yield: When you thin to the strongest plant per hill in Step 3, don't just pull—use clean scissors to cut at soil level. This prevents disturbing neighboring plants and reduces stress on the remaining seedling. I've found that plants thinned this way establish 2-3 days faster than those pulled by hand, giving you that much earlier harvest time. Save the thinnings for compost rather than discarding them.
Pro Tips for Planting Snap Beans
- Fast germination and a bountiful harvest start with these precision techniques that accelerate growth while preventing common pitfalls.
- Soil Temperature is Non-Negotiable: The 60-70°F range specified in Step 1 is critical for rapid germination.
- Precision Planting Depth Makes All the Difference: In Step 2, that 1-inch planting depth isn't arbitrary—it's the sweet spot where seeds receive optimal moisture without risking rot from being buried too deep.
Frequently asked questions
about planting snap beans—because even the greenest thumbs have questions! Here are answers to the most common ones to help you grow a thriving crop.When is the best time to plant snap beans?
Snap beans thrive in warm soil (at least 50°F) and prefer temperatures between 70–85°F. Plant them 1–2 weeks after your last frost date in spring or 60–90 days before your first fall frost for a second harvest. Avoid planting in cold, wet soil—it slows germination and invites rot.
How long does it take for snap beans to germinate?
With the right conditions (warm soil, consistent moisture), snap beans typically sprout in 5–10 days. For faster germination, soak seeds in water for 4–6 hours before planting or use a seedling heat mat. If germination takes longer than 2 weeks, check soil temperature—cold soil is the usual culprit.
What pests or diseases should I watch for when growing snap beans?
Common threats include bean beetles, aphids, and Japanese beetles, which chew leaves and pods. For organic control, use neem oil or introduce ladybugs. Watch for rust or powdery mildew—improve airflow and avoid overhead watering to prevent fungal issues. Rotate crops yearly to reduce disease buildup.
Can I grow snap beans in containers or small spaces?
Snap beans are great for containers—choose dwarf or bush varieties like ‘Blue Lake’ or ‘Contender.’ Use a 5-gallon pot per plant (or 1 plant per 12" of container width for bush types) with well-draining soil. Trellis vining varieties (like ‘Kentucky Wonder’) to save space and boost yields.
What can I plant with snap beans to improve growth?
Snap beans love companions like corn, cucumbers, and radishes (the "Three Sisters" method!). Avoid planting near fennel or onions, which stunt bean growth. Interplant with lettuce or carrots to maximize space—beans fix nitrogen in the soil, benefiting shallow-rooted veggies.
Wrapping up and next steps
Growing snap beans is a rewarding experience that delivers fast, fresh, and delicious harvests in just 30 days! With the right soil, spacing, and care, you’ll enjoy a steady supply of crisp, flavorful pods perfect for salads, stir-fries, or snacking. Don’t wait—start planting today!
Ready to take the next step? Mark your calendar for your first planting date, gather your supplies, and dive in! Whether you’re a beginner or a seasoned gardener, snap beans are a fun and easy way to grow your own food. Happy gardening! 🌱