Transplanting
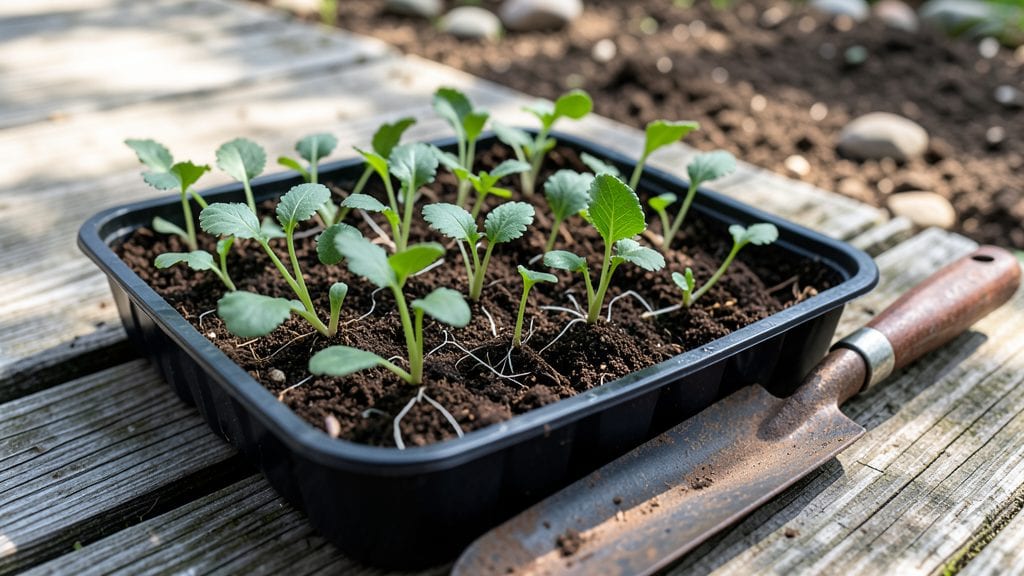
Planting radish seedlings gives you a head start on crisp, peppery greens that pop up in just 10 days—no waiting months for germination like with slower crops. I learned the hard way that skipping proper prep means leggy, weak seedlings that bolt before you even taste them.
The secret is treating them like the speedy little powerhouses they are: cool soil, consistent moisture, and shade at first.
You’ll need loose, well-draining soil mixed with compost (no rocks or clumps), a sunny spot with at least 6 hours of light, and a way to keep them moist without drowning them. Radishes hate soggy roots but won’t tolerate drying out either—think of it like Goldilocks.
If you’re transplanting store-bought seedlings, harden them off for 3-4 days first by moving them outside gradually. The right spacing (1-2 inches apart) prevents crowding, which leads to skinny, bitter roots.
By day 10, you’ll see tiny green leaves breaking through the soil, and in just 3-4 weeks, you’ll have harvest-ready radishes—crunchy, vibrant, and packed with flavor. The key is keeping them cool (they bolt fast in heat) and thinning seedlings if they get too crowded.
Companion plants like lettuce or spinach work well because they share similar growing conditions. Once established, they’re basically foolproof—just water and watch them grow.
This method works for any radish variety, whether you’re growing in containers, raised beds, or straight in the garden. The only real mistake is rushing—give them time to root properly, and you’ll avoid the bitter, woody radishes that happen when they get stressed.
Ready to grow? Let’s get those seedlings in the ground!
📚 In This Guide
- What you need
- Instructions
- Tips and common mistakes
- Wrapping up and next steps
What you need
- ● Radish seedlings: 10–20 healthy, 2–3 week-old seedlings (check for sturdy stems and vibrant green leaves).
- ● Garden bed or containers: For in-ground planting: A loose, well-draining soil bed (6–12 inches deep, enriched with compost).
- ● For containers: 5–6 inch deep pots (1 seedling per pot) or a shallow raised bed (space seedlings 1–2 inches apart).
- ○ Gloves: 1 pair (optional but recommended for soil handling).
- ● Trowel or small hand shovel: 1 (for digging holes or transplanting).
- ● Watering can or hose with a gentle spray nozzle: 1 (to avoid disturbing seedlings).
- ● Organic fertilizer (balanced or nitrogen-rich): 1 small bag (e.g., 5–10 lb).
- ● Mulch (straw or shredded leaves): Enough to cover 1–2 inches of soil post-planting (helps retain moisture).
- ● Seedling heating mat: 1 (speeds up germination if transplanting early in the season).
- ● Row cover or shade cloth: 1 (protects seedlings from pests or harsh sun).
- ● Compost tea or liquid fertilizer: 1 bottle (boosts early growth).
- ● Plant markers: Small stakes or labels (to track varieties if growing multiple types).
- ● Pruning shears: 1 (for trimming leggy seedlings before transplanting).
How to plant radish seedlings for a quick harvest
Here’s how to get your seedlings in the ground fast and growing strong—no waiting around for slow starters.
Prepare the Planting Site for Fast Germination
Radishes thrive in loose, well-draining soil, so work the 3 gallons of garden soil and 1 cup of compost together until the mix is light and crumbly. Break up any clumps with a fork to create a fine, even texture—this prevents water from pooling around delicate roots. If your soil feels heavy or compacted, add ½ cup of perlite to improve drainage. The goal is soil that holds moisture but doesn’t stay soggy.
Choose a location with full sun to partial shade—radishes tolerate light shade better than many greens. Test the spot by pressing your finger 1 inch deep into the soil; if it feels dry, water the area lightly before planting. Avoid freshly tilled beds, as the disturbed soil can cause seedlings to bolt prematurely. A slightly raised bed or mound will help excess water drain away quickly, which radishes appreciate.
Space Seedlings for Optimal Growth and Harvest
Using the 4 radish seedlings, plant them 1 inch deep and 2 inches apart in rows spaced 12 inches apart. Dig a small hole with your finger, place the seedling gently, and cover the roots with soil—press lightly to ensure good contact. If you’re planting in a container, use a 6-inch pot and place one seedling per pot for best results. Overcrowding leads to stunted growth and bitter flavors, so resist the urge to squeeze them in closer.
Water immediately after planting to settle the soil around the roots. Use a spray bottle or gentle stream to avoid disturbing the seedlings. The soil should feel evenly moist but not waterlogged—think of a damp sponge, not a dripping one. Mulch lightly with ½ cup of straw to retain moisture and suppress weeds, but keep it 2 inches away from the stems to prevent rot.
Maintain Moisture and Monitor for Quick Harvest
Radishes germinate in just 3-5 days, so keep the soil consistently moist during this critical window. Water every other day if the weather is dry, checking the soil ½ inch deep—it should feel damp but not saturated. Too much water causes rot, while too little leads to tough, woody roots. A drip irrigation system or soaker hose works best to deliver water directly to the roots without disturbing the seedlings.
Watch for first true leaves (the second set after the initial cotyledons) to appear in 5-7 days. This is your cue that the seedlings are established. Thin to the strongest plant if you overcrowded, but radishes grow fast—you’ll see harvest-ready roots in 10-14 days if conditions are ideal. For baby radishes, harvest when they’re ½ inch in diameter; for full-sized roots, wait until they reach 1-1½ inches before pulling.
Protect and Extend the Harvest Season
If temperatures rise above 75°F, radishes may bolt (send up flower stalks) quickly. Provide light shade cloth during peak afternoon sun to keep them cool, especially in hot climates. A row cover or even a simple shade umbrella works well. Water in the early morning to reduce evaporation and stress on the plants. Consistent moisture is key—radishes are sensitive to fluctuations, and dry spells cause roots to become pithy and bitter.
For a continuous harvest, plant successive batches every 2 weeks after the first planting. This ensures you always have fresh radishes ready in 10 days or less. Pull roots gently by the leaves—twisting can damage nearby plants. Store harvested radishes in the crisp drawer of your refrigerator for up to 2 weeks, or enjoy them fresh in salads, roasted, or pickled within a few days for the best flavor.
Tips & tricks for planting radish seedlings
Speed is everything when planting radish seedlings—these quick tips will help you avoid common pitfalls and get your harvest in record time.
Soil Preparation is Critical: The texture of your soil mix is the foundation for fast germination. When combining the 3 gallons of garden soil with 1 cup of compost, aim for a consistency like damp potting mix—it should hold its shape when squeezed but crumble easily between your fingers. If your soil feels dense, the ½ cup of perlite isn't just for drainage; it also creates tiny air pockets that radish roots need to expand quickly. I've seen seedlings double in size overnight when planted in properly aerated soil.
Timing Your Watering: The 3-5 day germination window is your fastest path to harvest, but timing watering perfectly makes all the difference. After planting, water immediately to settle the soil, then maintain that "damp sponge" consistency by checking the soil ½ inch deep every other day. Morning watering is ideal—it gives the soil time to dry slightly during the day, preventing rot while keeping roots hydrated. I've learned the hard way that afternoon watering can lead to soggy soil and fungal issues.
Heat Management: Radishes are sensitive to temperatures above 75°F, which can trigger bolting—the plant's desperate attempt to reproduce before forming proper roots. If your forecast shows afternoon temps climbing, set up your light shade cloth before planting. Even a simple white bedsheet draped over a frame can provide enough protection. I've successfully grown radishes in summer by planting in the late afternoon and providing shade until evening, then removing it the next morning.
Container Considerations: While the instructions suggest using a 6-inch pot for container growing, you can actually use any pot that's at least 6 inches deep and has drainage holes. The key is maintaining that 2-inch spacing between plants—this prevents competition for nutrients and ensures each radish develops properly. I've grown radishes in everything from vintage tin cans to repurposed yogurt containers, as long as they meet the depth requirement and have drainage.
Pro Tips for Planting Radish Seedlings
- Speed is everything when planting radish seedlings—these quick tips will help you avoid common pitfalls and get your ...
- Soil Preparation is Critical: The texture of your soil mix is the foundation for fast germination. When combining the...
- Timing Your Watering: The 3-5 day germination window is your fastest path to harvest, but timing watering perfectly m...
Frequently asked questions
Got questions about transplanting radish seedlings?
You’re not alone—this fast-growing veggie has a few quirks! Here are answers to the most common concerns to help you grow a thriving radish patch.
When is the best time to transplant radish seedlings?
Transplant seedlings 3–4 weeks after sowing (or when they have 2–3 true leaves) and 2–3 weeks before your first frost date. Radishes thrive in cool weather (50–70°F), so avoid hot summers—they’ll bolt quickly. For fall crops, start seedlings 6–8 weeks before the first frost for a second harvest.
How deep should I plant radish seedlings?
Keep the transplanting shallow! Place seedlings ½ inch deep in the soil, ensuring the soil line on the stem stays just above ground. Deeper planting can cause leggy growth or rot. Space them 1–2 inches apart in rows 12–18 inches apart for optimal airflow and growth.
What should I do if my radish seedlings look yellow or wilted?
Yellowing leaves often signal overcrowding, poor drainage, or nutrient deficiencies. Thin seedlings to 1–2 inches apart immediately. Wilting can mean underwatering (soil should stay moist but not soggy) or heat stress. Provide afternoon shade in hot climates and mulch to retain moisture. For nutrient issues, add a balanced fertilizer (10-10-10) lightly.
Can I transplant radish seedlings in containers or small spaces?
Radishes are perfect for containers—just use pots at least 6 inches deep and 8–10 inches wide. Plant 3–4 seedlings per container and ensure drainage holes are present. For small gardens, try interplanting with lettuce or spinach to maximize space efficiently.
How do I prevent radish seedlings from bolting (going to seed) too soon?
Bolting happens when radishes get too hot or stressed. To delay it:
- Plant in cooler months (spring or fall).
- Avoid overcrowding—thin seedlings promptly.
- Provide shade cloth (30–50%) if temps exceed 75°F.
- Water consistently—drought stress triggers bolting.
Wrapping up and next steps
Planting radish seedlings is a rewarding way to enjoy fast, flavorful harvests in just 10 days! With the right soil, spacing, and care, you’ll be savoring crisp greens or spicy roots before you know it.
Whether you’re a beginner or seasoned gardener, radishes are a perfect crop to build confidence and excitement for your garden.
Now that you’re armed with tips and tricks, take the next step—grab those seedlings and get planting! 🌱 Track your progress, experiment with varieties, and soon you’ll be sharing your homegrown radishes with friends and family. Happy growing!