Orchid Care
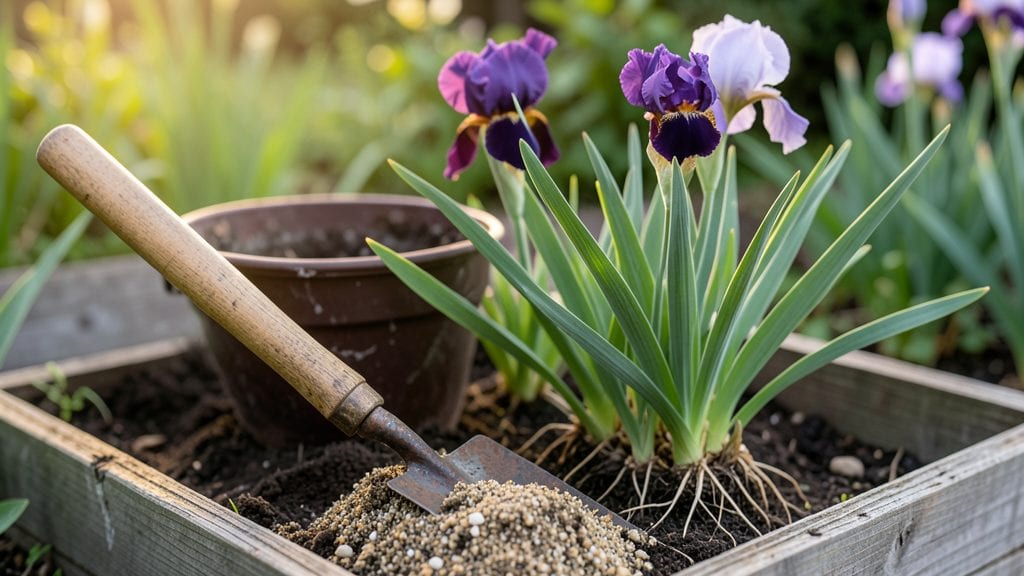
Planting iris roots in the right soil makes all the difference between bold purple blooms and sad, sparse flowers. I learned this the hard way after my first attempt—planting them too deep in regular garden soil—left me with nothing but disappointment.
The secret lies in that perfect mix of gritty, well-draining soil that keeps roots happy and blooms popping.
Start by choosing a spot with full sun and loose, sandy soil. If your yard is heavy clay, amend it with coarse sand or perlite to prevent rot. Iris roots need to breathe, so avoid soggy spots.
The best time to plant is in early fall or late winter, when the ground is cool but workable. This gives roots time to establish before the heat of summer.
When handling those thick, fleshy roots, don’t bury the rhizomes too deep—they should sit just above the soil line. Space them about 12-18 inches apart in rows, with the roots pointing outward. After planting, water lightly and mulch with gravel to keep moisture out while letting air in.
Within weeks, you’ll see new growth, and by spring, those signature sword-like leaves will lead to showstopping blooms.
Here’s where most gardeners trip up: overwatering or planting too shallow. Irises hate wet feet, so let the soil dry between waterings. And if you see yellowing leaves, it’s a sign you’ve buried them too deep.
With the right soil and care, these perennials will reward you for years—just like my second batch did after I finally got it right.
📚 In This Guide
- What you need
- Instructions
- Tips and common mistakes
- Wrapping up and next steps
What you need
- ● Iris rhizomes: Healthy, firm rhizomes with at least one fan of leaves (3–5 per plant). Choose dormant (late summer/fall) or newly dug (spring) rhizomes.
- ● Well-draining soil: Mix 1 part garden soil, 1 part compost, and 1 part coarse sand or perlite (aim for a sandy loam texture). pH 6.0–7.0 is ideal.
- ● Garden fork or trowel: For digging and loosening soil (a broadfork works best for larger beds).
- ● Rake: To level and smooth the soil before planting.
- ● Organic mulch: 2–3 inches of gravel, pine bark, or coarse wood chips (keeps rhizomes cool and prevents rot).
- ● Watering can or hose with a gentle spray nozzle: For deep but controlled watering.
- ○ Gloves (optional but recommended): Iris rhizomes can have sharp edges—protect your hands!
- ● Slow-release fertilizer: A balanced 10-10-10 or low-phosphorus formula (apply lightly at planting time).
- ● Soil test kit: To check pH and nutrient levels before planting.
- ● Plant markers: If you’re growing multiple varieties, label them to avoid mix-ups!
- ● Fungicide (like copper-based): A preventative spray if your area has history of fungal diseases.
Step-by-Step instructions for planting iris roots
Here’s how to plant iris roots for vibrant blooms—layered soil and proper spacing make all the difference.
Prepare the Planting Site
Choose a location with full sun—iris thrives with at least 6 hours of direct sunlight daily. Clear the area of weeds and loosen the soil to a depth of 12 inches using a garden fork. This ensures roots can spread easily without compacted soil restricting growth.
I like to amend the soil with a 2-inch layer of compost mixed into the top 6 inches of soil. This improves drainage, which iris roots need to prevent rot. Avoid heavy clay soil—it holds too much moisture and can suffocate the rhizomes.
Arrange the Iris Rhizomes
Spread the rhizomes out on the prepared soil, spacing them 12 to 24 inches apart. The fan-shaped top (where the leaves emerge) should face upward, never buried. If the rhizomes are too close, they’ll compete for nutrients and produce fewer blooms.
I position them in a slight mound—just enough to elevate the center slightly. This helps with drainage and prevents water from pooling around the base, which can cause rot. Leave 3 to 4 inches of space between each rhizome for airflow.
Layer Soil Strategically
Cover the rhizomes with 2 to 3 inches of soil, leaving the top half exposed. This is key—iris rhizomes need sunlight to stay healthy. If you bury them too deep, they’ll rot before blooming. Tap the soil gently to settle it around the rhizomes without compacting.
I like to add a 1-inch layer of coarse sand or gravel beneath the soil in the planting hole. This extra drainage layer prevents water from sitting against the rhizomes, which is especially important in rainy climates. Mulch lightly with 2 inches of organic mulch (like shredded bark) to retain moisture without smothering the roots.
Water and Monitor Growth
Water the newly planted iris deeply but lightly—just enough to moisten the soil without soaking it. Overwatering at this stage can drown the rhizomes before they establish roots. After watering, let the soil dry slightly before watering again. Iris roots are drought-tolerant once established, so don’t keep the soil soggy.
In 4 to 6 weeks, you’ll see new fan-shaped leaves emerge from the rhizomes. This is your signal that the roots have taken hold. Avoid fertilizing during the first year—iris thrives on minimal nutrients and blooms best when left undisturbed.
Maintain for Long-Term Blooms
After the first year, apply a low-nitrogen fertilizer in early spring to encourage strong foliage and blooms. I use a balanced 10-10-10 formula sparingly—just a handful sprinkled around the base of the clumps. Water deeply after fertilizing to help nutrients reach the roots.
Deadhead spent blooms by cutting the flower stalks back to the ground after they fade. This redirects the plant’s energy into next year’s blooms instead of seed production. In late fall, reduce watering but don’t let the soil dry out completely—iris needs moisture to prepare for dormancy.
Tips & tricks for planting iris roots
These small adjustments make all the difference between iris plants that thrive and ones that struggle to bloom. Here's what I've learned after years of trial and error.
Soil Depth Matters: When loosening the soil to 12 inches in Step 1, focus on breaking up any compacted layers with a garden fork. Iris roots need this depth to spread naturally, but don't overwork the soil—just enough to create channels for root growth. In clay-heavy soils, mix in a 1-inch layer of coarse sand throughout the 12-inch depth to improve drainage permanently. The goal is to mimic the loose, well-draining conditions iris prefers in their native habitats.
Rhizome Orientation Secret: In Step 2, the fan-shaped top facing upward is absolutely critical, but here's what nobody tells you—those small bumps along the rhizome are actually growth points. Position them slightly upward as well, about 1-2 inches off the soil line. This subtle adjustment encourages more vigorous growth from those points rather than letting them rot at soil level. Think of it as giving each rhizome a slight head start.
Layering Strategy: The 2-3 inches of soil coverage in Step 3 is non-negotiable, but here's how to execute it perfectly: Use a soil mixture that's 60% native soil and 40% compost. This blend gives you the right balance of nutrients and drainage. When you tap the soil gently to settle it, do it in three light taps rather than one firm tap—this prevents compacting while still ensuring good contact with the rhizomes. The exposed top half should look like it's basking in sunlight, not buried.
Watering Wisdom: That first deep-but-light watering in Step 4 is tricky to judge. Here's my method: Water until moisture reaches 4 inches deep, then wait until the top 2 inches feel dry before watering again. Use a moisture meter or simply stick your finger in—if it comes out clean, it's time. In the first month, I water every 5-7 days, but adjust based on rainfall. The key is to keep the soil consistently moist without creating soggy conditions that invite rot.
Pro Tips for Planting Iris Roots
- These small adjustments make all the difference between iris plants that thrive and ones that struggle to bloom.
- Soil Depth Matters: When loosening the soil to 12 inches in Step 1, focus on breaking up any compacted layers with a garden fork.
- Rhizome Orientation Secret: In Step 2, the fan-shaped top facing upward is absolutely critical, but here's what nobody tells you—those small bumps along the rhizome are actually growth points.
Frequently asked questions
Got questions about planting iris roots? You’re not alone! Here are answers to the most common concerns—so you can dig in with confidence and enjoy those stunning blooms next spring.
When is the best time to plant iris roots?
Plant iris roots in early fall (4–6 weeks before the first frost) or late winter/early spring (just as new shoots emerge). Fall planting gives roots time to establish before winter, while spring planting works if you’re in a mild climate. Avoid planting in summer heat—roots can dry out or rot!
Can I plant iris roots in containers instead of the ground?
Use a container with drainage holes and a well-draining mix (like 60% potting soil + 30% perlite + 10% sand). Plant rhizomes (roots) with the tops exposed to sunlight. Containers are great for small spaces or colder climates—just move them indoors before winter or use a frost-protective cover.
What if my iris roots look mushy or rotten when I plant them?
Mushy or soft rhizomes are a red flag for rot, often caused by overwatering or fungal issues. Trim away the squishy parts with sterilized scissors, then dust the cuts with fungicide (like copper-based spray). Plant only the healthy sections in dry, well-draining soil. If most of the rhizome is rotten, it’s best to discard it to avoid spreading disease.
Should I fertilize iris roots right after planting?
Hold off on fertilizer for the first 4–6 weeks to avoid burning new roots. After that, apply a balanced, slow-release granular fertilizer (like 10-10-10) in early spring. Iris prefer low-nitrogen, phosphorus-rich food to encourage blooms. Too much nitrogen = lush leaves but fewer flowers. Pro tip: Top-dress with compost in fall for a natural boost!
How often should I divide iris clumps?
Divide iris clumps every 3–4 years in early fall or spring to prevent overcrowding and improve blooms. Look for clumps with 3–5 fans (leaf clusters) per section. Separate gently with a spade, ensuring each piece has healthy roots and at least one fan. Replant immediately—iris roots don’t like to dry out during division!
Wrapping up and next steps
Planting iris roots is your gateway to vibrant spring blooms that’ll steal the show! 🌸 By choosing the right soil layers, timing, and care, you’ve got everything you need to nurture these stunning perennials.
Remember, patience and preparation are key—your irises will reward you with bold colors and lush foliage year after year.
Ready to dive in? Grab your gloves, mark your calendar, and start digging! Whether you’re a seasoned gardener or a beginner, every iris planted is a step toward a brighter, more beautiful garden. Happy planting! 🌱