Propagation
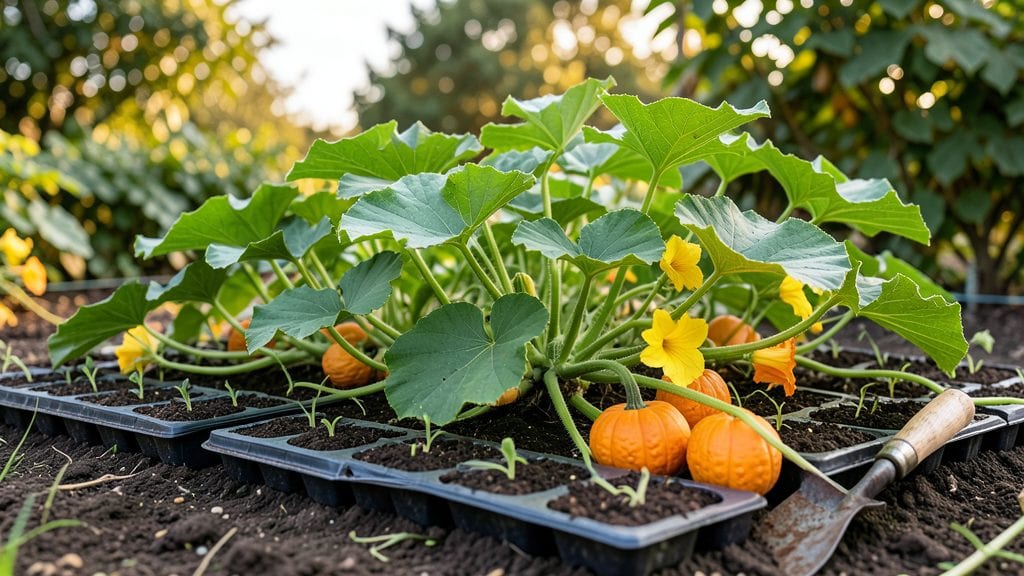
Planting giant pumpkin seeds is your first step toward growing the biggest pumpkins—with the right prep work. Planting giant pumpkin seeds isn't just about dropping them in the dirt; it's about giving them the head start they need to grow into vines that stretch longer than your car.
I've learned that skipping the soak and stratification steps means smaller fruits and weaker vines, no matter how much space you give them.
You'll need a sunny spot with at least 50 feet of space for the vines to sprawl, rich soil amended with compost, and a way to train those monster stems—whether that's a trellis, hill mounding, or just clearing a massive open area.
Most beginners underestimate how aggressive these plants get; I've seen vines cross entire backyards if left unchecked. The key is starting with seeds that have been soaked overnight and stratified for a few days to break dormancy.
By midsummer, you'll be watching vines grow 2-3 feet per week, with leaves the size of dinner plates. The real magic happens when those first flowers appear—each one a potential 50-pound pumpkin if you've given the plant everything it needs.
The payoff isn't just the size, though; it's the sheer spectacle of vines heavy with fruit that makes neighbors stop and stare.
This isn't a project for small gardens or impatient gardeners—it takes space, time, and attention to detail. But if you're willing to commit, you'll end up with pumpkins that dwarf everything else in the patch.
Here's how to make it happen without the common pitfalls that trip up even experienced growers.
📚 In This Guide
- What you need
- Instructions
- Tips and common mistakes
- Wrapping up and next steps
What you need
- ● Giant pumpkin seeds: 5–10 seeds (look for heirloom varieties like Atlantic Giant, Big Max, or Dill’s Atlantic Giant).
- ● Soaking container: A glass jar or bowl (large enough to hold seeds + water).
- ● Stratification setup: Paper towels or damp sphagnum moss
- ● A sealed plastic bag or container with a lid
- ● Potting mix: 5–10 gallons of well-draining, nutrient-rich soil (mix compost, coconut coir, and perlite for aeration).
- ● Containers: 5–10 gallon pots or a raised bed (minimum 12" deep).
- ● Fertilizer: Balanced organic fertilizer (10-10-10) or compost tea for early growth.
- ● Watering can or hose: With a gentle spray nozzle.
- ● Pruners or shears: For trimming vines (sterilize with rubbing alcohol).
- ● Trellis or support: Heavy-duty netting or stakes (giant pumpkins can weigh 200+ lbs!).
- ● pH test kit: To monitor soil pH (ideal: 6.0–6.8).
- ● Row cover or shade cloth: For young seedlings (protects from pests and extreme sun).
- ● Gloves & knee pads: Because handling giant pumpkins gets messy!
Step-by-step instructions for planting giant pumpkin seeds
Giant pumpkins need extra care from the start—here’s how to get those massive vines off to the right beginning.
Soak Seeds for 12–24 Hours
Place the giant pumpkin seeds in a bowl of lukewarm water—just enough to cover them completely. Soaking softens the tough outer shell and jumpstarts germination. I like to use a mesh bag or strainer so I can easily lift them out later without losing any. Let them soak for at least 12 hours, but no more than 24 hours—longer soaking can cause the seeds to split or rot.
After soaking, gently pat the seeds dry with a paper towel. This step is crucial because damp seeds won’t germinate well in cold soil. You’ll know they’re ready when they feel slightly plump but not mushy. Store them in a warm, dry place overnight before planting—this ensures they’re primed for quick growth once in the ground.
Stratify Seeds for Cold Hardening
Giant pumpkin seeds benefit from a short cold treatment called stratification, which mimics winter conditions and signals it’s time to grow. Place the soaked seeds in a sealed plastic bag with a damp paper towel and refrigerate for 3–5 days. Check them daily—they shouldn’t feel soggy, just lightly moist.
This step is especially important if you’re planting early in the season. The cold exposure helps break dormancy and encourages stronger root development. After stratification, let the seeds sit at room temperature for another 24 hours before planting. You’ll notice they’ll feel firmer and slightly swollen—this is your cue that they’re ready for the soil.
Plant Seeds in Warm, Well-Drained Soil
Wait until the soil temperature reaches at least 70°F before planting—giant pumpkins won’t germinate in cold soil. Use a trowel to dig small holes about 1–2 inches deep, spacing them 4–6 feet apart to give the vines room to sprawl. Drop 2–3 seeds per hole and cover them lightly with soil, pressing down gently to ensure good contact.
Mulch the area with 2–3 inches of straw or shredded leaves to retain moisture and regulate soil temperature. Water the soil deeply after planting, keeping it consistently moist but not waterlogged. You’ll see sprouts in 7–14 days, depending on soil warmth. If germination takes longer than two weeks, the soil may still be too cool—consider using a seedling heat mat for faster results.
Provide Support and Monitor Growth
Once seedlings emerge, thin them to leave the strongest plant per hill, cutting the weaker stems at the base. Giant pumpkins need full sun (6–8 hours daily) and plenty of space—plan for vines that can stretch 30–50 feet long. Install a sturdy trellis or use a pumpkin support sling early to prevent the heavy vines from breaking.
Fertilize with a balanced 10-10-10 or 5-10-10 formula when vines start running, following package instructions. Watch for signs of stress—yellowing leaves often mean the plant needs more water or nutrients. If flowers appear but don’t set fruit, hand-pollinate them with a small brush to encourage pumpkin development.
Protect and Harvest at Peak Ripeness
As the pumpkins swell, protect them from pests like squash bugs and deer with row covers or fencing. Giant pumpkins are heavy—use a board or sling to lift them instead of dragging, which can cause bruising. Harvest when the stem near the pumpkin turns brown and dry, usually 90–120 days after planting. A mature giant pumpkin should have a hard rind and feel heavy for its size.
Leave a 2-inch stem attached when cutting the pumpkin to extend its shelf life. Cure them in a dry, shaded area for 10 days before storage. With proper care, your giant pumpkins could weigh 50–100 pounds or more—just don’t expect them all to reach that size in one season!
Tips & tricks for planting giant pumpkin seeds
Growing monster-sized pumpkins starts with these key strategies that make all the difference between a decent harvest and a record-breaking vine.
Soaking Secrets: The 12–24 hour soak time is your window for success—don't rush it! I've found that using lukewarm water (around 70°F) speeds up the process slightly while preventing the seeds from overheating. For extra protection, add a splash of hydrogen peroxide (just a teaspoon per quart of water) to prevent mold growth during soaking. This keeps your seeds healthy and ready for planting.
Stratification Strategy: When refrigerating your seeds for 3–5 days, place them on a wire rack inside the bag rather than directly on the paper towel. This allows better air circulation and prevents moisture buildup that could lead to mold. After the cold treatment, that final 24-hour room temperature rest is crucial—it helps the seeds adjust gradually to warmer planting conditions, reducing shock when they hit the soil.
Planting Precision: The 70°F soil temperature requirement isn't just a suggestion—it's non-negotiable for giant pumpkins. Use a soil thermometer to check before planting, especially in cooler climates. For early planting, consider using black plastic mulch several weeks before planting to naturally warm the soil. And remember, those 1–2 inch deep holes should be just deep enough to cover the seeds completely—any deeper and they'll struggle to emerge.
Growth Monitoring: After planting, keep a growth journal noting when you first see sprouts (within 7–14 days) and when vines start running. This helps you track progress and adjust care as needed. The 6–8 hours of daily sun requirement means positioning your pumpkins where they'll get morning sun and afternoon shade if your climate gets extremely hot—this prevents leaf scorch while maintaining energy production for vine growth.
Pro Tips for Planting Giant Pumpkin Seeds
- Growing monster-sized pumpkins starts with these key strategies that make all the difference between a decent harvest and a record-breaking vine.
- Soaking Secrets: The 12–24 hour soak time is your window for success—don't rush it!
- Stratification Strategy: When refrigerating your seeds for 3–5 days, place them on a wire rack inside the bag rather than directly on the paper towel.
Frequently asked questions
Got questions about growing giant pumpkins? You’re not alone! Here are some of the most common queries—and their answers—to help you crush your giant pumpkin goals.
When is the best time to plant giant pumpkin seeds?
Plant giant pumpkin seeds after the last frost when soil temperatures reach at least 70°F (21°C). In most regions, this means late spring to early summer. Giant pumpkins need 90–120 days of warm weather to thrive, so check your local frost dates and seed packet instructions for precise timing.
Do I need to soak or stratify giant pumpkin seeds before planting?
Giant pumpkin seeds benefit from soaking in warm water for 12–24 hours before planting to kickstart germination. Stratification (cold treatment) isn’t necessary—these seeds are not dormant like some other varieties. Just ensure they’re firm and plump before soaking for best results.
What if my giant pumpkin seeds don’t sprout?
If seeds fail to sprout, check these fixes:
- Temperature: Soil must stay warm (70°F+). Use a seedling heat mat if needed.
- Moisture: Keep soil consistently damp (not soggy) during germination.
- Depth: Plant seeds 1–2 inches deep—too shallow can dry them out.
- Viability: Test a few seeds in a damp paper towel; if none sprout in 7–10 days, they may be old.
Can I grow giant pumpkins in containers?
Giant pumpkins prefer sprawling space, but you can try containers if you’re creative! Use a 50+ gallon pot with excellent drainage and support a 10–12 ft trellis or cage. Expect smaller yields than in-ground planting, but container-growing works in urban areas or poor soil.
Are there alternatives to planting seeds directly in the ground?
Yes! For earlier starts or colder climates, try:
- Transplanting seedlings: Start seeds indoors 2–3 weeks before the last frost, then transplant after danger of frost passes.
- Biodegradable pots: Use peat or coconut fiber pots to reduce root shock when moving seedlings outdoors.
- Row covers: Protect young plants with floating row covers for 2–3 weeks to deter pests and retain heat.
Pro tip: Giant pumpkins hate being disturbed, so handle seedlings gently during transplanting!
Wrapping up and next steps
Growing giant pumpkins is a rewarding challenge that blends patience, creativity, and a little bit of science! By mastering the art of soaking and stratifying your seeds—and providing the right care—you’ll be well on your way to cultivating vines that produce monster-sized fruits. 🌱✨
Now that you’re armed with the know-how, why not take the next step? Start with just a few seeds, experiment with techniques, and track your progress. Before you know it, you could be competing in pumpkin-growing contests—or simply enjoying the thrill of watching your garden thrive!