Aphids
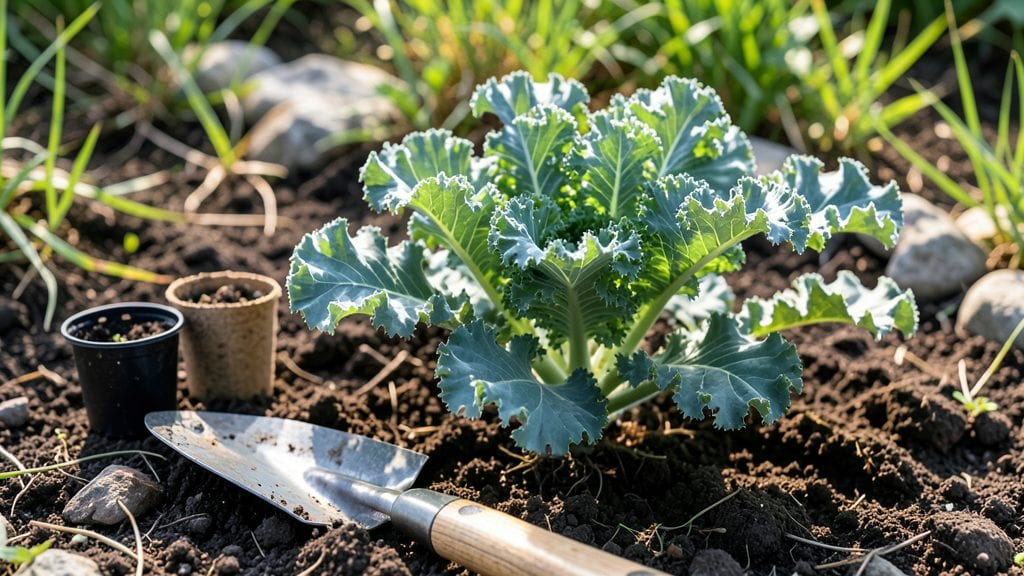
Summer kale planting might sound counterintuitive, but the right timing and varieties can give you bold, crisp leaves in just 60 days—even when temperatures climb. 🌿 I’ve grown summer kale in my own garden, and the secret isn’t avoiding heat but working with it: choosing heat-tolerant varieties, spacing plants properly, and keeping soil moist without drowning roots.
The key is starting seeds indoors 4-6 weeks before your last frost, then transplanting young seedlings when nights cool slightly. Use well-draining soil mixed with compost, and space plants 12-18 inches apart to allow airflow.
Summer kale thrives in partial shade, especially in hotter zones, so avoid planting in full sun without afternoon shade.
You’ll harvest tender, vibrant leaves in about 60 days, with a second flush possible if you keep plants watered and protected from pests like aphids. The flavor is milder than winter kale but still packed with nutrients, and the deep green color is a showstopper in any garden.
For best results, pair kale with companion plants like radishes or onions to deter pests, and consider succession planting every 2 weeks for a continuous harvest. Even in summer, kale can be a star—with the right approach, it’s foolproof.
📚 In This Guide
- What you need
- Instructions
- Tips and common mistakes
- Wrapping up and next steps
What you need
- ● Kale seedlings or seeds: Choose cold-hardy varieties like Winterbor or Lacinato (3–5 plants or 10–15 seeds per square foot).
- ● Well-draining potting mix: 2–3 cubic feet (for containers) or enrich garden soil with compost (1–2 inches mixed in).
- ○ Containers (optional but helpful): 12–18" deep pots (1–2 per plant) or raised beds (if gardening in-ground).
- ● Organic fertilizer: Balanced 10-10-10 or fish emulsion (1 tbsp per plant at planting + monthly).
- ● Mulch: Straw or shredded leaves (1–2 inches) to retain moisture and deter pests.
- ● Garden trowel or transplanting tool (for seedling placement).
- ● Watering can or hose with nozzle (gentle spray to avoid damaging leaves).
- ● Pruning shears (for harvesting outer leaves and shaping plants).
- ● Gloves (to protect hands from thorns on some varieties).
- ○ Row covers or shade cloth (optional) (30–50% shade for hot climates to prevent bolting).
- ● Sunlight: 4–6 hours of partial shade (especially in summer heat).
- ● Temperature: Ideal soil temps: 50–75°F (avoid planting when temps exceed 80°F).
- ● Water source: Consistent moisture (1–1.5 inches per week; drip irrigation works best).
- ● Pest prevention: Neem oil or insecticidal soap (for aphids or cabbage worms).
Step-by-Step instructions for kale summer planting
Here's how to grow hearty, flavorful kale from summer starts—no winter chill required.
🌱 Step 1: Choose the Right Variety and Prep the Soil
For summer planting, select heat-tolerant varieties like 'Dwarf Blue Curled' or 'Red Russian'—they handle warmer temperatures better than winter types. Kale thrives in well-draining, nutrient-rich soil with a pH between 6.0 and 7.0. Work in 2-3 inches of compost or aged manure into the top 6 inches of soil to improve fertility and moisture retention.
Kale loves organic matter, so mix in a handful of worm castings or a balanced organic fertilizer (like 5-5-5) at planting time. Avoid fresh manure—it can burn tender seedlings. If your soil is heavy clay, amend with 1-2 inches of sand to improve drainage. The goal is loose, crumbly soil that holds moisture but doesn't stay soggy.
☀️ Step 2: Plant at the Right Time and Depth
In warm climates, sow seeds 8-10 weeks before your first fall frost—typically late June or early July. If you're in a cooler region, you can plant as late as mid-August. Space seeds ½ inch apart in rows 18 inches apart to allow for thinning and airflow. Plant seeds ¼ inch deep—any deeper delays germination because seedlings struggle to push through dense soil.
Keep the soil consistently moist until germination, which typically takes 7-14 days depending on temperature. If the soil surface dries out, seeds may fail to sprout. Use a fine mist setting on your watering can to avoid displacing the tiny seeds. Once seedlings reach 2 inches tall, thin to 12-18 inches apart—this prevents overcrowding and reduces disease risk.
💧 Step 3: Water and Fertilize for Rapid Growth
Kale needs 1-1.5 inches of water per week, either from rainfall or irrigation. Water deeply at the base of plants in the morning to reduce evaporation and fungal diseases. Avoid overhead watering, especially in the evening—wet foliage invites downy mildew. Mulch with 2-3 inches of straw or shredded leaves to retain moisture and suppress weeds.
Feed plants every 3-4 weeks with a balanced organic fertilizer (like fish emulsion or seaweed extract) to encourage lush growth. Kale is a heavy feeder, so don’t skimp on nutrients. You’ll notice vibrant green leaves and sturdy stems when the plant is thriving. If leaves start yellowing between veins, it’s a sign of nitrogen deficiency—apply a quick boost of compost tea or blood meal.
✂️ Step 4: Harvest Strategically for Continuous Yields
Start harvesting outer leaves when they reach 6-8 inches long, leaving the inner leaves to keep growing. This method encourages bushier plants and extends the harvest season. Use clean, sharp scissors or pruners to cut leaves just above a leaf node—this promotes new growth from that point. Regular harvesting prevents bolting (flowering) in warm weather.
For baby kale, harvest entire small plants when they’re 4-6 inches tall. If your kale bolts (sends up a flower stalk), cut the stalk off at the base—it won’t produce edible leaves, but the plant may regrow side shoots. With proper care, a single plant can yield ½ pound of leaves per week for months. Store harvested leaves in the fridge for up to 5-7 days or freeze for longer storage.
🪴 Step 5: Protect from Pests and Heat Stress
Watch for common pests like aphids, cabbage worms, and flea beetles—these can defoliate plants quickly. Handpick larger pests or spray with neem oil for organic control. Row covers (floating fabric) can shield young plants from flea beetles, which chew irregular holes in leaves. If temperatures exceed 85°F, provide afternoon shade to prevent bolting.
Kale is more heat-tolerant than many greens, but extreme heat still stresses it. If leaves yellow or wilt, it’s a sign of heat stress. Increase watering slightly and mulch thicker to keep roots cool. With these adjustments, your summer-planted kale will stay productive well into fall—long after most gardeners have given up on leafy greens.
Tips & tricks for perfect summer kale planting
Summer kale thrives when you pay attention to these often-overlooked details that make all the difference between struggling seedlings and a thriving harvest.
Soil Preparation Insight: When amending your soil with 2-3 inches of compost or 1-2 inches of sand in Step 1, don't just mix it in superficially—work it into the top 6 inches of soil. Kale roots need consistent moisture and nutrients throughout their growing zone. I've seen gardeners skip this deep incorporation, only to have their plants struggle later when roots hit compacted subsoil. A simple soil test before planting can reveal if you need to adjust pH—kale prefers that 6.0-7.0 range, and lime or sulfur amendments might be needed depending on your local soil.
Timing Secret for Germination: That 7-14 day germination window in Step 2 can feel like an eternity, but there's a trick to speed things up: keep the soil consistently moist but not soggy during this period. I use a spray bottle with a fine mist setting to water gently, avoiding any disturbance to the tiny seeds. If you're planting in hotter climates, consider using a seedling heat mat for the first few days—this can cut germination time by 2-3 days. Just remember to remove it once sprouts appear to prevent overheating.
Heat Management Strategy: When temperatures exceed 85°F as mentioned in Step 5, don't just provide afternoon shade—think about the entire plant's environment. I've found that reflective mulch (like white plastic sheeting) around the base can reduce soil temperatures by 10-15°F, which helps prevent bolting. You can also try planting in partial shade areas of your garden where the sun hits for only 4-6 hours per day. This approach maintains productivity while protecting your plants from heat stress that would otherwise trigger premature flowering.
Harvesting Technique: When harvesting those 6-8 inch leaves in Step 4, use a pair of clean, sharp scissors to cut just above a leaf node. This precise cutting method stimulates new growth from that exact point. I've noticed that gardeners often pull leaves rather than cut them, which can damage the plant and reduce future yields. For baby kale harvesting, wait until the entire plant reaches 4-6 inches—this ensures you get a full, tender harvest rather than stunted growth from premature cutting.
Pro Tips for Kale Summer Planting
- Summer kale thrives when you pay attention to these often-overlooked details that make all the difference between struggling seedlings and a thriving harvest.
- Soil Preparation Insight: When amending your soil with 2-3 inches of compost or 1-2 inches of sand in Step 1, don't just mix it in superficially—work it into the top 6 inches of soil.
- Timing Secret for Germination: That 7-14 day germination window in Step 2 can feel like an eternity, but there's a trick to speed things up: keep the soil consistently moist but not soggy during this period.
Frequently asked questions
Got questions about growing kale in the summer heat?
You’re not alone! Here are answers to the most common concerns—plus pro tips to keep your kale thriving despite the challenges.
Can kale survive summer heat, or will it bolt?
Kale can handle summer heat, but it prefers cooler temps (50–75°F). If days exceed 80°F, it may bolt (go to seed) or taste bitter. To delay bolting, plant heat-tolerant varieties like 'Lacinato' or 'Red Russian' and use shade cloth (30–50%) during peak sun. Mulch with straw to keep roots cool!
What’s the best time to plant kale in summer?
For a summer harvest, sow seeds 6–8 weeks before your first fall frost (typically late June–early July in most zones). If you’re in a hot climate, opt for succession planting every 2–3 weeks for a staggered harvest. Avoid planting in scorching July/August unless you’re using shade and extra water.
How often should I water kale in summer?
Kale needs consistent moisture—about 1–1.5 inches per week, including rainfall. Let soil dry slightly between waterings to prevent rot. Water deeply in the morning to reduce evaporation and fungal risks. Drip irrigation or soaker hoses work best to keep leaves dry and deter pests.
What’s eating my kale, and how do I stop it?
Summer pests like aphids, cabbage worms, and flea beetles love kale! Combat them with:
- Neem oil spray (organic, repeat every 5–7 days)
- Row covers (for young plants)
- Handpick larger pests (like cabbage loopers) in the morning
- Beneficial insects (ladybugs, lacewings)
What can I plant instead of kale if summer growing fails?
If kale struggles in your summer heat, try these low-maintenance, heat-tolerant greens:
- Swiss chard (handles heat better, colorful stems)
- Malabar spinach (vining, thrives in 90°F+)
- Amaranth (fast-growing, drought-resistant)
- Collard greens (more heat-tolerant than kale)
Wrapping up and next steps
Planting kale in the summer might seem bold, but with the right timing and care, you’ll be harvesting vibrant, nutrient-packed greens in just 60 days! 🌱 The key is choosing heat-tolerant varieties, providing shade, and keeping soil moist—while staying vigilant against pests like aphids.
Your garden will thank you with crisp, flavorful leaves that outshine store-bought options.
Ready to dive in? Start by sketching your summer kale layout this weekend—mark spots with partial shade, gather your supplies, and set a reminder to direct-sow seeds in early summer. You’ve got this! 💪