Landscaping
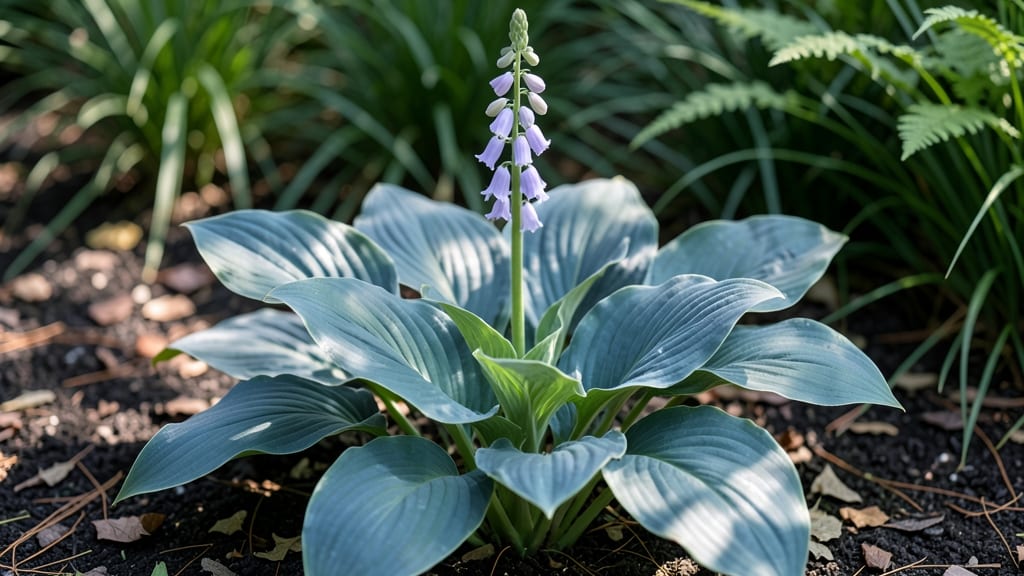
This hosta plant landscaping staple turns shady corners into lush green retreats with foliage that rivals any tropical vacation—perfect for transforming underused spots into year-round focal points, from deep woodland gardens to sun-starved patios. reaches.
The key is playing with their colors, textures, and heights to create depth, even when the light is dim.
Start with the right varieties for your space. Blue-green hostas like ‘Halcyon’ or ‘Blue Angel’ add cool contrast, while golden types like ‘Francee’ or ‘August Moon’ bring warmth. Mix them with ferns, astilbes, and heucheras to layer shadows and keep interest from spring through fall.
The best part? Hostas thrive with minimal fuss—no staking, no deadheading, just reliable growth that outshines many high-maintenance perennials.
By summer’s end, you’ll have a shady garden that feels like a secret garden—velvety leaves in every shade of green, purple, and gold. Add a few variegated types near walkways to brighten paths, and tuck smaller varieties under trees where nothing else grows.
The foliage alone makes them worth growing, but the way they frame other plants? That’s where the real magic happens.
Works in containers too—just choose compact varieties for patios or balconies. Here’s how to arrange them for maximum impact without overcrowding.
📚 In This Guide
- What you need
- Instructions
- Tips and common mistakes
- Wrapping up and next steps
What you need
- ● Hosta plants – Choose 3–5 varieties (e.g., Blue Angel, Halcyon, or Francee) for texture and color contrast. Buy 1–2 plants per square foot of space.
- ● High-quality garden soil – 2–3 cubic yards (or amended native soil with compost for better drainage).
- ● Organic mulch – 2–3 inches of shredded bark or pine straw to retain moisture and suppress weeds.
- ● Slow-release fertilizer – A balanced 10-10-10 or organic pellet fertilizer (apply 1–2 lbs per 100 sq ft).
- ○ Optional: Epsom salt (1 tbsp per plant) for magnesium boost (great for variegated hostas!).
- ● Garden trowel or spade – For digging holes (6–8 inches deep).
- ● Garden gloves – Heavy-duty to protect from thorns (some hostas have them!).
- ● Watering can or hose with a gentle spray nozzle – Hostas love moisture but hate soggy roots.
- ● Pruners or shears – For trimming dead leaves or shaping plants.
- ○ Optional: Soil pH tester (hostas prefer 6.5–7.5 pH) or landscape fabric (to block weeds long-term).
- ● A shady or partially shady spot (hostas thrive in 2–6 hours of direct sun).
- ● Well-draining soil – Amend clay soil with perlite or sand if needed.
- ● Time to plan – Sketch a layout to group hostas by size/mature height (tall varieties in back!).
- ● Patience! – Hostas grow slowly but reward you with lush foliage in 2–3 years.
Step-by-step guide to planting and maintaining hostas for stunning shade gardens
Hostas thrive where others falter—here’s how to create a thriving shade garden with these low-maintenance perennials.
Choose the Right Location and Prepare the Soil
Hostas love partial to full shade, so pick a spot receiving 2-6 hours of morning sun or dappled light all day. Avoid deep shade where they’ll grow leggy and weak. Clear the area of weeds and loosen the soil to a depth of 12 inches using a garden fork. Hostas prefer moist, well-draining soil with a pH of 6.5-7.5, so mix in 2-3 inches of compost from your materials list to enrich the soil naturally.
If your soil drains poorly, incorporate sand or perlite to improve aeration. Work the amendments into the top 6 inches of soil—this ensures roots have access to nutrients without sitting in soggy conditions. A quick test: Squeeze a handful of soil; if it holds its shape like clay, add more sand. If it crumbles easily, it’s ready for planting.
Plant Hostas at the Correct Depth and Spacing
Dig holes twice as wide as the hosta’s root ball but only as deep as the container it came in. Gently remove the plant from its pot and tease apart any circling roots—this encourages outward growth. Place the hosta in the hole so the crown sits just above soil level; burying it too deep invites rot, while planting too high stresses the plant.
Space hostas 18-36 inches apart, depending on the variety. Smaller types like ‘Blue Angel’ need 18 inches, while large varieties like ‘Francee’ require 36 inches to prevent overcrowding. Fill the hole with soil, pressing lightly to remove air pockets, and water deeply to settle the roots. Mulch with 2-3 inches of shredded bark (from your materials) to retain moisture and suppress weeds—just keep it 2 inches away from the crown to avoid rot.
Water Consistently and Monitor Soil Moisture
Hostas need consistent moisture, especially in their first growing season. Water 1-2 inches per week, adjusting for rain—stick your finger 1 inch into the soil; if it’s dry, water again. Drip irrigation or soaker hoses work best to deliver water slowly at the roots. Avoid overhead watering, which can cause fungal diseases like leaf spot. In hot weather, you may need to water every 2-3 days to keep the soil evenly moist but not soggy.
Yellowing leaves often signal underwatering, while mushy stems or wilting point to overwatering. Hostas are forgiving but perform best with steady care. Once established, they’ll tolerate short dry spells, but young plants need reliable moisture to thrive. A 5-gallon bucket of water per plant every 5-7 days in dry spells keeps them lush.
Fertilize and Mulch for Healthy Growth
Feed hostas once in early spring with a balanced, slow-release fertilizer (like the 10-10-10 type from your materials) to encourage strong foliage. Scatter the granules around the base, 3-4 inches from the crown, and water deeply to activate them. Avoid high-nitrogen fertilizers in late summer—they promote tender new growth that won’t harden off before winter.
Refresh the 2-3 inches of mulch annually in early spring to lock in moisture and regulate soil temperature. Choose shredded bark or pine needles—they break down slowly and improve soil structure over time. Mulch also smothers weeds, reducing competition for nutrients. Reapply after heavy rains or when it decomposes into the soil.
Divide and Maintain Hostas for Long-Term Beauty
Hostas spread over time, so divide clumps every 3-4 years in early spring or fall to keep them vigorous. Dig up the plant, separate the crowns with a sharp knife, and replant the strongest sections. Each division should have 3-5 healthy shoots. This rejuvenates the plant and gives you extra hostas for gifts or filling gaps in your garden.
Deadhead spent flower stalks in late summer to redirect energy into foliage rather than seed production. Remove any yellow or damaged leaves as they appear to prevent disease spread. Hostas are low-maintenance, but these small steps keep them looking their best for decades. With proper care, they’ll reward you with bold foliage, striking variegation, and a serene shade garden that’s the envy of the neighborhood.
Tips & tricks for perfect hosta plant landscaping
Hostas are forgiving plants, but these small details make all the difference between good and showstopping shade gardens.
Soil Preparation Secret: When amending your soil with 2-3 inches of compost, mix it into the top 6 inches—not just the surface. This ensures roots have access to nutrients throughout their growing zone. I’ve seen hostas struggle in amended surface soil because roots can’t reach deeper nutrients. Also, if your soil feels sticky when squeezed, it’s too dense—work in sand or perlite to improve aeration before planting.
Planting Depth Matters: The crown should sit just above soil level, never buried or exposed. I learned this the hard way after losing several plants to rot from planting too deep. For variety like ‘Francee’, which has larger root balls, dig holes twice as wide as the container but only as deep—this prevents water pooling around the crown. After planting, press soil gently around roots to remove air pockets, then water deeply to settle everything in place.
Watering Wisdom: The 1-2 inches per week guideline is a starting point, but adjust based on your soil type. Sandy soils dry faster, while clay holds moisture longer. I use the finger test—stick your finger 1 inch into the soil; if it’s dry, water again. For newly planted hostas, a 5-gallon bucket per plant every 5-7 days in dry spells gives them the consistent moisture they crave during their first growing season. Avoid overhead watering to prevent fungal diseases that can ruin those beautiful leaves.
Mulching Strategy: Refresh that 2-3 inches of mulch annually in early spring, but keep it 2 inches away from the crown to prevent rot. I’ve found pine needles work especially well in acidic soils, while shredded bark breaks down more slowly. Reapply after heavy rains or when mulch decomposes—this maintains moisture and regulates soil temperature year-round. A bonus tip: Mulch also smothers weeds, reducing competition for nutrients that your hostas need to thrive.
Pro Tips for Hosta Plant Landscaping
- Hostas are forgiving plants, but these small details make all the difference between good and showstopping shade gard...
- Soil Preparation Secret: When amending your soil with 2-3 inches of compost, mix it into the top 6 inches—not just th...
- Planting Depth Matters: The crown should sit just above soil level, never buried or exposed. I learned this the hard ...
Frequently asked questions
Got questions about using hostas in your landscaping?
Here are some of the most common ones—plus quick, practical answers to help you create a stunning shady garden with ease.
What’s the best time to plant hostas?
Plant hostas in early spring or fall (4–6 weeks before frost) for the best root establishment. Avoid extreme heat or cold—spring lets them grow strong before summer, while fall gives them time to settle before winter. Pro tip: Water deeply after planting to reduce transplant shock!
Do hostas grow well in full shade?
Hostas thrive in partial to full shade (2–6 hours of sunlight daily). Variegated varieties need slightly more light to maintain their striking patterns, while solid-green types tolerate deeper shade. Bonus: They’re perfect for under trees or north-facing yards where other plants struggle.
How do I protect hostas from slugs and pests?
Slugs and snails love hostas! Use copper tape barriers, diatomaceous earth, or beer traps to deter them. For pests like aphids, spray with neem oil or introduce ladybugs. Prevention tip: Keep mulch away from plant bases to reduce hiding spots for slugs.
Can hostas survive winter in cold climates?
Yes! Hostas are hardy in USDA zones 3–9. In colder areas, mulch heavily with straw or leaves to insulate roots. Winter care: Avoid cutting back foliage until spring—it protects the crown and adds texture to your garden.
What are some great hosta alternatives for low-maintenance shade?
If hostas aren’t your style, try:
- Ferns (e.g., Maidenhair or Ostrich): Lush, delicate, and drought-tolerant once established.
- Hellebores (Lenten Rose): Blooms early spring with minimal care.
- Astilbes: Feathery plumes add height and texture.
- Heucheras (Coral Bells): Stunning foliage in shades of purple, silver, or lime.
Wrapping up and next steps
Hostas are the superstars of shady gardens—offering year-round texture, vibrant foliage, and low-maintenance beauty that transforms even the trickiest spots into lush, inviting spaces. Whether you’re a seasoned gardener or just starting, these versatile plants make it easy to create a stunning, shade-friendly landscape with minimal effort.
Ready to elevate your outdoor oasis? Start small—pick a few varieties, test your soil, and let hostas work their magic! 🌿✨
🌱 Next Steps:
- Browse hosta varieties to find your perfect match.
- Check local nurseries for healthy, well-established plants.
- Sketch a simple shade garden layout—hostas thrive in groups!