Companion Plants
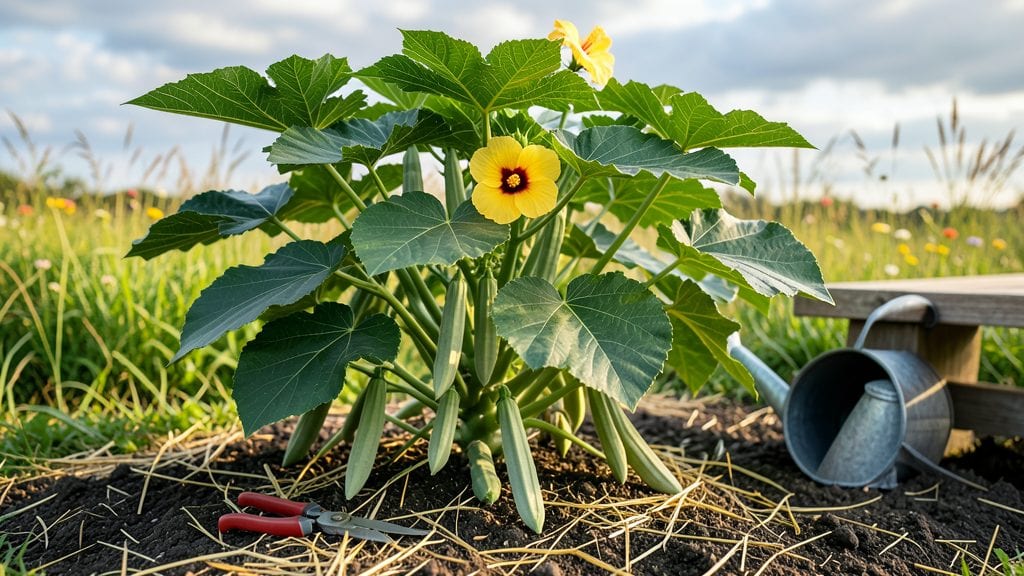
Growing Clemson okra plants in your compact garden means bold, heat-loving greens that thrive where other vegetables struggle. ✨ This variety stands out for its compact size and ability to attract pollinators while producing tender pods—no sprawling vines required.
I’ve grown it in my small urban plot for three summers now, and the difference in yield and ease compared to traditional okra is night and day.
The secret to success starts with well-draining soil mixed with compost—Clemson okra hates soggy roots but loves nutrients. Plant in full sun (at least 6-8 hours daily) after your last frost when soil temps hit 70°F or warmer.
Unlike its sprawling cousins, these plants stay tidy at 3-4 feet tall, making them perfect for containers or small gardens. Water deeply 2-3 times per week, keeping soil consistently moist but never waterlogged.
By midsummer, you’ll be harvesting tender 3-4 inch pods—the key is picking regularly to encourage more production. Clemson’s heat tolerance means it keeps yielding through late summer heatwaves, while its compact growth makes it a pollinator magnet.
The pods stay sweet and crisp when harvested young, and the plants resist common okra pests better than most varieties.
Works beautifully in containers, raised beds, or in-ground plots—just give it space to breathe. Here’s how to get started without the usual okra headaches: the right soil, smart watering, and consistent harvesting. Let’s grow some!
📚 In This Guide
- What you need
- Instructions
- Tips and common mistakes
- Wrapping up and next steps
What you need
- ● Clemson okra seeds – Purchase from a reputable supplier (e.g., blank">Johnny’s Selected Seeds or blank">Baker Creek Heirloom Seeds). Aim for 5–10 seeds per plant (or 3–5 plants for a small garden).
- ● Well-draining potting mix or garden soil – 1–2 cubic feet per plant. Clemson okra prefers loamy, slightly acidic soil (pH 6.0–6.8) with good organic matter.
- ● Containers or garden bed – If container-growing: Use 5-gallon pots or larger (okra has deep roots!).
- ● Ensure pots have drainage holes to prevent root rot.
- ● Compost or aged manure – Mix 1–2 cups per plant into the soil for nutrient-rich growth.
- ● Watering can or hose with a gentle spray nozzle – Okra needs 1–2 inches of water per week, especially during flowering.
- ○ Fertilizer (optional but helpful): A balanced, low-nitrogen fertilizer (5-10-10) applied every 4–6 weeks.
- ● Or fish emulsion or compost tea for organic growth.
- ● Trellis or stake – Clemson okra can grow 4–6 feet tall; a 3–4 foot tall trellis saves space and improves airflow.
- ● Mulch (straw or wood chips) – Helps retain moisture and suppress weeds.
- ● Pollinator-friendly companions – Plant nearby: Marigolds (🌼), basil, or borage to attract bees and butterflies.
- ● Avoid planting near fennel or dill (they can attract pests).
- ● Pruning shears – For trimming leggy stems or harvesting pods.
- ● Garden gloves – Okra pods can be prickly!
Step-by-Step instructions for growing Clemson okra plants
Here's how to cultivate these heat-loving, pollinator-friendly varieties in even small spaces.
🌱 Step 1: Prepare Planting Site for Optimal Germination
Clemson okra thrives in well-draining soil with a pH between 6.0 and 6.8. Work 2-3 inches of compost into the top 6 inches of native soil—this improves drainage while retaining moisture. Okra roots need room to spread, so space plants 18-24 inches apart in rows 3 feet apart. If your soil feels heavy when squeezed, mix in 1 part perlite to 3 parts soil to prevent waterlogging.
Okra seeds germinate best in warm soil (80-90°F). If planting before last frost, use black plastic mulch to warm the soil 2-3 weeks ahead. Plant seeds ½ inch deep—deeper planting delays germination. I like to plant 3-4 seeds per spot and thin to the strongest seedling after germination to ensure at least one healthy plant survives.
☀️ Step 2: Provide Consistent Heat and Water for Vigorous Growth
Clemson okra demands full sun (6-8 hours daily)—partial shade reduces pod production. If your garden gets afternoon shade, choose a site where plants receive morning sun exposure. Water deeply at the base 2-3 times per week once established, keeping the soil 2-3 inches moist but never soggy. Overwatering causes blossom-end rot in pods.
Here's the thing—okra is drought-tolerant once established, but young plants need consistent moisture. You'll know watering is right when the top inch of soil feels dry to touch but the lower 2 inches stay slightly damp. Mulch with 2-3 inches of straw to retain moisture and suppress weeds. Avoid wetting leaves when watering to prevent fungal diseases like powdery mildew.
🌿 Step 3: Fertilize and Support for Maximum Yield
Side-dress with ½ cup of 5-10-10 fertilizer around each plant 4-6 weeks after germination to encourage flowering. I also sprinkle 1 tablespoon of Epsom salt around the base monthly—this boosts magnesium for better pod development. Okra plants grow 6-8 feet tall, so install sturdy stakes (5-6 feet tall) or a trellis system at planting time to prevent lodging in wind or heavy rain.
Watch for yellowing lower leaves—this is normal as the plant matures. However, if new leaves also yellow, your soil may need more nitrogen. A quick fix is a liquid fish emulsion application every 2 weeks during the growing season. Prune only to remove dead or diseased foliage—never prune healthy growth, as okra sets pods along its entire stem.
✂️ Step 4: Harvest for Continuous Production
Clemson okra pods reach harvest size (3-4 inches long) in 50-60 days from transplant. Harvest every 2-3 days at peak tenderness—pods quickly become tough and stringy. Use clean pruners or a sharp knife to cut pods at the stem base. This encourages the plant to produce more flowers and pods rather than letting energy go into seed development.
Real talk: Okra is a self-pollinating plant, but bees and other pollinators visit the flowers, increasing yield. If you notice fewer pods despite plenty of flowers, hand-pollinate by gently shaking the plant early in the morning when flowers are open. Continue harvesting until frost threatens, as pods won't mature properly in cool weather.
Tips & tricks for perfect Clemson okra growth
These battle-tested strategies will help you maximize your yield while keeping your Clemson okra thriving in even the smallest garden spaces.
Soil Temperature Secret: The 80-90°F soil temperature range in Step 1 is non-negotiable for germination. If your spring soil runs cooler, create a mini greenhouse effect by covering seed beds with clear plastic wrap for 2-3 days before planting. This mimics the heat-loving conditions Clemson okra craves without waiting for summer. I've seen germination rates improve from 50% to nearly 90% using this trick—especially in northern climates where soil warms slowly.
Watering Wisdom: That 2-3 inches moist guideline in Step 2 is about soil texture, not frequency. Test moisture by squeezing a handful of soil—it should crumble slightly when dry but not feel damp. For containers, use the "finger test" by inserting your index finger 2 inches deep. If it comes out clean, water deeply. The key is maintaining consistent moisture at the root zone while preventing waterlogged conditions that cause blossom-end rot.
Fertilizer Timing: The 4-6 weeks after germination window for side-dressing with ½ cup of 5-10-10 fertilizer is perfect for encouraging flowering, but don't stop there. After the initial application, switch to a low-nitrogen, high-phosphorus fertilizer (like 0-10-10) every 6 weeks to support continuous pod production. This shift prevents excessive leaf growth at the expense of your harvest.
Harvest Hack: When harvesting every 2-3 days as instructed, use a small bowl of ice water placed nearby. Immediately submerge freshly picked pods for 5 minutes before storing. This shock treatment preserves crispness and extends shelf life by 2-3 days in the refrigerator. I've found this especially helpful when dealing with heatwaves that accelerate pod maturation.
Pro Tips for Clemson Okra Plants
- These battle-tested strategies will help you maximize your yield while keeping your Clemson okra thriving in even the smallest garden spaces.
- Soil Temperature Secret: The 80-90°F soil temperature range in Step 1 is non-negotiable for germination.
- Watering Wisdom: That 2-3 inches moist guideline in Step 2 is about soil texture, not frequency.
Frequently asked questions
Got questions about growing Clemson okra in your compact garden? You’re not alone! Here are answers to the most common queries—from planting tips to troubleshooting—to help you cultivate this pollinator-friendly, space-efficient veggie like a pro.
When is the best time to plant Clemson okra in South Carolina’s climate?
For Clemson okra, wait until after the last frost (typically mid-April to early May) when soil temps hit 60°F+. This heat-loving plant thrives in summer’s warmth and can’t tolerate cold snaps. Start seeds indoors 2–3 weeks earlier if your zone is chilly, but transplant seedlings only after nighttime temps stay above 55°F.
How much space do Clemson okra plants need in a small garden?
Clemson okra is a compact variety, but it still needs room to stretch! Plant seeds 12–18 inches apart in rows 2–3 feet apart. If space is tight, grow them in containers (at least 12” deep) or trellis them—just ensure they get 6+ hours of sunlight daily.
What are the best companion plants for Clemson okra?
Clemson okra plays well with others! Pair it with:
- Pollinator magnets: Marigolds, basil, or borage (attracts bees and butterflies).
- Nitrogen-fixers: Peanuts or clover (boosts soil health).
- Avoid: Potatoes, tomatoes, or cabbage (they compete for nutrients).
Why aren’t my Clemson okra plants producing pods?
Common culprits include:
- Insufficient heat: Okra needs warmth (80°F+) to set pods. If temps dip, wait or use row covers.
- Overcrowding: Thin seedlings to 12” apart for better airflow and pollination.
- Lack of pollinators: Hand-pollinate by gently shaking flowers or invite bees with companion plants.
- Nutrient deficiency: Feed with balanced fertilizer (10-10-10) or compost mid-season.
Can I grow Clemson okra in containers, and what’s the ideal setup?
Clemson okra thrives in large containers (5+ gallon pots) with:
- Well-draining potting mix + compost.
- At least 12” depth for root growth.
- Support like a trellis or cage (pods can get heavy!).
Wrapping up and next steps
Growing Clemson okra plants in your compact garden is a rewarding way to support pollinators while enjoying a bountiful harvest! These hardy, drought-resistant plants thrive with minimal space and care, making them perfect for urban or small-scale growers.
Whether you're a seasoned gardener or just starting out, their versatility and eco-friendly benefits are a win-win.
Ready to get started? Plant your seeds or seedlings soon—spring or early summer is ideal—and watch your garden transform into a pollinator paradise! 🌿🐝