Planting
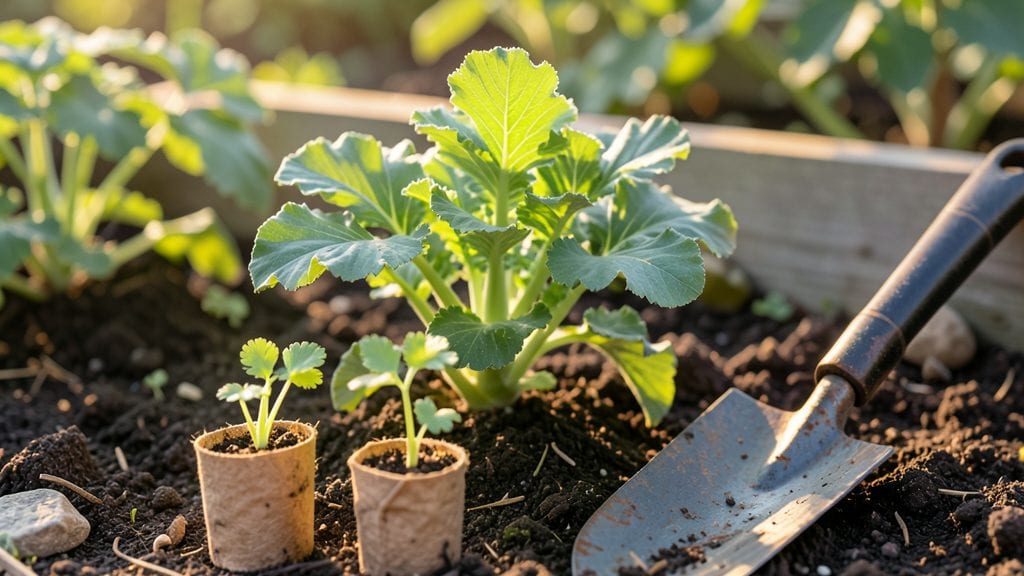
Here are some essential celery planting tips—because growing this slow but satisfying crop from seed feels like waiting for a train, but the crisp, homegrown reward makes it all worthwhile. 🌱 frustration of bolting or stunted growth.
Most gardeners give up after two weeks of waiting, but with the right approach, you’ll see those first true leaves within three weeks and harvestable stalks by late summer.
The secret starts with cool soil temperatures—celery hates heat. Plant seeds indoors 10-12 weeks before your last frost, or buy sturdy transplants in early spring. Use a well-draining, slightly sandy soil mix, and keep seeds moist but never soggy.
If you’re growing in containers, a 5-gallon pot per plant works perfectly, and you’ll avoid the bolting problem that plagues in-ground gardens in hot climates. The payoff? Thick, vibrant stalks that stay crisp longer than store-bought—no bitter aftertaste, just pure garden freshness.
📚 In This Guide
- What you need
- Instructions
- Tips and common mistakes
- Wrapping up and next steps
What you need
- ● Celery Seeds or Seedlings: Option 1: 1–2 packets of celery seeds (about 500–1,000 seeds per packet). Choose varieties like Utah, Tall Utah, or Golden Self-Blanching for best results.
- ● Option 2: 6–10 young celery seedlings (if starting from nursery plants). Look for sturdy, green stems with no yellowing.
- ● Growing Containers or Garden Bed: Container option: 5–10 gallon pots (at least 12–18 inches deep) with drainage holes. Use 1–2 pots per plant for better growth.
- ● Garden bed option: A sunny, well-drained spot with 12–18 inches of loose, fertile soil. Space plants 12–18 inches apart in rows 18–24 inches apart.
- ● High-Quality Potting Mix or Soil: 1–2 bags of organic potting mix (or a blend of 50% garden soil + 50% compost). Celery thrives in moist, well-draining, slightly acidic soil (pH 6.0–6.8).
- ● Fertilizer: Balanced organic fertilizer (e.g., 5-5-5 or 10-10-10) or a compost tea to boost nutrients. Apply at planting and again after 4–6 weeks.
- ● Watering Can or Hose: A gentle watering system (like a can with a rose attachment) to keep soil consistently moist without flooding.
- ● Mulch: 2–3 inches of straw or shredded leaves to retain moisture and suppress weeds. Avoid mulch with high nitrogen (like grass clippings).
- ● Blanching Material: If growing self-blanching varieties, use cardboard or straw wraps to tie around stalks for paler, sweeter stems.
- ● Plant Markers: Small sticks or labels to track varieties and planting dates.
- ● Row Covers: Lightweight fabric to protect seedlings from pests or frost in early stages.
- ● Soil pH Test Kit: To ensure your soil is in the ideal 6.0–6.8 pH range.
- ● Epsom Salt: A tablespoon per plant every 4–6 weeks for magnesium boosts.
Step-by-step guide to planting celery for optimal yield
Celery thrives with patience and precision—here's how to grow it like a seasoned pro.
🌱 Step 1: Start Seeds Indoors at the Right Time
Celery seeds germinate best at 70-75°F, so start them indoors 10-12 weeks before your last frost date. Use the seed-starting mix to fill seed trays or small pots to 1 inch below the rim, then gently press the surface to eliminate air pockets. Moisten the mix until it feels like a damp sponge—not soggy, but holding moisture.
Sow seeds ¼ inch deep, spacing them ½ inch apart in rows 1 inch apart. Cover lightly with additional mix and mist the surface with water until evenly damp. Place the trays in a warm, dark spot (like a seedling heat mat) until germination, which typically takes 14-21 days. Here's the thing—celery seeds are tiny and slow to sprout, so don't disturb them until you see green shoots.
☀️ Step 2: Provide Consistent Light and Humidity
Once seedlings emerge, move them to a bright location with 14-16 hours of light daily. A south-facing window works, but supplement with a grow light if natural light is insufficient. Keep the light 2-3 inches above the seedlings and raise it gradually as they grow to prevent leggy stems.
Celery loves humidity—cover the trays with a plastic dome or plastic wrap to maintain moisture until 2-3 true leaves appear. After that, remove the cover but keep the soil consistently moist. You'll know moisture is right when the top inch of soil feels damp to the touch but doesn't stick together. Avoid overhead watering to prevent fungal diseases like damping-off, which can wipe out seedlings overnight.
🪴 Step 3: Harden Off and Transplant Seedlings
About 2 weeks before transplanting outdoors, begin hardening off seedlings by placing them outside in a sheltered spot for 1-2 hours daily. Gradually increase their time outdoors over 7-10 days, exposing them to more direct sunlight and wind each day. This process strengthens their stems and prepares them for the garden.
Transplant seedlings outdoors after the soil warms to at least 60°F and all danger of frost has passed. Space them 12-16 inches apart in rows 18-24 inches apart to allow for adequate airflow and growth. Dig holes just deep enough to accommodate the root ball, place the seedlings in, and firm the soil gently around the base. Water deeply right after transplanting to help settle the soil and reduce shock.
💧 Step 4: Maintain Moisture and Fertility for Thick Stems
Celery requires consistent moisture to develop thick, crisp stems. Keep the soil evenly moist—never let it dry out completely, but avoid waterlogging, which can cause rot. Water at the base of the plants in the early morning to allow foliage to dry quickly, reducing the risk of fungal diseases. Mulch around the plants with 2-3 inches of mulch to retain moisture and suppress weeds.
Feed celery with a balanced fertilizer every 3-4 weeks to encourage steady growth. I like to use a liquid fertilizer diluted to half strength to avoid burning the plants. You'll see the difference in just a few weeks—thicker stems and lush, vibrant leaves. Watch for signs of nutrient deficiency, like yellowing leaves, which may indicate a need for more nitrogen.
✂️ Step 5: Harvest and Encourage Regrowth
Harvest celery by cutting the outer stalks at the base with a sharp knife or shears. Leave the inner stalks to continue growing—this encourages the plant to produce more harvests. Avoid cutting more than ⅓ of the plant at a time to prevent stress. Harvest in the morning when the stalks are crispest and most flavorful.
With proper care, a single celery plant can produce multiple harvests over 6-8 months. If the plant bolts (sends up a flower stalk) before you're ready for it to finish, cut it back to encourage leafy regrowth. This is the moment that matters: a well-maintained celery plant will keep giving you fresh, homegrown stalks long after store-bought varieties have wilted.
Tips & tricks for perfect celery planting
A few subtle adjustments can transform your celery harvest from mediocre to outstanding. Here's what I've learned after years of growing this finicky but rewarding plant.
Germination Secret: Celery seeds are notoriously slow to sprout, but patience pays off. After sowing your seeds ¼ inch deep in the seed-starting mix, place the trays on a seedling heat mat set to 75°F—this consistent warmth is crucial for breaking dormancy. I've found that using a clear plastic dome to create a mini greenhouse effect can cut germination time by 2-3 days, but remove it once you see those first tiny green shoots to prevent fungal issues. The key is to keep the soil consistently moist without waterlogging it, which is why I recommend misting rather than pouring water.
Light Management: The 14-16 hours of light daily requirement isn't just about duration—it's about intensity. If your seedlings start stretching toward the light (a sign of legginess), you're not providing enough. Position your grow lights 2-3 inches above the seedlings and adjust as they grow. I've seen celery plants go from compact and sturdy to weak and spindly in just a week when light conditions change. For best results, use full-spectrum LED grow lights that mimic natural sunlight, and keep them on a timer to maintain that critical light cycle.
Transplanting Strategy: When hardening off your seedlings in Step 3, I've discovered that starting with just 1-2 hours daily in partial shade is the safest approach. Gradually increase their outdoor time over 7-10 days, but watch for wilting—this is your plant's way of saying "too much, too soon." For transplanting, I always wait until soil temperatures reach at least 60°F and test it with a soil thermometer. The shock from cold soil can set your plants back for weeks, and celery is particularly sensitive to temperature fluctuations during establishment.
Post-Transplant Care: After transplanting, the 2-3 inches of mulch isn't just about moisture retention—it's about protecting those tender stems from temperature swings. I've found that straw mulch works best because it breaks down slowly and adds organic matter to the soil. When fertilizing every 3-4 weeks, I always dilute my liquid fertilizer to half strength to prevent salt burn, which can cause brown leaf tips. The secret to thick stems lies in this balance: consistent moisture without waterlogging, and gentle but regular feeding without overdoing it.
Pro Tips for Celery Planting Tips
- A few subtle adjustments can transform your celery harvest from mediocre to outstanding.
- Germination Secret: Celery seeds are notoriously slow to sprout, but patience pays off.
- Light Management: The 14-16 hours of light daily requirement isn't just about duration—it's about intensity.
Frequently asked questions
Got questions about growing celery? You’re not alone! Here are answers to the most common queries to help you cultivate a thriving crop with confidence.
When is the best time to plant celery?
Celery thrives in cool weather, so plant seeds indoors 10–12 weeks before the last frost (typically February–March in most climates). Transplant seedlings outdoors after soil warms to 50°F (10°C), usually in late spring or early summer. For fall harvests, plant seeds in late summer for a late-autumn crop.
How long does it take for celery to grow?
From seed to harvest, celery takes 100–130 days—longer than many veggies! Start with transplants if you’re impatient (they mature in 80–100 days). Patience pays off: tender stalks develop best with consistent moisture and cool temps. Check soil depth—celery needs 12–18 inches of loose, fertile soil to grow properly.
Why is my celery bolting or flowering?
Bolting (premature flowering) happens when celery feels heat stress, drought, or poor soil. To prevent it:
- Keep soil consistently moist (not soggy).
- Avoid planting in hot summer months—opt for spring/fall.
- Use well-draining, rich soil (add compost!).
- Choose slow-bolting varieties like ‘Tall Utah’ or ‘Golden Self-Blanking.’
Can I grow celery in containers or small spaces?
Celery adapts well to containers 12–18 inches deep (bigger = better for root growth). Use a balanced fertilizer (like 10-10-10) and place pots in full sun to partial shade. For compact varieties, try ‘Utah Improved’—it’s perfect for patios or balconies. Just ensure daily watering (containers dry out fast!).
What pests or diseases should I watch for?
Celery’s biggest foes are aphids, slugs, and fungal diseases (like early blight). Prevent issues with:
- Row covers to deter pests.
- Copper fungicide if spots appear on leaves.
- Beer traps for slugs (yes, it works!).
- Crop rotation to avoid soil-borne pathogens.
If leaves yellow or wilt, check for overwatering or nutrient deficiency (add compost or a balanced fertilizer).
Wrapping up and next steps
Growing celery from scratch is a rewarding journey that combines patience with delicious results! With the right soil prep, lighting conditions, and consistent care, you’ll soon be harvesting crisp, flavorful stalks to elevate your favorite dishes. 🌱
Now that you’re armed with these proven techniques, why not take the next step? Start small—plant a few seeds or seedlings this season—and watch your garden thrive. Happy planting, and may your celery grow tall and tasty! 🌿