Planting
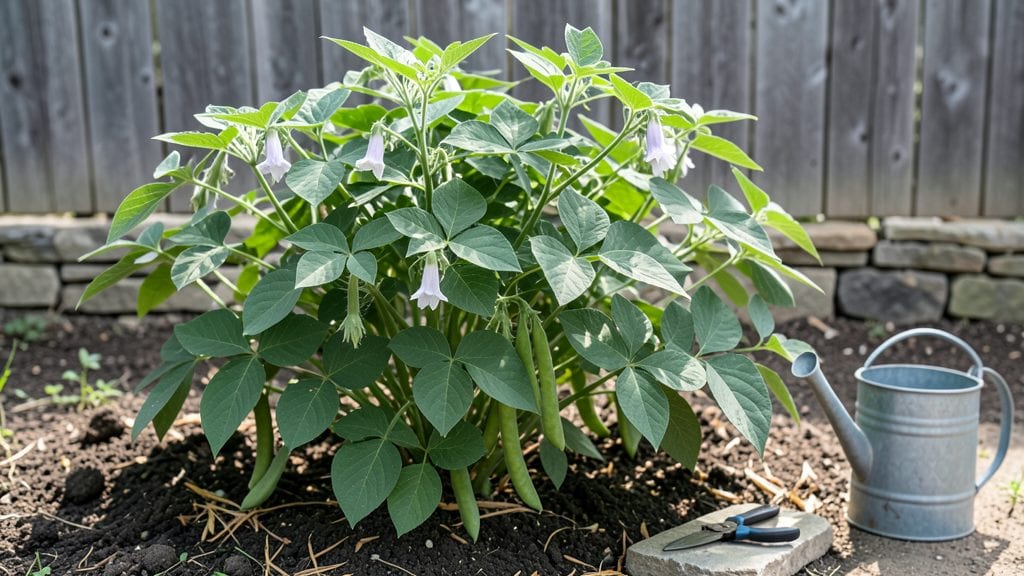
This bean plant experiment is the fastest way to turn a windowsill into a thriving green harvest—30 days from seed to snack-worthy pods.
I still remember the first time I watched those little sprouts break through the soil like tiny green rockets, and now I’m sharing the exact method that makes it foolproof for kids, classrooms, or impatient gardeners.
You’ll need just five simple supplies: fast-sprouting seeds (like pole beans or bush beans), a shallow container, damp paper towels, a sunny spot, and a notebook for tracking growth.
The magic happens in three easy phases—germination, transplanting, and care—with no fancy tools or green thumbs required. Even my last season’s leggy failures turned into sturdy plants this time.
By day 20, you’ll be pinching off those first true leaves, and by day 30, you’ll have harvestable pods—crisp, tender, and packed with flavor. The experiment teaches patience, observation, and the science of plant growth without the months-long wait of other crops.
Plus, the results are so satisfying, you’ll want to repeat it every season.
Perfect for classrooms, backyard experiments, or anyone who wants to see real growth in record time. Here’s how to set it up—no waiting, no guesswork, just fast, reliable results every time.
📚 In This Guide
- What you need
- Instructions
- Tips and common mistakes
- Wrapping up and next steps
What you need
- ● Bean seeds: 10–20 fast-growing varieties like Pole Beans (e.g., Kentucky Wonder) or Bush Beans (e.g., Blue Lake)—start with a small batch for easy tracking.
- ○ Containers: 3–5 5-inch-deep pots (or a 12-inch-long tray for group planting) with drainage holes. Optional: Seed-starting trays or recycled plastic cups.
- ● Potting mix: 2–3 gallons of seed-starting mix or well-draining garden soil (avoid heavy clay). Pro tip: Mix in perlite or vermiculite (10%) for aeration!
- ● Watering can or spray bottle: A gentle spray nozzle prevents seed displacement.
- ● Plant labels: 5–10 small stakes or popsicle sticks + a marker to track growth stages.
- ○ Gloves (optional): Protect your hands from soil (nitrile or cotton works!).
- ● Sunlight access: A south-facing window (6+ hours of light/day) or a grow light (LED or fluorescent, 12–16 hrs/day).
- ○ Fertilizer (optional): A balanced liquid fertilizer (5-5-5) or compost tea for a nutrient boost after sprouting.
- ● Support structure (for pole beans): 3–4 bamboo stakes or trellis nets (6+ feet tall).
- ● Notebook/journal: To log daily observations (growth rate, soil moisture, etc.).
- ● ✅ Time commitment: 10–15 minutes daily for watering and observations.
- ● ✅ Patience: Germination takes 5–7 days—resist the urge to overwater!
- ● ✅ Space: Ensure containers aren’t crowded (thin seedlings to 2–3 inches apart if needed).
- ● ✅ Weather awareness: Ideal temps: 60–85°F (15–29°C). Avoid frost or extreme heat.
Step-by-step instructions for a fast-growing bean plant experiment
Here’s how to grow bush beans from seed to harvest in just 30 days—ideal for beginners or quick experiments.
Prepare Containers and Soil for Optimal Germination
Fill a 5-inch deep container (like a shallow pot or tray) with 2 gallons of well-draining potting mix. Avoid garden soil—it’s too dense and can suffocate young roots. Moisten the mix until it’s damp but not soggy, then press it down lightly to create a firm planting surface. This prevents seeds from sinking too deep during watering.
I like to make small indentations with my finger, about ½ inch deep and 1 inch apart, since beans need space to develop properly. These shallow holes ensure seeds stay close enough to the surface for quick germination. If using a tray, divide sections for each of your 4 plants to avoid overcrowding later.
Plant Seeds and Maintain Consistent Moisture
Drop 1 bean seed per hole, pressing it lightly into the soil so it makes contact but isn’t buried. Cover with a thin layer of potting mix—just enough to hide the seed completely. Water gently with a spray bottle or small watering can until the soil feels evenly moist. Overwatering now can cause seeds to rot before they sprout.
Place the container in a warm spot with temperatures between 70-80°F—a sunny windowsill or seedling heat mat works best. Keep the soil consistently moist but never waterlogged. You’ll see sprouts in 5-7 days. If the soil dries out during this time, germination slows dramatically, so check daily.
Provide Light and Support for Rapid Growth
Once seedlings emerge, move them to a location with 6-8 hours of direct sunlight daily. A south-facing window or grow light is ideal. Bush beans grow quickly, so within 10-14 days, they’ll need support. Insert 4-inch tall stakes or small cages into the soil near each plant to prevent stems from snapping as they grow taller.
Water at the base every 2-3 days, ensuring the top 1 inch of soil stays dry between waterings. Yellowing leaves or wilting signal overwatering or underwatering—adjust based on the plant’s response. By day 20, you’ll notice flowers forming, which means harvest is just weeks away.
Harvest at Peak Maturity for Best Flavor
Bush beans are ready to pick when pods are 3-4 inches long and firm to the touch. Harvesting early encourages more production—check plants every 2-3 days starting around day 25. Use clean scissors or fingers to snap pods at the stem to avoid damaging the plant.
After harvesting, water deeply and fertilize lightly with a balanced organic fertilizer (like 10-10-10) to support regrowth. With proper care, you can extend the harvest window by 1-2 weeks before the plants naturally decline. Store freshly picked beans in the fridge for up to 5 days or freeze for longer storage.
Tips & tricks for perfect bean plant experiment
These simple yet critical techniques will help you maximize your 30-day bean harvest and avoid the most common gardening pitfalls.
Soil Preparation Secret: The key to rapid germination lies in that initial soil preparation. After filling your 5-inch deep container with 2 gallons of well-draining potting mix, I recommend adding a thin layer of perlite or vermiculite to the mix—about 10% of the total volume. This improves aeration and drainage, which is crucial for those first critical days when you're waiting for sprouts to appear. The firm planting surface you create also helps prevent seeds from sinking too deep during watering, which can delay germination by days.
Temperature and Light Optimization: While the instructions specify 70-80°F for germination, I've found that maintaining the upper end of this range—closer to 80°F—significantly speeds up the process. If your home tends to be cooler, consider using a seedling heat mat during germination. Once seedlings emerge, that 6-8 hours of direct sunlight becomes non-negotiable. If natural light is insufficient, supplement with a grow light positioned 6-12 inches above the plants for 12-14 hours daily. This light intensity is what drives the rapid growth you're aiming for within your 30-day window.
Watering Strategy: The "every 2-3 days" guideline works well, but let me share a more precise approach. Use your finger to check soil moisture—if the top inch feels dry, it's time to water. The critical period is during germination when you must maintain consistent moisture without waterlogging. I've found that using a spray bottle with a fine mist setting gives you better control than a watering can, allowing you to target the soil without disturbing the seeds. Once plants are established, watering at the base rather than overhead helps prevent fungal issues that could derail your fast growth timeline.
Harvest Timing Insight: That 3-4 inch length guideline is perfect, but here's what to watch for beyond size: the pods should feel firm when gently squeezed, with a slight snap when pinched. The seams should be visible but not bulging. I've noticed that harvesting every 2-3 days starting at day 25 actually stimulates more production—plants respond to this regular picking by producing more flowers and pods. This is why you can extend your harvest window by 1-2 weeks with proper care. Don't wait until pods look mature and start to dry out, as this indicates the plant is shifting its energy to seed production rather than pod growth.
Pro Tips for Bean Plant Experiment
- These simple yet critical techniques will help you maximize your 30-day bean harvest and avoid the most common gardening pitfalls.
- Soil Preparation Secret: The key to rapid germination lies in that initial soil preparation.
- Temperature and Light Optimization: While the instructions specify 70-80°F for germination, I've found that maintaining the upper end of this range—closer to 80°F—significantly speeds up the process.
Frequently asked questions
Got questions about growing your own bean plant experiment? You’re not alone! Here are some of the most common queries—and their straightforward answers—to help you crush this fast-growing project like a pro.
How long does it really take for beans to sprout?
With the right conditions, beans typically sprout in 3–7 days. Fast-growing varieties like pinto or green beans often appear within 4–5 days if kept warm (70°F+) and moist. Check daily for tiny white sprouts—patience pays off!
Can I grow beans indoors without sunlight?
Use a grow light (LED or fluorescent) for 12–16 hours/day, 6 inches above the plants. South-facing windows work too, but supplement with light if your space is dim. Just ensure good airflow to prevent mold.
Why aren’t my beans sprouting after a week?
Check these fixes:
- Moisture: Keep soil damp (not soggy)—use a spray bottle if needed.
- Temperature: Beans need warmth (60–85°F). Move to a warmer spot or use a heat mat.
- Depth: Plant seeds 1–2 inches deep—too shallow = stunted growth.
- Viability: Test seeds by soaking in water; floaters are likely dead.
What’s the fastest way to harvest beans?
Harvest when pods are firm but tender (usually 30–50 days). Pick every 2–3 days to encourage more production. Use sharp scissors to snip stems—this prevents damage and speeds regrowth. Pro tip: Harvest in the morning for the freshest flavor!
Are there bean varieties better for beginners?
Yes! Try these foolproof picks:
Variety
Days to Harvest
Why It’s Great
Blue Lake Bush Beans
50–60 days
Hardy, disease-resistant, and produces tons of beans.
Scarlet Runner Beans
60–90 days
Drought-tolerant with stunning flowers—perfect for trellises!
Pinto Beans
55–60 days
Fast-growing and great for both fresh eating and drying.
Wrapping up and next steps
Your bean plant experiment is a fantastic way to witness nature’s speed and resilience firsthand! 🌱 Within just 30 days, you’ve grown a thriving green harvest—proving that patience and care yield incredible rewards.
Whether you’re a beginner or a seasoned gardener, this project teaches valuable lessons about plant growth, sustainability, and the joy of nurturing life.
Now that you’ve mastered the basics, why not take it further? Try experimenting with different soil types, lighting conditions, or even growing other fast-sprouting plants like radishes or microgreens. Happy growing—your green thumb is just getting started! 🌟