Pruning
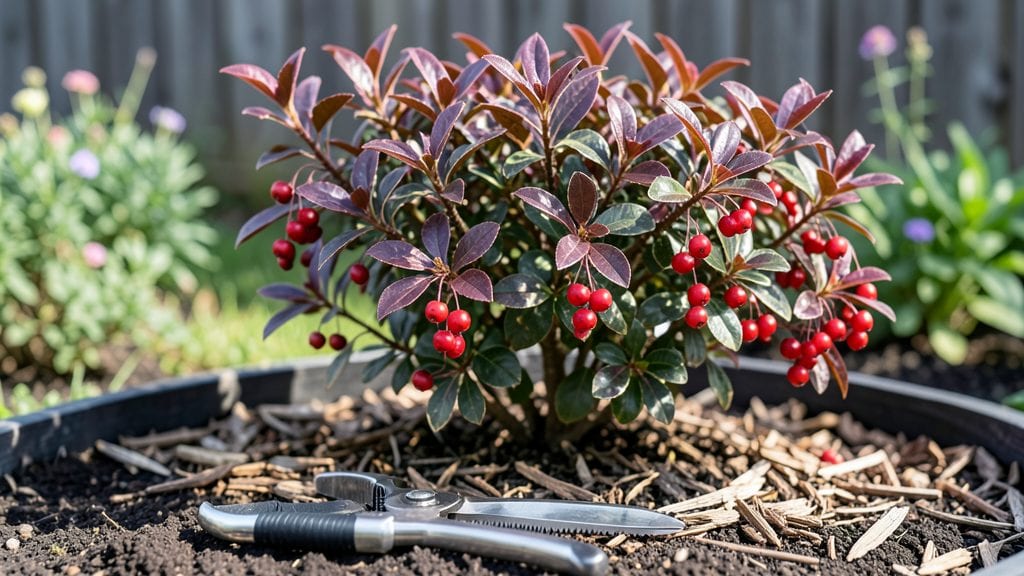
Three strategic cuts transform your barberry from scraggly to showstopping. ✨ I’ve pruned these tough shrubs for years, and the secret isn’t just when you cut—it’s how you shape the plant to encourage dense growth and vibrant foliage.
Most gardeners overlook the late-winter trim that sets the stage for summer’s best display.
The right tools and timing make all the difference. You’ll need sharp bypass pruners, a pair of gloves (those thorns don’t play nice), and a clear day to assess the plant’s structure.
Prune in three phases—late winter, early summer, and post-bloom—and you’ll avoid the common mistake of shearing too hard, which weakens the plant. Each cut should open the center for airflow and light.
What you’ll end up with is a barberry that stays compact, produces more berries, and resists disease like a champ. The foliage turns a deeper, richer green, and those golden-yellow fall hues pop against the landscape.
Within a season, your neighbors will be asking for your pruning secrets—trust me, it’s that noticeable.
Works for both common barberry varieties and the thornless types, making it perfect for hedges, borders, or even container gardens. Let’s get those shears ready—your barberry’s best look starts with just a few cuts.
📚 In This Guide
- What you need
- Instructions
- Tips and common mistakes
- Wrapping up and next steps
What you need
- ● Before you dive into pruning your barberry plant, gathering the right tools and materials ensures a smooth, efficient, and safe process. Here’s what you’ll need:
How to prune barberry plants for full, bushy growth
This is the pruning routine I’ve used for years to keep my barberries lush and productive—no guesswork, just three strategic cuts.
✂️ Step 1: Late Winter Cleanup (Before New Growth)
Grab your pruners and work in late February or early March while the plant is still dormant. This first cut removes all dead, diseased, or crossing branches—think of it as giving your barberry a fresh start. I always start with the obvious: any stems that look blackened, mushy, or hollowed out go first. These are disease entry points and won’t recover.
Next, look for branches rubbing against each other. Where two stems cross, they’ll eventually tear and create wounds that attract pests. Cut the smaller of the two branches at the base. You’ll know you’re doing it right when you see a clean, angled cut that exposes fresh green beneath. Don’t worry about making the cuts perfect—just remove what’s clearly damaged or problematic.
✂️ Step 2: Summer Thinning (After Flowering)
Wait until June or July, after your barberry has finished flowering but before the berries fully ripen. This is when you shape the plant by thinning out crowded branches. I focus on removing one-third of the oldest stems at their base—these are usually the woody, thicker branches. Older stems produce fewer berries and flowers, so cutting them back encourages new, vigorous growth from the base.
As you work, step back every few cuts to visualize the plant’s shape. You’re aiming for an open center that lets sunlight and air circulate. If you see any leggy growth (long, thin stems with sparse foliage), trim those back by half their length. This forces the plant to put energy into bushier, more compact growth. Use clean, sharp pruners to make cuts just above a leaf bud or side branch—never leave stubs.
✂️ Step 3: Light Fall Maintenance (After Berry Harvest)
In September or October, after the berries have been harvested or fallen naturally, do a final light pruning pass. This is all about tidying up—remove any remaining dead growth, weak stems, or branches that spoil the plant’s shape. I also look for water sprouts (fast-growing, vertical shoots with no leaves) and cut them back to the main stem. These shoots steal energy from the rest of the plant.
This final cut keeps the plant healthy through winter and prevents disease buildup in old growth. Avoid heavy pruning now—your goal is to let the plant harden off for dormancy. If you notice any branches with signs of fungal issues (like powdery mildew), prune those out immediately and dispose of them in the trash, not the compost. A clean finish means a stronger start next spring.
⏰ Step 4: Year-Round Monitoring (Preventative Care)
Between these three main pruning sessions, keep an eye on your barberry. Twice a month, walk around the plant and remove any suckers (shoots growing from the base) or sprouts (new growth from old wood). These compete with the main structure for nutrients. Use your fingers or small pruners to pinch them off at the base—no need for heavy tools here.
I also check for pest damage (like spider mites or aphids) during these inspections. If you see webbing or sticky residue on leaves, treat it immediately with neem oil or insecticidal soap. A healthy barberry is resilient, but neglecting small issues leads to bigger problems later. Think of this as your plant’s regular checkup—just 10 minutes every few weeks keeps everything in top shape.
Tips & tricks for pruning barberry plants like a pro
Let me save you from the pruning mistakes I made before I figured out these game-changing tricks!
Timing is Everything: The late February/March window in Step 1 is crucial because that's when your barberry is fully dormant. If you prune too early, you risk exposing fresh cuts to late winter freezes that can damage new growth. I've learned the hard way—wait until you see those first tiny buds starting to swell before you begin. This timing ensures your plant has the best chance to heal and grow strong once spring arrives.
The One-Third Rule: In Step 2, when you're removing one-third of the oldest stems, don't just grab any branches! Focus on the thickest, woody stems at the base—these are the ones that have stopped producing well and are just taking up space. I always make a quick sketch of my plant's shape before I start so I can visualize where those older stems are located. This selective approach keeps your barberry producing berries and flowers for years to come.
Cutting Technique Secrets: That clean, angled cut just above a leaf bud isn't just for looks—it's how your plant knows where to grow next! When you make cuts that leave stubs or cut into old growth, you create wounds that take forever to heal and attract pests. I keep a small bottle of rubbing alcohol with me to wipe down my pruners between cuts—this prevents spreading any potential diseases from branch to branch. Sharp pruners make clean cuts, so invest in a good pair if yours are dull.
Year-Round Maintenance Hack: Those 10 minutes every few weeks in Step 4 add up to big results! I set a reminder on my phone for every other Thursday because it's easy to forget. Grab a small bag for your clippings and a pair of gloves, then walk around your plant looking for anything that doesn't look right. You'll be amazed at how much healthier your barberry looks after just a few of these quick sessions. It's like giving your plant a spa day!
Pro Tips for Barberry Plant Pruning
- Let me save you from the pruning mistakes I made before I figured out these game-changing tricks!
- Timing is Everything: The late February/March window in Step 1 is crucial because that's when your barberry is fully ...
- The One-Third Rule: In Step 2, when you're removing one-third of the oldest stems, don't just grab any branches! Focu...
Frequently asked questions
Got questions about keeping your barberry plants thriving with the right pruning? Here are some of the most common concerns—plus clear, actionable answers to keep your shrubs looking sharp all year long!
When is the absolute best time to prune barberry plants?
The ideal window is late winter or early spring (just before new growth spurs), but you can also prune lightly after flowering (late spring) to shape the plant. Avoid heavy pruning in fall—it can stimulate tender new growth that won’t survive winter. Pro tip: If you missed the spring cut, a light summer trim is better than nothing!
How do I prune barberry for thicker, bushier growth?
Focus on cutting back ⅓ of the oldest stems to the ground each year. This encourages younger, more vigorous growth from the base. For a fuller look, trim back any leggy or overcrowded branches to the nearest outward-facing bud. Avoid "topping" (cutting the top flat)—it weakens the plant and creates ugly stubs.
Can I prune barberry in winter? What if it’s snowing?
Light pruning in mild winter (when temps stay above freezing) is fine, but heavy cuts are best avoided until spring. If it’s snowing or below 20°F, wait—pruning stressed plants can invite disease. If you must prune in winter, do it on a dry, calm day to reduce stress on the plant.
What should I do if my barberry looks sad after pruning?
Don’t panic! A "sad" look often means the plant is adjusting to new growth. Water deeply after pruning, and avoid fertilizing for 4–6 weeks. If branches turn brown or wilt, check for over-pruning (cutting too much) or disease. Most barberries bounce back within a few weeks with proper care.
Do I need to sterilize my pruners between cuts?
Absolutely!
Barberries can harbor spores of rust or fire blight, so clean your tools with rubbing alcohol or a 10% bleach solution between plants. Dip pruners in hydrogen peroxide (3%) for extra protection. This small step prevents big problems down the line.
Wrapping up and next steps
Mastering barberry plant pruning is your ticket to a thriving, healthy shrub year after year! 🌿 By focusing on the three key cuts—spring shaping, summer tidying, and late-winter renewal—you’ll encourage lush growth, vibrant berries, and a tidy form.
Remember, patience and precision pay off, so don’t rush the process.
Ready to take the next step? Grab your pruners and schedule a pruning session this weekend—your barberry will thank you with bold new growth and a stunning appearance! For extra confidence, bookmark this guide or share it with fellow gardening enthusiasts. Happy pruning! ✂️🌟