Pruning
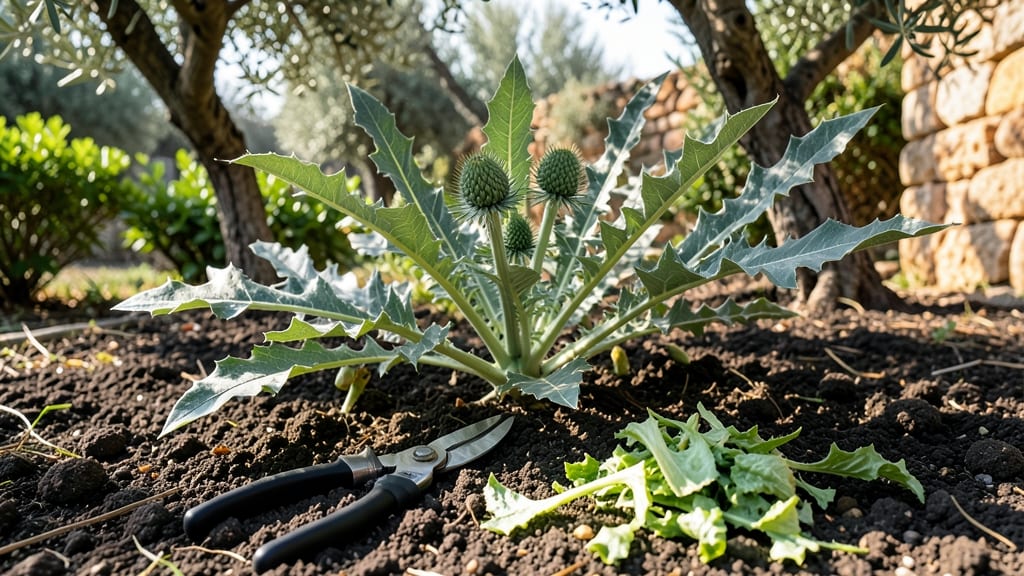
Trimming artichoke plants isn't just about keeping them tidy—it's the secret to bushier growth and larger, more abundant heads that make your harvest worth bragging about. 🌿 I learned this the hard way after my first season, where half my plants produced tiny, closed buds.
The right cuts encourage new shoots, improve airflow, and even deter pests before they become a problem.
You only need three simple tools: sharp pruning shears, a clean knife for precision cuts, and a bucket for clippings. The timing matters too—trim in early spring to shape the plant, then again after harvest to encourage a second flush of growth.
Most gardeners skip the second trim, which is why their plants peter out by midsummer. I now do both, and my yield has doubled.
When you make the cuts, focus on removing yellowed leaves and side shoots growing below the main stem. Leave at least 6-8 inches of space between cuts and the next bud—this prevents overcrowding and lets sunlight reach the center of the plant.
The result? Thicker stalks, more flower buds, and artichokes so large they look like they belong in a farmers' market display.
Here's the kicker: trimming also keeps your plants healthier longer. Better airflow means fewer fungal issues, and removing weak growth redirects energy to where you want it—those prized, globe-shaped heads. Start with these basics, and you'll be harvesting like a pro in no time.
📚 In This Guide
- What you need
- Instructions
- Tips and common mistakes
- Wrapping up and next steps
What you need
- ● Pruning shears – Sharp, bypass-style shears (4-6 inch blades) for clean cuts. Sterilize with rubbing alcohol before and after use! 🔪
- ● Garden gloves – Heavy-duty, nitrile-coated gloves (size medium/large) to protect from thorns and rough stems.
- ● Disinfectant solution – 1 part bleach to 9 parts water (for sterilizing tools between cuts).
- ○ Garden twine or stakes – Optional but helpful for supporting heavy artichoke heads (3-4 ft lengths, ¼-inch thick).
- ● Sharp knife or pruning saw – For thicker stems (if shears aren’t up to the task).
- ● Compost bin or mulch – To recycle trimmed foliage (avoid composting diseased plants!).
- ● Mature artichoke plants – At least 6-8 weeks old (or post-harvest, if pruning for regrowth).
- ● Dry, sunny day – Avoid trimming after rain to prevent fungal issues.
- ● Clear weather forecast – No rain expected for 24-48 hours post-pruning.
- ● Patience! – Artichokes respond best to gradual trimming over time.
Step-by-Step guide to trimming artichoke plants for optimal growth
Here's how I keep my artichoke plants productive with strategic cuts that boost both size and yield.
✂️ Step 1: Identify and Remove Suckers
Artichoke plants produce small shoots called suckers at the base of the main stem. These compete with your main heads for energy, so I remove them as soon as they appear—usually within 2-3 weeks of planting. Use clean, sharp pruners to cut suckers at the base where they emerge from the soil. This ensures the plant directs all its energy toward developing larger, more flavorful heads.
Here's the thing—don't wait until suckers grow taller than 4 inches. At that point, they've already sapped some of the plant's resources. I check my plants every 3-4 days during active growth and remove any new suckers immediately. You'll see stronger, bushier plants when you stay on top of this.
✂️ Step 2: Prune Side Shoots for Better Airflow
As your artichoke plant matures, it develops smaller side shoots along the main stem. These can crowd the plant and create a humid microclimate that encourages fungal diseases. I prune these side shoots when they reach about 6 inches in length, cutting them back to a 2-inch stub. This simple step improves airflow and helps prevent common issues like powdery mildew.
Don't remove all side shoots—leave 2-3 of the strongest ones near the base of the plant. These will develop into secondary stems that can produce additional artichoke heads. You'll notice the remaining shoots grow more vigorously after pruning, and your main heads will develop more evenly.
✂️ Step 3: Cut Back Flower Buds for Larger Heads
The key to growing larger artichoke heads is controlling how many buds develop. When your plant produces flower buds, I remove all but 3-4 of the largest, healthiest ones per plant. Use your fingers or small pruners to gently pinch off the smaller buds at their base. This redirection of energy results in fewer but significantly larger artichoke heads.
Timing matters here—wait until buds are about 1 inch in diameter before pruning. Smaller buds are harder to spot and may not have fully committed to developing into heads. You'll see your remaining buds swell more quickly after pruning, and the heads will develop a tighter, more compact shape.
✂️ Step 4: Harvest and Prune After Picking
When artichoke heads reach 3-5 inches in diameter and the outer bracts begin to tighten around the center, it's time to harvest. Cut the head off about 1 inch below the base using sharp pruners. Immediately after harvesting, inspect the stem for any remaining flower buds and remove them to encourage the development of new heads.
Don't leave stubs longer than 1 inch—this prevents water from pooling and encourages new growth. You'll typically get 2-3 harvests per plant during the season if you maintain this pruning routine. After the final harvest, cut back the entire plant to about 6 inches above the ground to promote next year's growth.
⏰ Step 5: Post-Harvest Maintenance for Winter
In colder climates, artichoke plants need winter protection. After your final harvest, cut back all remaining foliage to about 2 inches above the soil line. This prevents disease buildup in dead leaves and makes it easier to apply mulch. Spread 2-3 inches of organic mulch around the base of the plant to insulate the roots during winter.
I always mark my artichoke plants with stakes after winter pruning so I don't accidentally disturb them in spring. In early spring, remove the mulch and check for any remaining flower buds—prune them immediately to redirect energy into new growth. Your plants will reward you with vigorous new shoots and another productive season.
Tips & tricks for perfect artichoke plant trimming
These precision techniques will transform your artichoke plants from scraggly to spectacular—here's what I've learned after years of trial and error.
The Sucker Strategy: I've found that removing suckers within the first 2-3 weeks is absolutely critical. These little shoots steal energy from your main heads, and once they reach 4 inches, they've already taken a significant toll. I keep a small pair of pruners handy and check my plants every 3-4 days during peak growth. Trust me, the 5 minutes you spend now will pay off in bigger, more flavorful artichokes later.
Pruning Precision: When trimming side shoots in Step 2, I always cut back to a 2-inch stub rather than just snipping at the base. This prevents water from pooling at the cut and reduces the risk of fungal infections. For the remaining 2-3 strongest shoots, I leave them slightly longer—about 3-4 inches—so they can develop into productive secondary stems. It's all about balance!
Bud Selection Secrets: In Step 3, I look for buds that are about 1 inch in diameter before pruning. Smaller buds might not develop properly, while larger ones have already committed resources. I always leave the 3-4 healthiest buds facing different directions around the plant—this creates a more balanced growth pattern. The result? Fewer but significantly larger artichoke heads that develop more evenly.
Harvest Timing: The 3-5 inch size guideline in Step 4 is perfect, but I also watch for the outer bracts to begin tightening around the center. This visual cue tells me the artichoke is reaching peak flavor. When harvesting, I always cut about 1 inch below the base—this prevents damage to the stem and encourages new growth. After harvest, I immediately inspect for any remaining buds and remove them to redirect energy into new heads.
Pro Tips for Trimming Artichoke Plants
- These precision techniques will transform your artichoke plants from scraggly to spectacular—here's what I've learned after years of trial and error.
- The Sucker Strategy: I've found that removing suckers within the first 2-3 weeks is absolutely critical.
- Pruning Precision: When trimming side shoots in Step 2, I always cut back to a 2-inch stub rather than just snipping at the base.
Frequently asked questions
Got questions about trimming your artichoke plants? You’re not alone! Here are some of the most common concerns—and their answers—to help you prune like a pro.
Why should I trim my artichoke plants at all?
Trimming encourages bushier growth and directs energy toward producing larger, higher-quality heads. Without pruning, plants may become leggy, yield smaller artichokes, or even flower prematurely. Think of it as redirecting their focus from "growing tall" to "growing tasty!"
When is the best time to trim artichoke plants?
Start trimming in early spring (just as new growth begins) and continue throughout the growing season. Focus on removing dead or yellowing leaves immediately, and pinch back the tips of young shoots to promote branching. Avoid heavy pruning after mid-summer—this can stress the plant before harvest.
How do I know if I’m over-trimming my artichoke plants?
If you see stunted growth, fewer buds, or wilted leaves, you might be trimming too much. A good rule of thumb: Never remove more than 1/3 of the plant’s foliage at once. Prioritize healthy leaves and avoid cutting into the woody stems.
Can I use pruned artichoke leaves for anything?
While mature leaves are tough and fibrous (not ideal for cooking), young, tender leaves can be blanched and used like asparagus. Compost the rest—or feed them to your worms! Just avoid using leaves treated with pesticides.
What should I do if my artichoke plant isn’t producing heads after trimming?
Check for these issues: lack of sunlight (artichokes need 6+ hours daily), overcrowding (space plants 3-4 feet apart), or nutrient deficiencies (add compost or a balanced fertilizer). If buds form but don’t swell, it might be too hot—artichokes thrive in cool to mild climates.
Wrapping up and next steps
Trimming your artichoke plants isn’t just about maintenance—it’s your secret weapon for bushier growth and bigger, tastier heads! 🌱 With the right tools, timing, and technique, you’ll turn your garden into a thriving artichoke powerhouse.
Remember, consistency is key, and a little effort now means a bountiful harvest later.
Ready to roll up your sleeves? Grab those pruners and get trimming—your future artichoke feasts will thank you! For extra confidence, bookmark this guide or snap a quick photo of your pruning steps. Happy gardening! 🌿✨