Pruning
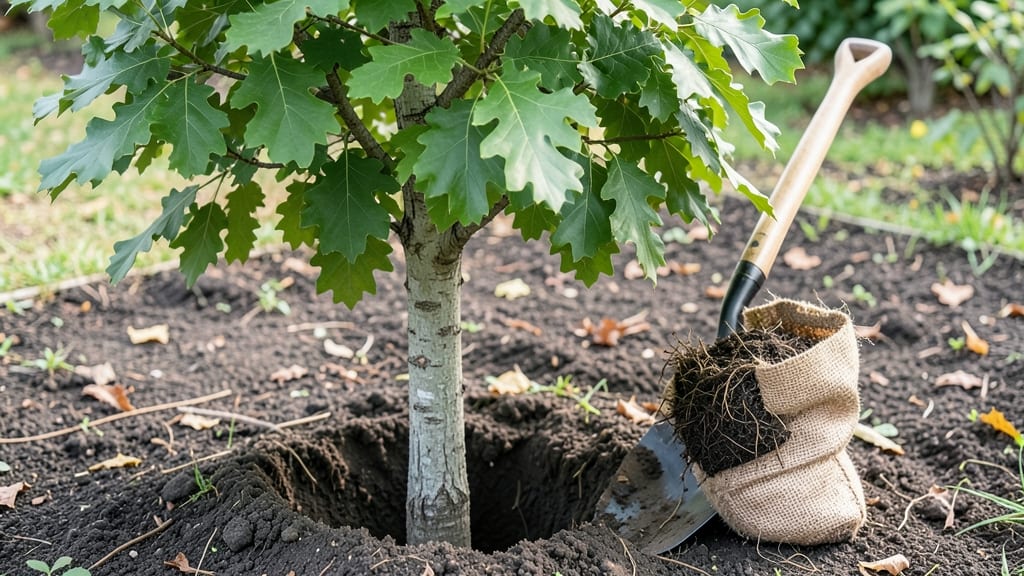
The tree planting process transforms a simple hole into a living legacy of shade, wildlife haven, and timeless curb appeal. I've planted over 50 trees, and the difference between a thriving specimen and a struggling one often comes down to those first 30 minutes in the ground.
The right spot, the right soil, and the right technique make all the difference, especially when you're dealing with delicate root systems or finicky species like maples or oaks.
You'll need basic tools—a shovel, a wheelbarrow, and some compost—but the real secret is patience. Most people rush the hole size or skip the root pruning, and that's when problems start.
My first tree died because I planted it too deep, and I learned the hard way that even a few extra inches can strangle young roots.
The goal is to mimic the tree's natural conditions as closely as possible, whether that's well-draining soil for oaks or slightly acidic soil for azaleas.
By the time you're done, you'll have a tree standing tall with its roots settled into loose, nutrient-rich soil. The first few weeks are critical—watering deeply once a week (not daily) and keeping mulch 3 inches away from the trunk prevents rot while locking in moisture.
Within a year, you'll see new growth that tells you the whole process worked, and that's when the real magic begins.
This method works for everything from shade trees to fruit-bearing varieties, though conifers need slightly different soil prep. The key is adapting the basics to your tree's needs—whether that means adjusting pH, amending clay soil, or choosing the right mulch type.
Let's get those roots in the ground the right way.
📚 In This Guide
- What you need
- Instructions
- Tips and common mistakes
- Wrapping up and next steps
What you need
- ● Tree sapling or seedling: Choose a healthy, disease-free specimen with well-developed roots. Size depends on your project—small saplings (1–3 ft) for quick growth or larger trees (4–6 ft) for instant impact.
- ● Shovel or spade: A round-point shovel (for digging) or a mattress fork (for breaking up compacted soil) works best. A 16–24-inch blade is ideal for most trees.
- ● Garden gloves: Protect your hands with durable, breathable gloves (e.g., nitrile-coated for grip and protection).
- ● Watering can or hose: A 5-gallon watering can with a long spout or a soaker hose for deep hydration.
- ● Mulch: 3–4 inches of organic mulch (wood chips, straw, or shredded bark) to retain moisture and suppress weeds. Avoid piling mulch against the tree trunk.
- ○ Staking supplies (optional but recommended for young trees): 2–3 wooden or metal stakes (4–6 ft tall).
- ● Soft tree ties or nylon straps (wide enough to avoid trunk damage).
- ● Pruning shears or loppers: For trimming dead branches or shaping the tree post-planting. Choose bypass pruners for clean cuts.
- ● Site preparation: Clear debris, rocks, and weeds from the planting area. Test soil pH (ideal range: 6.0–7.0) and amend if needed (e.g., compost for poor soil).
- ● Weather check: Plant on a cool, cloudy day (avoid extreme heat or frost). Rainy weather? Wait 24–48 hours to let the soil settle.
- ● Permits (if applicable): Check local regulations—some areas require permits for planting near sidewalks, power lines, or in public spaces.
- ○ Safety gear (optional but smart): Safety glasses (if digging near roots or rocks).
- ● Knee pads (for comfort during extended planting).
Step-by-Step instructions for planting trees that will thrive
Here's how to plant trees that grow strong and healthy for decades—not just survive the first year.
Choose the Right Spot and Prepare the Soil
Select a location with at least 6 feet of clearance around the tree's mature size—most trees need space to spread their roots and branches. Test the soil by digging a hole about 12 inches deep and checking for rocks or hardpan. If the soil is compacted, loosen it with a shovel or garden fork to encourage root growth.
Amend the native soil with 2-3 inches of compost mixed into the top 12 inches of the planting hole. This improves drainage and provides nutrients without overwhelming the tree. Avoid heavy clay soil by planting on a slight mound if needed—this prevents water pooling around the roots. I always check for underground utilities before digging to avoid costly accidents.
Dig the Planting Hole Correctly
Dig a hole twice as wide as the tree's root ball but no deeper—this prevents the roots from settling too low and suffocating. The top of the root ball should sit 1-2 inches above ground level after planting to allow for settling. If the tree came in a container, gently loosen the roots around the edges to encourage them to spread outward rather than circling.
Step back and visualize the tree's mature shape. Place the hole where the tree will have room to grow without crowding structures, sidewalks, or other plants. For larger trees, consider a soil berm (a raised mound of native soil) around the planting area to support the root system as it expands.
Position the Tree and Backfill the Hole
Carefully remove the tree from its container or burlap wrap, keeping the root ball intact. Place it in the hole so the root flare (where the roots meet the trunk) is visible above the soil line—this ensures the tree grows upright and avoids girdling. If the tree is balled-and-burlapped, remove the twine or wire and unfold the burlap so roots aren’t restricted.
Backfill the hole with the native soil you removed, tamping it down gently in 2-inch layers to eliminate air pockets. Avoid using amended soil or compost in the hole—this can create a nutrient-rich layer that encourages shallow root growth. Water the tree deeply after backfilling to settle the soil around the roots.
Mulch and Water for Long-Term Support
Spread 2-3 inches of mulch (like wood chips or shredded bark) in a 3-inch-wide ring around the tree, keeping it 6 inches away from the trunk to prevent rot. Mulch helps retain moisture and regulates soil temperature, but too much can suffocate the roots. Water the tree deeply once a week for the first year, providing 10-15 gallons depending on the tree size.
Install a tree stake or support system only if necessary—most young trees don’t need staking unless they’re in a windy area. If you do stake, use soft ties (like fabric strips) to avoid damaging the trunk as it grows. Monitor the tree weekly for signs of stress, like wilting leaves or yellowing foliage, and adjust watering as needed.
Maintain and Protect the Tree Long-Term
Prune only to remove dead, broken, or crossing branches in the first year—never "thin" a young tree for aesthetic reasons. This reduces stress and allows the tree to focus on root development. Fertilize lightly in the second year with a slow-release, balanced fertilizer (like 10-10-10) to support growth without overfeeding.
Protect the tree from lawn equipment, pets, and foot traffic for at least 3-5 years—compaction and damage can stunt root growth permanently. As the tree matures, mulch annually to maintain the 2-3 inch layer, and avoid piling mulch against the trunk. With proper care, your tree will establish a strong root system and thrive for generations.
Tips & tricks for perfect tree planting
Planting a tree that thrives for decades starts with these key strategies that most people overlook.
Soil Preparation Secret: When you're amending the native soil with 2-3 inches of compost in Step 1, focus on mixing it into only the top 12 inches of the planting hole. This creates a nutrient-rich zone where roots will naturally seek out moisture and nutrients without encouraging shallow root growth that can make trees vulnerable to wind. I've seen trees planted with compost deeper in the hole develop roots that stay too close to the surface, making them more susceptible to drought and storm damage.
Root Ball Positioning: In Step 3, the root flare must be visible above the soil line after planting. This isn't just about aesthetics—it's crucial for the tree's health. If you bury the root flare, you're essentially girdling the tree, which can strangle its growth. Think of the root flare as the tree's "waistline"—it needs to be exposed to allow proper water drainage and prevent rot. If you're unsure where the root flare is, gently separate the roots until you see where they naturally flare out from the trunk.
Mulching Technique: The 2-3 inches of mulch you spread in Step 4 should create a donut shape around the tree, not a volcano. Too much mulch piled against the trunk can cause rot by trapping moisture. I always visualize a 3-inch wide ring that extends outward from the trunk, keeping the mulch 6 inches away. This creates the perfect microclimate for root growth while preventing common mulch-related problems. Plus, it looks much more professional and intentional in the landscape.
Watering Wisdom: That first year of weekly deep watering (10-15 gallons) is critical, but timing matters just as much as quantity. Water in the early morning so the tree can absorb moisture before the heat of the day causes evaporation. I've seen many well-intentioned gardeners water in the evening, which can lead to fungal issues. Also, water slowly to allow it to penetrate deeply rather than running off the surface. A soaker hose works perfectly for this.
Pro Tips for Tree Planting Process
- Planting a tree that thrives for decades starts with these key strategies that most people overlook.
- Soil Preparation Secret: When you're amending the native soil with 2-3 inches of compost in Step 1, focus on mixing it into only the top 12 inches of the planting hole.
- Root Ball Positioning: In Step 3, the root flare must be visible above the soil line after planting.
Frequently asked questions
Got questions about planting trees?
You’re not alone! Here are some of the most common queries—and straightforward answers—to help you get started with confidence.
What’s the best time of year to plant a tree?
The ideal window is early spring or fall (3–4 weeks before the first frost). These seasons offer mild temperatures, ample rainfall, and minimal stress for roots. Avoid planting in extreme heat or winter—your tree will struggle to establish itself.
How deep should I plant a tree?
Dig a hole twice as wide as the root ball but no deeper. The top of the root flare (where roots meet the trunk) should sit just above ground level. Planting too deep can suffocate roots, while too shallow leaves them exposed. Pro tip: Loosen the root ball before planting to encourage spread!
How often should I water a newly planted tree?
Water deeply 2–3 times per week for the first year, soaking the root zone (about 12–18 inches down). After that, reduce to once a week unless drought strikes. Mulch (2–4 inches) retains moisture and protects roots—just keep it away from the trunk to avoid rot.
Can I plant a tree in a small yard or container?
Yes! Dwarf or columnar varieties (like ‘Fastigiata’ oak or ‘Sky Pencil’ holly) thrive in tight spaces. For containers, use a 5-gallon pot minimum, well-draining soil, and repot every 2–3 years. Just ensure the tree gets 6+ hours of sunlight daily—even small trees need room to grow!
My tree’s leaves are yellowing—what went wrong?
Yellow leaves often signal overwatering, underwatering, or poor drainage. Check the soil: if it’s soggy, improve drainage; if dry, water more deeply. Fungal issues (like root rot) may need fungicide or pruning. Pro tip: Test soil pH—most trees prefer 6.0–7.0.
Should I stake a young tree?
Only stake if your tree is top-heavy, in a windy area, or at risk of falling. Use soft ties (not wire) and remove stakes after 1–2 years to avoid girdling. Most trees develop stability naturally—let them sway a little!
Wrapping up and next steps
Planting a tree is a rewarding journey that connects you to nature while leaving a lasting legacy. From choosing the right species to nurturing young roots, every step plays a vital role in ensuring your tree thrives for years to come.
Whether you're a seasoned gardener or a first-time planter, your effort makes a real difference—one tree at a time!
Ready to take the next step? Start small—research local tree species, gather your tools, and pick a sunny spot in your yard. Then, plant with confidence and watch your green investment grow into a beautiful, shady haven. 🌱✨