Pruning
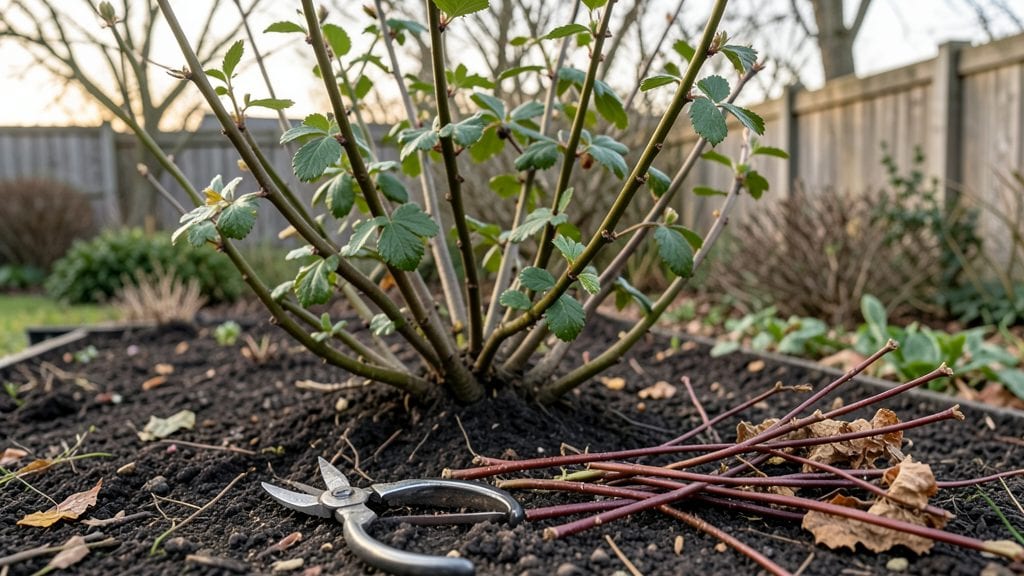
Pruning blackcurrant plants in late winter transforms weak, tangled bushes into vigorous, fruit-bearing powerhouses. ✨ I’ve spent years refining this technique after watching my first attempts produce sparse harvests—until I learned the right cuts and timing.
The key isn’t just trimming; it’s shaping the plant to focus energy where it matters most: on next season’s fruit and sturdy growth.
You’ll need sharp pruners, a clean saw for thicker stems, and a sunny day to work. Start by removing dead or diseased wood first—those branches are just stealing nutrients. Then, cut back last year’s growth by about one-third, targeting older stems to encourage new, productive shoots.
Thinning crowded areas improves airflow, which cuts down on fungal issues that plague blackcurrants.
After pruning, your plants will reward you with lush green foliage by spring and a bumper crop of sweet, tart berries by summer. The structure stays open, making harvesting easier and reducing the risk of mildew.
Just avoid over-pruning—too many cuts shock the plant, and you’ll delay fruiting. Balance is everything.
This method works for both male and female bushes (if you’re growing for fruit), and it adapts to container-grown plants too. The late-winter timing ensures you’re ready for the growing season without missing critical steps. Let’s get those bushes in shape for their best year yet.
📚 In This Guide
- What you need
- Instructions
- Tips and common mistakes
- Wrapping up and next steps
What you need
- ● Pruning shears: Bypass pruners (sharp, clean, and 4- to 6-inch blade length) for clean cuts. Avoid anvil shears—they crush stems.
- ● Loppers: For thicker branches (½-inch or larger). Opt for bypass-style loppers with 8- to 10-inch handles for leverage.
- ● Gloves: Heavy-duty, cut-resistant gloves (e.g., mechanics’ or gardening gloves) to protect against thorns and sap.
- ● Disinfectant: 70% isopropyl alcohol or a 10% bleach solution (1 part bleach to 9 parts water) to sterilize tools between cuts.
- ● Rag or paper towels: For wiping tools clean before and after pruning.
- ● Trash bag or bucket: For collecting pruned branches (avoid composting diseased wood).
- ○ Markers (optional): Waterproof plant markers to label varieties if pruning multiple bushes.
- ● Timing: Prune in late winter (dormant season), ideally 3-4 weeks before bud break (varies by climate zone).
- ● Weather: Choose a dry, calm day (no rain forecast for 24 hours) to prevent fungal issues.
- ● Safety gear: Long sleeves and pants to protect against thorns and sap irritation.
- ● Plant health check: Inspect bushes for diseased or dead wood before pruning—remove and dispose of it separately.
Step-by-step guide to pruning blackcurrant plants
Late-winter pruning transforms blackcurrants into vigorous producers—here’s how to do it right.
✂️ Step 1: Remove Dead, Diseased, or Weak Wood
Start by examining each branch closely. Look for stems that are brown or mushy (dead or diseased), or those that are thinner than a pencil (weak growth). These branches won’t contribute to your harvest and should be cut out first. Use clean, sharp pruning shears to make a clean cut just outside the branch collar—the swollen area where the branch meets the main stem.
I always prune on a dry day to reduce the risk of spreading disease. If you find any branches with black spots or mold, discard them immediately in the trash—not your compost pile. This step ensures your plant focuses energy on healthy growth rather than fighting off infection.
✂️ Step 2: Thin Out Overcrowded Branches
Blackcurrants produce best when they have good airflow. Look for branches that cross or rub against each other—these are prime candidates for removal. Aim to leave the strongest, most outward-facing branches. If you have a cluster of branches growing in the same direction, keep only the healthiest one and cut the others back to their origin.
Here’s the thing—blackcurrants can get leggy if overcrowded. You’ll see long, thin stems with sparse leaves. By thinning now, you encourage the plant to develop a sturdy framework for next year’s fruit. Don’t worry about removing too much; blackcurrants are resilient and will bounce back with fresh, vigorous growth.
✂️ Step 3: Shorten Last Year’s Growth by One-Third
Now it’s time to shape the plant. For each remaining branch, cut back the tips by about one-third of their length. This promotes bushier growth and more fruit production. Make your cuts just above a bud that faces outward—this encourages the plant to fill out rather than grow inward.
I like to step back and visualize the plant after pruning. You’re aiming for an open, rounded shape with branches spaced evenly. If a branch is too long, don’t be afraid to cut it back further—blackcurrants respond well to pruning and will reward you with stronger stems and heavier fruit loads.
✂️ Step 4: Clean Up and Sterilize Tools
After pruning, gather all the clippings and dispose of them in a sealed bag. Blackcurrant prunings can harbor fungal spores, so don’t leave them lying around the garden. Once you’ve cleared the area, wipe down your pruning shears with rubbing alcohol or a 10% bleach solution to sterilize them for the next use.
This is the moment that matters: a clean workspace prevents future problems. I also like to sprinkle a little wood ash around the base of the plant to deter pests and improve soil health. Finish by giving the plant a deep watering to help it recover from the pruning stress.
⏰ Step 5: Monitor and Adjust Through Early Spring
Over the next few weeks, keep an eye on your blackcurrant plant. You’ll notice new growth emerging from the buds you left behind. If any branches look weak or spindly, you can trim them back further in early spring. Strong growth will have thick stems and dark green leaves**—these are the branches that will produce the most fruit.
Real talk: blackcurrants are forgiving, but consistency is key. If you skip pruning one year, the plant can become overgrown and produce less fruit. Stick with this routine every late winter, and you’ll have a thriving, productive blackcurrant bush for years to come.
Tips & tricks for pruning blackcurrant plants
A few strategic cuts now will set your blackcurrants up for a bountiful harvest next season—here's how to do it right.
Timing is Everything: Late winter is the perfect window for pruning blackcurrants, typically between late February and early March when the plant is still dormant but before new growth begins. This timing prevents stressing the plant too early in the growing season. If you're in a warmer climate, aim for just before bud break—you'll notice tiny green buds starting to swell.
The One-Third Rule: In Step 3, when shortening last year's growth by one-third, focus on the outward-facing buds. These will develop into branches that grow away from the center, creating that open, rounded shape we want. I've seen gardeners accidentally cut too close to the bud, which can damage it—always leave at least a quarter-inch above the bud to ensure healthy regrowth.
Tool Maintenance Matters: After pruning, don't just wipe down your shears—sterilize them properly. A 10% bleach solution works great, but I also keep rubbing alcohol handy for quick cleanups between cuts. This prevents cross-contamination between plants. I've learned the hard way that skipping this step can lead to fungal infections spreading through your entire garden.
Visualize the Final Shape: Before making any cuts, step back and imagine your plant's ideal shape. You're aiming for an open center with branches spaced evenly around the perimeter. This airflow is crucial—it prevents fungal diseases that thrive in dense, humid conditions. Think of it like creating a dome shape that catches sunlight from all angles.
Pro Tips for Pruning Blackcurrant Plants
- A few strategic cuts now will set your blackcurrants up for a bountiful harvest next season—here's how to do it right.
- Timing is Everything: Late winter is the perfect window for pruning blackcurrants, typically between late February and early March when the plant is still dormant but before new growth begins.
- The One-Third Rule: In Step 3, when shortening last year's growth by one-third, focus on the outward-facing buds.
Frequently asked questions
Got questions about pruning blackcurrant plants? You’re not alone!
Here are answers to the most common concerns—from timing to tools—to help you prune like a pro.
When is the best time to prune blackcurrants?
Late winter (just before buds swell) is ideal—typically February to early March in most U.S. zones. This timing avoids disease spread and encourages vigorous spring growth. Pro tip: Avoid pruning in fall, as wet conditions can invite fungal issues like botrytis.
How much can I cut back without harming the plant?
Remove 20–30% of the oldest wood each year to maintain balance. For mature bushes, thin out 1–2-year-old stems (they’re less productive) and keep 6–8 strong, young canes. Never cut more than ⅓ of the plant in one season—blackcurrants are resilient but not invincible!
What if my blackcurrant plant looks sad after pruning?
Don’t panic! Yellowing leaves or slow regrowth often mean you pruned too aggressively. Focus on keeping healthy canes (thick, upright stems) and avoid cutting into old, woody centers. If the plant is completely bare, it may need a year of recovery—feed with compost and water deeply.
Can I prune blackcurrants in summer instead?
Summer pruning is possible but riskier. If you must, lightly trim only dead or diseased wood after harvest (July–August). Avoid heavy cuts—it stresses the plant and can reduce next year’s fruit. Warning: Pruning too late can invite pests like currant worms.
Do I need special tools for pruning blackcurrants?
Basic tools suffice: secateurs (pruners) for small stems and loppers for thicker canes. Disinfect tools with rubbing alcohol between cuts to prevent disease. A sharp saw may help for stubborn, woody growth. Skip dull tools—they tear stems and slow healing.
Still unsure? Snap a photo of your plant before/after pruning and compare it to healthy examples online. Blackcurrants reward patience—your future harvest will thank you!
Wrapping up and next steps
Pruning your blackcurrant plants in late winter isn’t just about tidying up—it’s a powerful way to boost next season’s harvest and keep your bushes thriving! 🌱 By following the right techniques, you’ll encourage stronger growth, better air circulation, and fewer pests.
Now that you’re armed with the know-how, grab those shears and get pruning—your future berries will thank you!
Ready to take it further? Monitor your plants throughout the growing season and adjust as needed. Happy pruning—and here’s to a bountiful harvest ahead! 🍇✨