Pruning
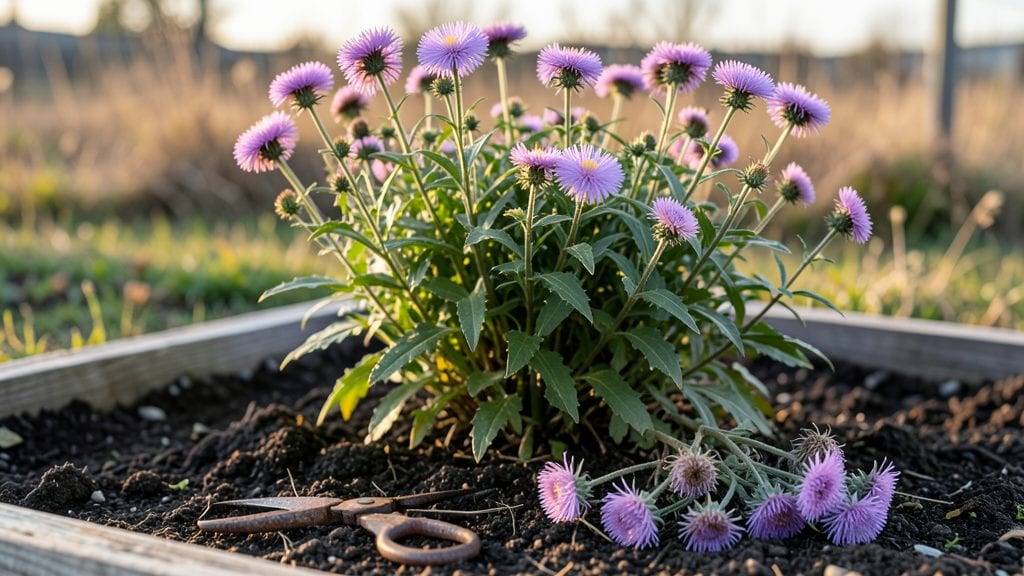
Pruning asters plants turns a single burst of fall color into a month-long show. 🌿 I learned the hard way that skipping this step means missing out on those extra weeks of purple, pink, and blue blooms that make your garden the envy of the neighborhood.
The secret isn't complicated—it's about timing, technique, and knowing exactly where to cut.
You only need three things: sharp pruners, a sunny morning, and about 15 minutes every few days. The key is deadheading—snipping off spent blooms just above the next set of leaves—so the plant focuses its energy on producing new flowers instead of seeds.
Most people overlook this, but it's what transforms a decent fall display into a showstopper.
By the time October rolls around, you'll have asters blooming nonstop until frost. The plants stay bushier, the stems stronger, and you'll avoid that sad, leggy look that happens when flowers go to seed too early. Plus, fewer spent blooms mean fewer hiding spots for pests and diseases.
This works for all aster varieties—whether you're growing New England asters, China asters, or the hardy native varieties. The only rule is consistency: check your plants every few days, and you'll keep that color going until winter. Ready to make your fall garden shine?
📚 In This Guide
- What you need
- Instructions
- Tips and common mistakes
- Wrapping up and next steps
What you need
- ● Sharp pruning shears – Bypass-style (for clean cuts) or anvil-style (for thicker stems). Size: 5–7 inches (13–18 cm) for precision.
- ● Garden gloves – Durable, cut-resistant (e.g., nitrile-coated) to protect hands from thorns and sap.
- ● Disinfectant (70% isopropyl alcohol or bleach solution) – 1 part bleach to 9 parts water to sterilize tools between cuts and prevent disease.
- ● Garden twine or rubber bands – For tying up leggy stems if staking is needed.
- ○ Pruning saw (optional) – For thick, woody stems (if your asters are mature or overgrown).
- ● Hand pruners with a bypass blade – For smaller, detailed cuts on delicate stems.
- ● Compost bin or bag – To collect deadheaded flowers and clippings for nutrient-rich compost.
- ● Plant markers or labels – If you’re pruning multiple varieties (e.g., ‘Royal Ruby’ vs. ‘Profusion’).
- ● Knee pads or a small stool – For comfortable access to low-growing asters.
- ● Timing: Prune on a dry, overcast day or early morning to reduce stress on the plant.
- ● Weather: Avoid pruning if rain is forecasted within 24 hours—wet cuts can invite fungal issues.
- ● Plant health: Wait until at least 1/3 of the blooms are spent (usually late summer/early fall).
Step-by-Step guide to pruning asters for longer blooms
Here’s how to keep your asters flowering until hard frost with minimal effort.
✂️ Step 1: Wait for the Right Time to Prune
Never cut back asters until they’ve finished their first flush of blooms—usually around mid-to-late summer. I wait until at least 50% of stems have faded before touching them. This ensures the plant has stored enough energy for a second round of flowers. If you prune too early, you’ll sacrifice those first blooms entirely.
Look for stems where the flower heads have turned brown and dried out. These are your deadheading targets. Avoid cutting healthy blooms—you’ll know which ones to keep because they’ll still have vibrant purple, pink, or blue petals. Grab your pruners and focus only on the spent flowers.
✂️ Step 2: Cut Back to a Healthy Leaf Pair
Make your first cut just above a set of healthy leaves—never above bare stem. I aim for the second or third leaf pair below the dead bloom to encourage new growth. This ensures the plant has enough foliage to support photosynthesis for the next set of flowers. If you cut too close to the base, you risk stunting regrowth.
Use sharp pruners to avoid crushing stems. A clean cut at a 45-degree angle prevents water from pooling on the wound, which could rot the stem. After cutting, toss the spent blooms into your compost pile—they’ll break down quickly and return nutrients to the soil.
✂️ Step 3: Thin Overcrowded Stems for Better Airflow
While you’re pruning, check for stems that are too close together—asters can get leggy and congested. Remove 1-2 weak or crowded stems per plant by cutting them at the base. This improves airflow, which reduces fungal diseases like powdery mildew. I prioritize stems that look thin, pale, or overly stretched—these won’t produce strong blooms anyway.
Don’t overdo it—leave at least 3-4 strong stems per plant to maintain structure. If you remove too many stems at once, the plant may struggle to rebound. After thinning, give the foliage a gentle shake to encourage new side shoots to form.
⏰ Step 4: Monitor and Repeat for Continuous Blooms
After your first pruning, watch for new buds forming at the leaf nodes. These will develop into your second round of flowers. When those blooms fade in late fall, repeat the deadheading process—but this time, cut back only the spent stems, leaving the rest of the plant intact. Asters are tough perennials and can handle light pruning until frost.
If your asters start looking ragged by early winter, you can give them a final trim by cutting all stems back to 2-3 inches tall. This keeps the garden tidy and prevents self-seeding, which can lead to unwanted volunteers popping up next spring. Mulch around the base with 2-3 inches of organic mulch to protect the crowns over winter.
🌿 Step 5: Fertilize Lightly After Pruning
After deadheading, give your asters a light feeding with a balanced, water-soluble fertilizer (like 10-10-10) diluted to half strength. This gives them a gentle boost without encouraging too much leafy growth at the expense of flowers. I apply it once in early summer and again after the first deadheading—that’s it. Over-fertilizing leads to weak stems and fewer blooms.
Water deeply right after fertilizing to help the nutrients soak into the soil. Keep the soil evenly moist but not soggy—asters hate wet feet. If your area gets heavy rain, skip the watering for a few days to avoid root rot. With proper care, your asters will keep flowering until a hard frost, sometimes even into December in mild climates.
Tips & tricks for perfect pruning asters plants
Here's what I've learned after years of keeping my asters blooming well into winter.
Timing is Everything: The mid-to-late summer timing in Step 1 is absolutely critical. I've seen gardeners prune too early and completely lose their first flush of flowers—don't make that mistake! Look for at least 50% of stems with fully browned, dried flower heads before you start. This ensures your plants have stored enough energy for that glorious second bloom. Pro tip: Check your asters every few days during peak bloom season—you'll notice new buds forming at the leaf nodes within 7-10 days of proper pruning.
Leaf Pair Location Matters: When you're making that first cut in Step 2, resist the urge to cut too close to the base. I always aim for the second or third healthy leaf pair below the dead bloom—this gives your plant enough foliage to continue photosynthesizing while still encouraging new growth. Think of it like giving your plant a fresh start without taking away its lifeline. A good rule of thumb is to leave at least 4-6 inches of stem above your cut—this prevents stunting while still removing enough of the old growth.
Thinning Strategy: The 1-2 stems per plant guideline in Step 3 might seem strict, but trust me on this—it works wonders. I've learned the hard way that removing too many stems at once can shock the plant. Focus on the weakest, most crowded stems first—they're not contributing much to your display anyway. After thinning, give the foliage a gentle shake to stimulate new side shoots. This simple action can double your flowering potential for the second round!
Final Winter Prep: That 2-3 inch final trim in Step 4 isn't just about tidiness—it's about protecting your plants through winter. The shorter stems are less likely to snap in heavy snow or ice. Plus, mulching with 2-3 inches of organic material creates a cozy insulation layer. I use shredded leaves mixed with straw for the best results. This combo breaks down slowly, adding nutrients to the soil while protecting the crowns from freezing temperatures.
Pro Tips for Pruning Asters Plants
- Here's what I've learned after years of keeping my asters blooming well into winter.
- Timing is Everything: The mid-to-late summer timing in Step 1 is absolutely critical.
- Leaf Pair Location Matters: When you're making that first cut in Step 2, resist the urge to cut too close to the base.
Frequently asked questions
Got questions about keeping your asters blooming all season? Here are the most common ones—and their answers—to help you master the pruning game!
When is the best time to prune asters for continuous blooms?
Prune asters after they finish blooming in their first flush (usually early to mid-fall). For nonstop color, deadhead spent blooms every 1–2 weeks throughout the season. Avoid pruning too early—this can stunt new growth. Late summer is also a great time to trim leggy stems to encourage bushier plants.
How much should I cut back asters when pruning?
For deadheading, simply snip off spent flower heads just above the nearest set of leaves or side bud. If rejuvenating the plant, cut back 1/3 of the stem at a 45-degree angle to promote new growth. Avoid over-pruning—never trim more than 20–30% of the plant at once.
What if my asters get pests or diseases after pruning?
Pruning improves airflow, which reduces fungal issues like powdery mildew. If pests (like aphids) appear, spray with neem oil or insecticidal soap. For mildew, remove infected leaves immediately and apply a fungicide. Always sterilize pruners with rubbing alcohol between cuts to prevent spreading pathogens.
Can I prune asters too late in the season?
Yes! Avoid heavy pruning after early fall (late October in most zones), as new growth won’t harden off before frost. For perennial asters, light deadheading is fine until the first freeze. If you miss the window, simply wait until spring to trim back 1/3 of the plant for fresh regrowth.
What’s the difference between pruning and deadheading asters?
Deadheading
= Removing only spent blooms to encourage more flowers. Pruning = Trimming leggy stems or overgrown foliage to shape the plant or rejuvenate growth. Both extend blooming season, but deadheading is quicker and done more frequently!
Wrapping up and next steps
Mastering the art of pruning asters is your ticket to a vibrant, long-lasting fall display—no green thumb required!
By deadheading spent blooms and trimming back leggy stems, you’ll encourage fresh flowers, boost plant health, and keep those cheerful colors popping until frost. Remember: consistency is key, but even small efforts yield big rewards.
Ready to transform your garden? Grab your shears and start pruning today—your asters (and future blooms!) will thank you. Need a refresher? Revisit our FAQs or watch a quick tutorial to sharpen your skills!