Pruning
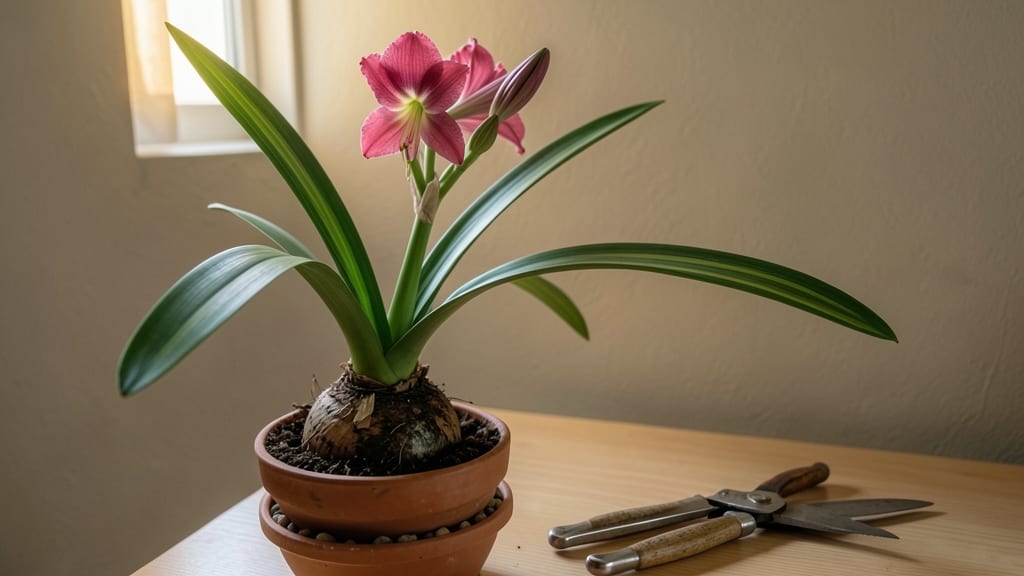
Pruning amaryllis plants after flowering is the secret to keeping them blooming year after year—no fancy tools or green thumbs required. ✨ I’ve turned my single spring bloom into a showstopper that flowers twice a year by sticking to three simple cuts: the dead flower stalk, yellow leaves, and any leggy growth.
The key isn’t timing as much as consistency—most people wait too long, and the plant wastes energy on dead parts instead of storing it for next season’s blooms.
You’ll need just three things: sharp scissors (or pruning shears), a small container of water, and about 15 minutes. Cut the flower stalk at the base when it’s fully brown, trim yellow leaves back to the green stem, and snip off any stems that look weak or stretched.
The plant might look bare afterward, but that’s normal—it’s redirecting energy underground to build next year’s blooms. Think of it like giving your amaryllis a spa day: less clutter, more focus on what matters.
What you’ll end up with is a plant that blooms stronger and more often, with glossy green leaves and sturdy stems. The first signs of success are new shoots at the base within 4-6 weeks, followed by buds forming in late summer or early fall.
Even if you’ve let yours go unpruned for years, it’s never too late to start—just work your way through the dead growth, and the plant will bounce back faster than you expect.
This method works for both indoor and outdoor amaryllis, though outdoor plants need extra care during winter dormancy. Whether you’re a first-time grower or a seasoned plant parent, these three trims will keep your amaryllis thriving without the guesswork. Let’s get those blooms coming back year after year!
📚 In This Guide
- What you need
- Instructions
- Tips and common mistakes
- Wrapping up and next steps
What you need
- ● Sharp, clean pruning shears or scissors – Disease-free, sterilized with rubbing alcohol to prevent bacterial spread.
- ○ Gloves (optional but recommended) – Protects hands from sap and sharp edges.
- ● Disinfectant (rubbing alcohol or bleach solution) – 1 part bleach to 9 parts water for cleaning tools between cuts.
- ● Newspaper or cardboard – To contain mess and protect surfaces.
- ● Small container or bucket – For collecting pruned stems and leaves.
- ● Watering can or spray bottle – To hydrate the plant post-pruning.
- ● Pruning sealant or wax – Helps prevent rot on larger cuts.
- ● Compost bin or bag – For disposing of healthy pruned material.
- ● Grow lights or a sunny windowsill – If repurposing cuttings for propagation.
- ● Plant food or fertilizer – To boost recovery after trimming.
Step-by-Step instructions for pruning amaryllis plants
Here's how to keep your amaryllis thriving and blooming all year with just three simple trims.
✂️ Step 1: Trim Dead Flowers After Blooming
Once your amaryllis flowers fade and wilt, cut the spent bloom stalk 1 inch above the bulb using clean, sharp pruners. This prevents the plant from wasting energy trying to revive dead blooms. I always sterilize my pruners with rubbing alcohol first—it keeps infections away and extends the life of your cutting tools.
Don't yank the stalk—this can damage the bulb. Instead, make a clean cut at the base. You'll notice new growth emerging from the sides of the bulb within 2-4 weeks, signaling the plant is redirecting energy toward future blooms. If you see any brown or mushy areas on the stalk, trim those off immediately to prevent rot from spreading to the bulb.
🌱 Step 2: Prune Yellow or Damaged Leaves Mid-Season
About 6-8 weeks after blooming, inspect your amaryllis for yellowing or brown leaves. These are signs the plant is either stressed or entering dormancy. Use your pruners to snip off any leaves that are more than 50% yellow or brown, cutting them back to healthy green tissue.
Here's the thing—amaryllis leaves are tough, but leaving dead foliage on the plant attracts pests and can harbor fungal spores. I like to do this step gradually, removing just a few leaves at a time. You'll see new, vibrant leaves emerging from the bulb's center within 1-2 weeks of pruning, proving the plant is staying strong.
⏰ Step 3: Cut Back Dormant Foliage for Winter Rest
When your amaryllis goes dormant in late fall or early winter, you'll notice the leaves turning completely yellow and crispy. This is the plant's natural signal to rest. Use your pruners to trim the foliage back to 2-3 inches above the bulb, leaving just a small stub. This makes it easier to monitor the bulb during dormancy and reduces the risk of rot.
Don't remove all the leaves—this stub helps protect the bulb and can even sprout new growth if you decide to force the plant early. After trimming, reduce watering to once every 3-4 weeks and move the pot to a cool, dark spot (around 55-65°F). You'll know dormancy is working when the bulb looks plump and firm, ready for its next blooming cycle.
🌿 Step 4: Encourage New Growth in Early Spring
In early spring, as temperatures rise and you notice new shoots emerging from the bulb, it's time for a final trim. Cut back any remaining dead or brown leaves to 1 inch above the bulb, but leave any fresh green growth untouched. This gives the plant a clean start while preserving its energy stores.
Here's where it gets fun—watch the new leaves unfurl within 2-3 weeks as the plant prepares for its next bloom. Increase watering gradually, keeping the soil lightly moist but never soggy. You'll see the first signs of a flower stalk forming as a small bump on the side of the bulb, usually around 8-10 weeks after new growth begins.
Tips & tricks for pruning amaryllis plants
Keeping your amaryllis blooming beautifully all year comes down to these simple but crucial pruning secrets.
The Sterilization Secret: Sterilizing your pruners with rubbing alcohol before each use isn't just about clean cuts—it's about protecting your plant's health. I've seen bulb rot develop after using the same pruners on multiple plants without sterilizing. Wipe them down before cutting the dead bloom stalk in Step 1, and again before trimming leaves in Step 2. This tiny habit prevents fungal infections that can kill your amaryllis over time.
Timing is Everything: The 6-8 week window for Step 2 pruning is when your amaryllis is naturally preparing for dormancy. If you wait too long, you might accidentally prune off new growth that's just starting. Watch for leaves that are more than 50% yellow—this is your plant's way of saying "I'm ready for a change." The 1-2 week recovery time after pruning gives you a clear sign the plant is happy with the trim.
Dormancy Done Right: When you cut back to 2-3 inches above the bulb in Step 3, you're not just tidying up—you're creating a protective barrier. That small stub prevents the bulb from drying out too quickly and helps regulate moisture during dormancy. Place the pot in a cool, dark spot around 55-65°F, and you'll notice the bulb becoming plump and firm, ready for its next bloom cycle. This is when you know you've done everything correctly.
Spring Growth Hack: The 2-3 week window for new leaves to unfurl in Step 4 is your reward for proper winter care. If you see new shoots emerging but they're weak or yellow, it might be time to check your watering—too much water can drown new growth, while too little can stunt it. Gradually increase moisture as you notice new leaves forming, and you'll see that flower stalk bump appear around 8-10 weeks later, signaling a successful cycle.
Pro Tips for Pruning Amaryllis Plant
- Keeping your amaryllis blooming beautifully all year comes down to these simple but crucial pruning secrets.
- The Sterilization Secret: Sterilizing your pruners with rubbing alcohol before each use isn't just about clean cuts—it's about protecting your plant's health.
- Timing is Everything: The 6-8 week window for Step 2 pruning is when your amaryllis is naturally preparing for dormancy.
Frequently asked questions
Got questions about keeping your amaryllis thriving with the right pruning? Here are some of the most common ones—plus expert answers to keep those blooms coming!
When is the best time to prune an amaryllis after it blooms?
Prune your amaryllis after the flowers fade but before the foliage turns yellow. Trim spent blooms at the base (about 1 inch above the bulb) to redirect energy to the bulb for next year’s growth. Avoid cutting leaves unless they’re damaged—healthy foliage stores nutrients for future blooms!
How often should I prune my amaryllis plant?
Amaryllis only need three key prunes per year:
- 1. Post-bloom trim: Remove faded flowers.
- 2. Leaf maintenance: Snip yellowed or brown leaves (but leave healthy ones!).
- 3. Dormancy prep: Trim all foliage only after it fully yellows (late summer/early fall).
What should I do if my amaryllis leaves turn yellow after pruning?
Yellowing leaves post-prune are normal if they’re old or damaged. However, if healthy leaves yellow suddenly, check for:
- Overwatering (let soil dry between waterings).
- Underwatering (bulbs need moisture during growth).
- Pests (inspect leaves for mites or fungus).
Can I prune amaryllis leaves while it’s blooming?
No—never trim healthy leaves during bloom season! The foliage feeds the bulb for next year’s flowers. Only remove:
- Dead or dying leaves (brown, mushy, or crispy).
- Leaves with pests or disease (sterilize shears with rubbing alcohol first!).
What’s the difference between pruning and deadheading amaryllis?
They’re not the same!
- Deadheading: Removing spent flower stalks (after blooms wilt) to prevent seed pods and redirect energy to the bulb. Cut 1 inch above the bulb.
- Pruning: Trimming leaves or foliage for health, shape, or dormancy prep. Only do this after blooming or when leaves are yellow/brown.
Wrapping up and next steps
Pruning your amaryllis isn’t just about keeping it tidy—it’s the secret to longer, healthier blooms and a thriving plant year after year! 🌿 With the right timing (after flowering, post-bulb dormancy, and during regrowth) and a few simple tools, you’ll encourage vibrant growth and stunning flowers.
Remember: confidence comes with practice, so don’t hesitate to give it a try!
Ready to see your amaryllis shine? Start by observing your plant’s growth cycles and schedule your next trim—your future blooms will thank you! 🌸 For extra tips, bookmark this guide or share it with fellow plant lovers.