Propagation
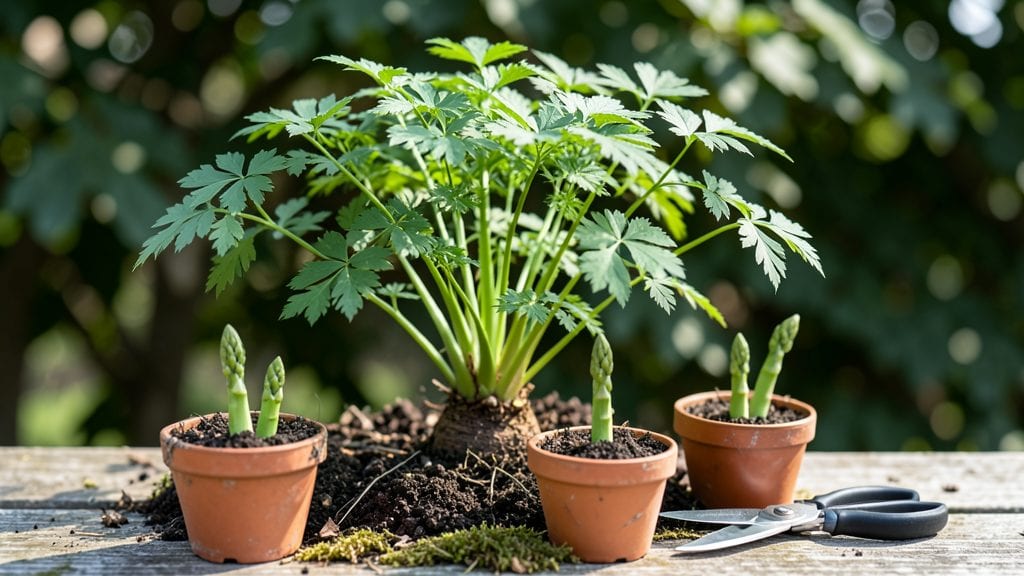
Propagating asparagus plants from tiny crowns is how I finally got my own homegrown harvest after years of buying expensive nursery starts. The key isn't just digging up pieces—it's timing the transplant when roots are ready to spread and soil conditions are perfect for survival.
My first attempt failed when I rushed the process, but I learned that patience pays off with these slow-growing perennials.
You'll need healthy crowns from established plants (or seeds if you're starting from scratch), loose soil with plenty of organic matter, and a sunny spot with at least 6-8 hours of light daily.
The best time to divide crowns is in early spring or fall when the soil is cool but workable. I use a sharp spade to carefully lift the crowns, then separate the smaller sections with at least one healthy bud each—these become your new plants.
Once planted, keep the soil consistently moist but not soggy for the first 6-8 weeks, which is when roots establish. You won't see spears for 2-3 years, but the payoff is worth it: a 20-year harvest from a single planting.
The first year focuses on root growth, so resist the urge to harvest anything—let those crowns build strength for future seasons.
Common mistakes include overwatering (which causes rot) or planting too deep (which smothers the crowns). If your soil drains poorly, mix in 2-3 inches of sand or perlite.
With the right care, you'll have a thriving asparagus patch that produces year after year with minimal upkeep—exactly what I wanted when I started this journey.
📚 In This Guide
- What you need
- Instructions
- Tips and common mistakes
- Wrapping up and next steps
What you need
- ● Asparagus crowns: 1–3 healthy, disease-free crowns (preferably from a local nursery or trusted source). Look for crowns with 3–5 sturdy, pencil-thick roots and compact fern-like tops.
- ● Garden soil: Well-draining, fertile soil with a pH of 6.5–7.5. Mix in 2–3 inches of compost or aged manure for nutrients.
- ● Garden bed or containers: For in-ground planting: A sunny spot (6+ hours of light daily) with loose, weed-free soil. Dig a trench 6–8 inches deep and 12–18 inches wide.
- ● For container growing: 5-gallon pots or larger (asparagus needs depth!). Use pots with drainage holes.
- ● Watering can or hose: With a gentle spray nozzle for deep but controlled watering.
- ● Mulch: 2–3 inches of straw, wood chips, or pine needles to retain moisture and suppress weeds.
- ● Garden fork or trowel: For digging trenches or planting holes without damaging roots.
- ○ Pruning shears: To trim dead ferns in late fall (optional but helps tidy up).
- ○ Soil pH test kit: To check and adjust soil acidity if needed (optional but helpful).
- ● Fertilizer: A balanced, low-nitrogen fertilizer (10-10-10) or compost tea for the first year.
- ○ Row cover or frost cloth: To protect young plants from late spring frosts (optional but useful in cold climates).
Step-by-Step instructions for propagating asparagus plants
Here’s how to grow a thriving asparagus patch from small crowns—no seeds needed.
Select and Prepare Healthy Asparagus Crowns
Choose 1-year-old asparagus crowns with 3-5 healthy buds each. These should be firm, free of rot, and show no signs of disease. I always inspect the roots for any brown or mushy areas—discard those immediately. Healthy crowns will have white, fibrous roots that look plump and active.
Before planting, soak the crowns in lukewarm water for 2-3 hours to rehydrate the roots. This jumpstarts growth and helps them establish faster. After soaking, let them sit for 30 minutes to drain excess water—soggy crowns won’t root well.
Dig and Amend the Planting Site
Asparagus needs deep, well-draining soil with a pH of 7.0-7.5. Choose a spot with full sun (at least 6-8 hours daily) and loose soil at least 12 inches deep. I avoid heavy clay—it restricts root growth and leads to poor harvests.
Work in 2-3 inches of compost and a handful of bone meal (for phosphorus) into the top 12 inches of soil. This gives roots the nutrients they need to establish quickly. Loosen the soil further with a garden fork—asperagus roots grow 1-2 feet deep, so resistance will stunt them.
Plant Crowns at the Right Depth and Spacing
Dig a 6-inch-deep trench wide enough to lay the crowns flat with the buds facing upward. Space crowns 12-18 inches apart in rows 3-4 feet apart. This spacing prevents overcrowding and makes future harvests easier.
Place each crown in the trench, ensuring the roots spread naturally without bending. Cover the roots with 2 inches of soil, leaving the buds exposed. Water gently but thoroughly—1 inch of water—to settle the soil around the roots. Avoid compacting it; asparagus roots need air.
Mulch and Water for Establishment
Apply 3 inches of organic mulch (like straw or shredded leaves) around each crown to retain moisture and suppress weeds. I avoid synthetic mulches—they can smother the soil and trap too much heat. Keep the mulch 2 inches away from the crowns to prevent rot.
Water deeply once a week during the first growing season, aiming for 1-1.5 inches of water per week. Let the top 2 inches of soil dry out between waterings—asperagus hates soggy roots. After 6-8 weeks, you’ll see new shoots emerge—this is your signal the crowns have taken.
Protect and Maintain Through the First Year
In the first year, do not harvest any spears—let the plants focus on root and crown development. Instead, allow the ferns to grow tall (up to 5 feet) and die back naturally. This builds energy for future harvests. I stake taller ferns in windy areas to prevent them from flopping over.
Fertilize lightly in early spring with a balanced 10-10-10 fertilizer (1 tablespoon per plant). Avoid high-nitrogen fertilizers—they encourage leafy growth at the expense of roots. By fall, the crowns will be fully established, ready to produce spears for 3-5 years to come.
Tips & tricks for perfect asparagus propagation
Growing a thriving asparagus patch from crowns requires precision—here’s how to maximize success with these game-changing insights.
Crown Selection Insight: When choosing crowns in Step 1, prioritize those with buds that are firm to the touch but not rock-hard. The buds should feel slightly plump, like overripe grapes—this indicates they’re ready to sprout. Avoid crowns with buds that are shriveled or have dark spots, as these won’t establish well. I’ve found that crowns with 4-5 buds strike the perfect balance between yield and vigor.
Soaking Strategy: During the 2-3 hour soaking period in Step 1, use lukewarm water that’s around 70°F—too hot will scald the roots, while cold water won’t properly rehydrate them. After draining for 30 minutes, gently shake the crowns to remove excess moisture before planting. This prevents waterlogging, which can cause rot. I always soak mine in a clean bucket with a bit of hydrogen peroxide (1 tablespoon per gallon) to disinfect the roots.
Soil Preparation Secret: When amending your soil in Step 2, don’t skimp on the compost—aim for a 50/50 mix of existing soil and compost in the top 12 inches. Asparagus roots are particularly sensitive to compacted soil, so use a garden fork to break up any clumps larger than a golf ball. I’ve noticed that adding a handful of sand to heavy clay soils improves drainage dramatically, which is crucial for preventing crown rot.
Planting Depth Tip: In Step 3, the 2-inch soil coverage over the roots is critical—this depth ensures the buds remain exposed while protecting the roots from drying out. When placing crowns in the trench, arrange them so the buds face slightly upward (about 15 degrees) rather than perfectly horizontal. This subtle angle helps the emerging shoots grow straight rather than bending toward the soil.
Pro Tips for Propagating Asparagus Plants
- Growing a thriving asparagus patch from crowns requires precision—here’s how to maximize success with these game-changing insights.
- Crown Selection Insight: When choosing crowns in Step 1, prioritize those with buds that are firm to the touch but not rock-hard.
- Soaking Strategy: During the 2-3 hour soaking period in Step 1, use lukewarm water that’s around 70°F—too hot will scald the roots, while cold water won’t properly rehydrate them.
Frequently asked questions
Got questions about propagating asparagus? You’re not alone!
Here are answers to the most common concerns—from timing to troubleshooting—to help you grow a thriving asparagus patch with confidence.
How long does it take for asparagus crowns to establish and produce spears?
Patience is key! Asparagus crowns take 2–3 years to fully establish before yielding harvestable spears. In the first year, focus on root growth—skip harvesting entirely. By year two, you might get a few small spears, but year three is when you’ll see a full, bountiful harvest (up to 20 years!).
When is the best time to plant asparagus crowns for propagation?
The ideal window is early spring (as soon as the soil is workable, around 40°F/4°C) or early fall (6–8 weeks before frost). Avoid planting in summer heat or freezing temperatures—crowns need stable, cool soil to root. Pro tip: Soak crowns in water for 2–4 hours before planting to kickstart growth!
Why did my asparagus crowns die after planting?
Common culprits include overwatering (roots rot in soggy soil), drought stress (keep soil consistently moist but not waterlogged), or planting too deep (crowns should sit 2 inches below soil). If leaves yellow or wilt, check for pests (cutworms, slugs) or fungal issues (like rust). Adjust care and monitor progress—healthy crowns sprout in 2–4 weeks!
Can I propagate asparagus from seeds instead of crowns?
Yes, but it’s not recommended for most gardeners. Seeds take 3 years or more to mature (vs. 2 years for crowns) and produce smaller, less vigorous plants. Crowns are the fastest, most reliable way to propagate asparagus. Save seeds only if you’re experimenting with heirloom varieties or breeding!
How do I divide existing asparagus plants to propagate?
Divide mature asparagus every 3–4 years in early spring or fall. Dig up the crown, gently separate the fleshy roots into 3–5 inch sections (each with 2–3 buds), and replant immediately. Water deeply and mulch to retain moisture. Warning: Overcrowding reduces spear quality, so dividing keeps plants healthy and productive!
Wrapping up and next steps
Propagating asparagus from crowns is a rewarding way to grow your own abundant, homegrown harvest—and yes, it’s easier than you think! 🌱 With patience and the right techniques, you’ll soon enjoy tender spears for years to come.
Whether you’re a beginner or a seasoned gardener, now’s the perfect time to start.
Ready to take the next step? Plant your crowns this season and watch your garden transform into a thriving asparagus patch. Happy growing!