Propagation
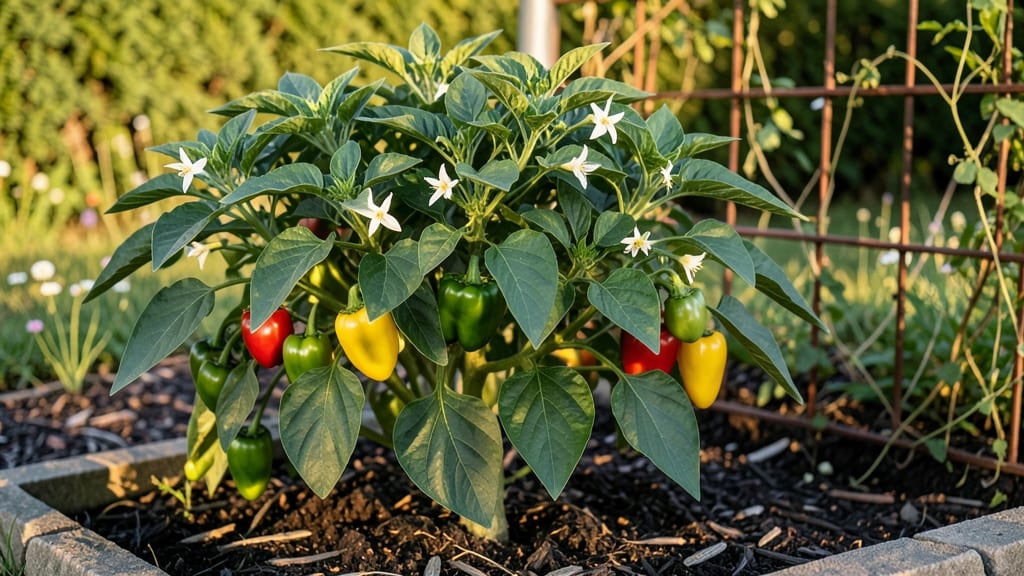
Propagating pepper plants from seeds or cuttings lets you grow varieties you won’t find at stores—spicy habaneros, sweet banana peppers, or heirlooms with names like 'Black Pearl' or 'Lunchbox.' The key to fast, healthy starts isn’t luck; it’s timing, the right soil mix, and a little patience.
I’ve watched pepper seedlings go from tiny specks to sturdy plants ready for transplant in just 4-6 weeks when done right.
Here’s the thing—pepper seeds need warmth to germinate, and cuttings need humidity to root. Most people skip the soil prep or overwater, which drowns those delicate roots before they even get going.
My first batch of jalapeños failed because I used regular potting mix instead of a light, airy blend with perlite. Since then, I’ve perfected a foolproof method that works for seeds and cuttings, whether you’re growing in a sunny windowsill or under grow lights.
By the time you’re ready to transplant, you’ll have stocky, vibrant green seedlings with strong root systems—no leggy, weak stems here. The first harvests arrive earlier, and the plants handle heat and pests better than store-bought starts.
Plus, you’ll save money and grow exactly what you love, not what’s available at the nursery.
Works for backyard gardens, containers, or even a small windowsill setup. Whether you’re starting from seed or rooting cuttings, this method cuts the guesswork. Let’s get those peppers growing!
📚 In This Guide
- What you need
- Instructions
- Tips and common mistakes
- Wrapping up and next steps
What you need
- ● Pepper plant cuttings: 4–6 healthy, non-flowering stems (4–6 inches long) from mature pepper plants (like jalapeños, bell peppers, or habaneros). Choose stems with at least 2–3 leaf nodes.
- ○ Rooting hormone (optional but recommended): A powder or gel (e.g., Clonex or Rootone) to speed up root growth. Follow package instructions for application.
- ● Well-draining propagation medium: Option 1: Perlite or vermiculite (sterilized and moistened).
- ● Option 2: A mix of 50% perlite + 50% coconut coir or sphagnum moss (kept damp but not soggy).
- ● Option 3: Seedling trays or small pots (2–3 inches deep) with drainage holes.
- ● Spray bottle: With water to mist cuttings and maintain humidity.
- ○ Clear plastic dome or ziplock bag: To create a mini greenhouse effect (optional but helpful for humidity).
- ● Sharp pruning shears or scissors: Sterilized with rubbing alcohol to prevent disease.
- ● Water: Room-temperature, preferably filtered or distilled (to avoid chlorine).
- ● Grow lights or sunny windowsill: A spot with 6–8 hours of indirect light daily (south-facing window or LED grow lights work great).
- ● Humidity tray: A shallow tray filled with water and pebbles to increase ambient moisture.
- ● Heating mat (70–75°F): Speeds up rooting for tropical peppers like habaneros.
- ● Fertilizer (diluted): A half-strength seaweed or fish emulsion solution (after roots form, ~4–6 weeks).
- ● Labeling tags: To track pepper varieties if propagating multiple types.
- ● Fungicide (e.g., neem oil or hydrogen peroxide): For sterilizing tools or treating cuttings if mold appears.
Step-by-Step instructions for propagating pepper plants
Here’s how to grow strong, disease-resistant pepper starts from cuttings—my method ensures roots form in just 10-14 days.
Select Healthy Stem Cuttings
Choose 4-6 inch long stems from the base of the plant, just below a leaf node. These sections should be thick and firm, not woody or leggy. Use clean, sharp scissors to make a 45-degree angle cut—this increases surface area for root growth. I always dip the cut end in rooting hormone (if using) to accelerate root formation.
Remove all but the top two leaves to reduce moisture loss. The larger leaves create a bigger surface area for evaporation, which can stress the cutting. Place the prepared cuttings in a shaded, humid environment while you prepare the propagation medium—this prevents wilting before they even root.
Prepare the Propagation Medium
Fill a 4-inch deep container with moistened perlite or vermiculite—these materials hold air and water perfectly while preventing rot. Avoid garden soil; it’s too dense and can introduce pathogens. I like to mix equal parts perlite and coconut coir for extra moisture retention without compacting.
Water the medium until it’s evenly damp but not soggy—think of a wrung-out sponge. Stick your finger in to check: if water drips out, it’s too wet. The goal is a light, airy mix that encourages root growth rather than fungal issues. Place the container in a warm spot (70-75°F) to speed up rooting.
Plant and Maintain Humidity
Insert the cuttings 2 inches deep into the medium, spacing them 2 inches apart. Gently firm the perlite around the base to eliminate air pockets—this ensures direct contact with moisture. Cover the container with a clear plastic bag or humidity dome to trap warmth and moisture. Without this step, cuttings dry out before roots form.
Place the setup under bright, indirect light—no direct sun yet. Check daily for condensation on the plastic; if it’s foggy inside, the humidity is perfect. Mist the cuttings lightly with room-temperature water every 2-3 days to maintain moisture without oversaturating the medium. Roots should appear in 10-14 days—watch for tiny white tendrils at the cut end.
Transition to Soil and Light
Once roots reach 1 inch long, carefully remove the cuttings and transplant them into individual 4-inch pots filled with sterile potting mix. Gently press the soil around the roots to secure them without compacting. Water lightly to settle the soil, then place the pots under bright, indirect light for 7-10 days to acclimate.
After a week, gradually introduce direct sunlight by moving the pots to a south-facing window or under grow lights for 12-14 hours daily. Avoid sudden exposure—pepper cuttings are sensitive to shock. You’ll know they’re thriving when new leaves emerge and the stems firm up. Now you’ve got fast, healthy starts ready for transplanting!
Tips & tricks for propagating pepper plants
A few precise techniques can transform your pepper propagation success rate from hit-or-miss to consistently fast, healthy starts. The details in these steps make all the difference between cuttings that root quickly and those that languish.
Cutting Selection: In Step 1, focus on stems that are pencil-thick or slightly thicker—these have the best balance of stored energy and vascular tissue for root development. Avoid stems that are too thin (they lack resources) or woody (they’ve already matured). The 45-degree angle cut isn’t just about aesthetics; it creates more surface area for root initiation. I’ve found that using a fresh razor blade instead of scissors gives an even cleaner cut, which reduces stress on the plant.
Medium Preparation: The 70-75°F temperature range in Step 2 is critical because it mimics tropical conditions where peppers thrive. To test your medium’s moisture without overwatering, press your finger about 1 inch deep—it should feel like a damp sponge, not a dripping wet rag. For an extra boost, I add a pinch of cinnamon powder to the medium before planting. This natural antifungal agent prevents rot while the roots establish, and it washes out completely when transplanting.
Humidity Management: The clear plastic bag in Step 3 serves two purposes: it traps humidity and creates a mini greenhouse effect that raises the temperature slightly above ambient. Check for condensation daily—if it’s foggy inside, you’ve got perfect humidity. If you notice water droplets forming on the leaves, that’s a sign of excessive moisture. In this case, remove the bag for 10-15 minutes to let excess water evaporate before resealing.
Light Transition: When moving cuttings to direct sunlight in Step 4, I recommend a gradual approach over 3-4 days. Start with just 1-2 hours of morning sun, then increase by 1 hour each day. This slow acclimation prevents sunburn, which can scorch tender new leaves. For indoor growers, position your lights about 6 inches above the plants—closer than you might think for peppers—since they need intense light to prevent leggy growth.
Pro Tips for Propagate Pepper Plants
- A few precise techniques can transform your pepper propagation success rate from hit-or-miss to consistently fast, healthy starts.
- Cutting Selection: In Step 1, focus on stems that are pencil-thick or slightly thicker—these have the best balance of stored energy and vascular tissue for root development.
- Medium Preparation: The 70-75°F temperature range in Step 2 is critical because it mimics tropical conditions where peppers thrive.
Frequently asked questions
Got questions about propagating pepper plants? You’re not alone—this process can feel tricky at first! Below, we’ve rounded up the most common queries to help you grow confidently. Whether you’re troubleshooting or looking for shortcuts, these answers will keep your peppers thriving.
How long does it take for pepper cuttings to root?
Most pepper cuttings root in 2–4 weeks with the right conditions. Keep them in a warm, humid environment (70–80°F) and avoid overwatering. Pro tip: Use a rooting hormone to speed things up—some gardeners see roots in just 10–14 days!
Can I propagate peppers from store-bought plants?
Yes! Store-bought peppers can be propagated, but choose healthy, disease-free plants and avoid chemicals (like fungicides) for 2–3 weeks before cutting. Snip a 4–6-inch stem just below a leaf node, and follow the rooting steps. Warning: Some hybrid peppers may not produce true-to-type fruit.
What’s the best temperature for rooting pepper cuttings?
Pepper cuttings thrive in 70–80°F (21–27°C). Use a heating mat if your home dips below 65°F (18°C)—cold temps slow root growth. A clear plastic bag or propagator tray traps humidity, mimicking a greenhouse. Hot tip: Place cuttings near a sunny window (but avoid direct sun) for optimal results.
Why are my pepper cuttings turning yellow or mushy?
Yellowing or mushy stems usually mean overwatering or rot. Let cuttings dry slightly between waterings—stick your finger in the soil; if it’s soggy, hold off. Ensure good airflow and use sterile potting mix to prevent bacterial/fungal issues. Quick fix: Trim mushy parts and replant in fresh, dry mix.
Can I propagate peppers from seeds instead of cuttings?
Seeds are a great alternative, especially for heirloom varieties. Start them indoors 8–10 weeks before last frost in seedling mix. Keep soil moist and warm (75–85°F). Seedlings may take longer to mature than cuttings but offer more genetic diversity. Bonus: Save seeds from your best peppers for next year!
Wrapping up and next steps
Propagating pepper plants is a rewarding way to kickstart your garden with fast, healthy starts—and now you’ve got the root boost to do it right! Whether you’re using water, soil, or the paper towel trick, the key is patience, the right conditions, and a little love.
Your new pepper plants are just weeks away from becoming thriving additions to your kitchen or garden.
Ready to take the next step? Start with just one cutting—you’ll be amazed at how quickly your pepper patch grows! 🌱🔥