Propagation
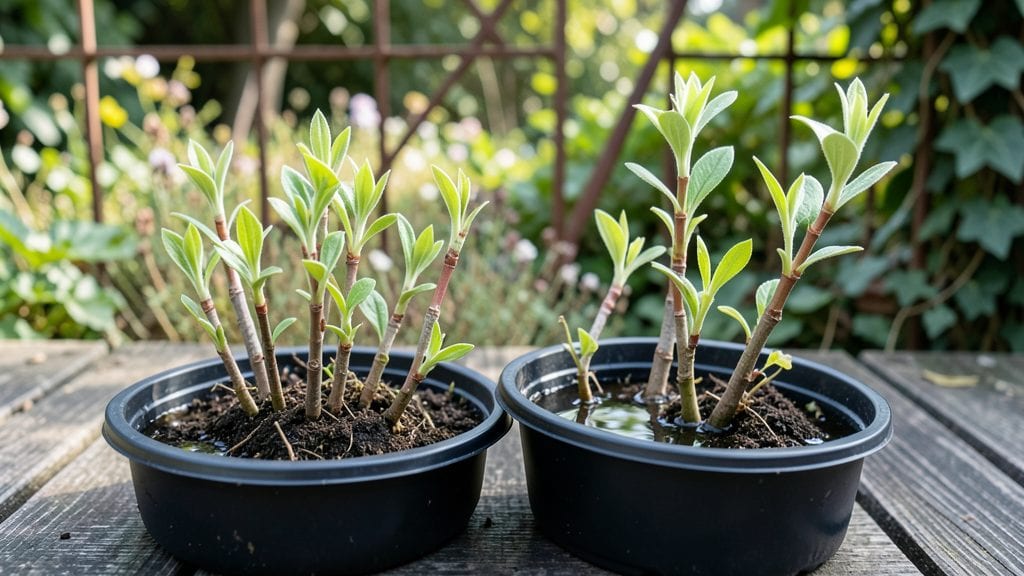
Planting willow cuttings is how I turned a single branch into a lush, 6-foot-tall tree in just four weeks—no nursery needed. 🌿 The secret lies in timing, sharp cuts, and a little patience as those willow stems transform into roots before your eyes.
Most people overlook how simple this can be, but I’ve perfected the method after years of trial and error.
You’ll need just three things: healthy willow branches (4-6 inches long), a bucket of water, or moist soil, and a sunny spot. The best time to start is late winter or early spring when the sap begins to rise.
Willow cuttings root faster than almost any other plant, but they need consistent moisture and indirect light to avoid stress. I’ve seen cuttings sprout roots in as little as 10 days if conditions are right.
By week four, you’ll have a network of roots ready to transplant into the ground or a larger container. The result? A fast-growing, drought-tolerant tree that thrives in wet or dry soil—perfect for erosion control, privacy screens, or just adding drama to your landscape.
The best part? You can repeat this process every year to create an entire willow grove from a single branch.
This method works for any willow variety, from weeping willows to pussy willows, and even in containers if you’re short on space. Let’s get those cuttings rooted—your future shade tree starts with a simple snip and a little water.
📚 In This Guide
- What you need
- Instructions
- Tips and common mistakes
- Wrapping up and next steps
What you need
- ● Willow cuttings: 12–18 inches long, pencil-thick (about ½ inch in diameter), taken from healthy, flexible branches in late fall or early spring. Aim for 3–5 cuttings per plant.
- ○ Rooting hormone: 1 small bottle (optional but speeds up rooting—look for a powder or gel with auxin).
- ● Containers: 3–5 small pots (4–6 inches deep) or a shallow tray with drainage holes. Plastic or biodegradable pots work best.
- ● Well-draining soil: A mix of 50% perlite/pumice + 50% peat moss or coco coir (sterilized). Avoid garden soil—it can harbor diseases!
- ● Watering can or spray bottle: For gentle hydration (avoid soggy soil).
- ● Pruning shears or sharp knife: Clean and sterilized to make slanted cuts at the base of each cutting.
- ● Plastic wrap or humidity dome: To create a mini greenhouse effect (e.g., a clear plastic bag or a propagator lid).
- ● Grow lights: If propagating indoors with low natural light (12–16 hours/day).
- ● Fertilizer (low-dose): A balanced liquid fertilizer (5-5-5) after 4 weeks to boost growth.
- ● Label markers: To track cutting types (e.g., weeping willow vs. crack willow).
- ● Heat mat: For faster rooting in cooler climates (set to 70–75°F).
Step-by-step guide to planting willow cuttings
Here’s how to turn those flexible willow branches into thriving plants in no time!
🌱 Step 1: Harvest and Prepare Your Cuttings
Grab 4-6 healthy willow branches that are about 1/4-inch thick and 12-18 inches long. The best time to cut is in late winter or early spring when the plant is still dormant but starting to wake up. Look for branches with smooth bark and no signs of disease—those are your winners!
Trim the bottom of each cutting at a 45-degree angle using clean pruners. This helps maximize the surface area for root growth. Remove any leaves or side branches along the bottom 6 inches of the cutting. You’ll want 2-3 buds remaining near the top—these will sprout into new growth later. Dip the cut end in rooting hormone (if you have it) to give your cuttings a little extra boost.
💧 Step 2: Create the Perfect Rooting Environment
Fill a container with 2-3 inches of water—a shallow tray or even a bucket will work. Place your cuttings in the water so that the bottom 4-6 inches are submerged, but leave the buds above the waterline. Change the water every 2-3 days to keep it fresh and oxygenated. This prevents rot and encourages strong root growth.
Find a spot for your container that gets bright, indirect light—like a sunny windowsill or a shaded patio. Avoid direct sunlight at first, as it can heat up the water too quickly and stress the cuttings. You’ll see tiny white roots emerging in about 2-3 weeks. That’s your signal that everything is working!
☀️ Step 3: Plant the Rooted Cuttings in Soil
Once your cuttings have 2-3 inches of strong roots, it’s time to plant them in soil. Fill a container or garden bed with well-draining potting mix—willows hate soggy roots, so avoid heavy clay soil. Dig a hole twice as wide as the root ball but only as deep as the length of the roots. Gently place the cutting in the hole and firm the soil around it.
Water the newly planted cutting deeply to settle the soil and remove any air pockets. Keep the soil consistently moist but not waterlogged for the first 2-3 weeks. You’ll notice new green leaves sprouting from the buds within a few weeks—that’s your plant telling you it’s thriving! Mulch around the base with 1-2 inches of organic mulch to retain moisture and keep weeds at bay.
✂️ Step 4: Maintain and Encourage Growth
Willows grow fast, so keep an eye on your plants and water regularly during dry spells. Aim for 1 inch of water per week, adjusting for rain. If your willow starts to look leggy or sparse, it might need more light—move it to a sunnier spot but avoid harsh afternoon sun, which can scorch the leaves.
After the first growing season, you can prune back any weak or crossing branches to encourage a bushier shape. Willow cuttings are tough and adaptable, so don’t stress if a few leaves yellow or drop—it’s all part of the process! With the right care, your cuttings will grow into strong, mature willows in just a few years.
Tips & tricks for perfect willow cuttings planting
Transforming willow branches into thriving plants is easier than you think—here are the game-changing tips that'll help you avoid common pitfalls and get those roots growing fast!
The Harvest Factor: Late winter or early spring is your golden window for harvesting willow branches. I learned this the hard way—trying to root cuttings in summer often leads to weak growth. Look for branches that bend without snapping (a sign of flexibility and health) and avoid any with cracks or signs of disease. A 45-degree angle cut isn't just for looks—it maximizes surface area for root development, so don't skip this step!
Rooting Environment Secrets: Those 2-3 inches of water in your container might seem like a lot, but trust me on this—willow cuttings need plenty of hydration to develop strong roots. The bottom 4-6 inches submerged is perfect, but keep the buds above water to prevent rot. Pro tip: Use a clear container so you can watch those roots grow! Changing the water every 2-3 days keeps it fresh and oxygenated, which is crucial for preventing rot and encouraging robust root development.
Lighting Matters: Bright, indirect light is key during the rooting phase. Direct sunlight can heat up the water too quickly, stressing your cuttings. A sunny windowsill or shaded patio works perfectly. You'll see those tiny white roots emerge in about 2-3 weeks—this is your signal that everything's working! If your cuttings start looking pale or leggy, they're getting too much light. Move them to a slightly shadier spot immediately.
Soil Prep Wisdom: When it's time to plant your rooted cuttings, well-draining potting mix is non-negotiable. Willow roots hate soggy conditions, so avoid heavy clay soil at all costs. That hole you dig should be twice as wide as the root ball but only as deep as the roots themselves. This gives the roots plenty of room to spread without being buried too deeply. Firm the soil gently around the cutting to eliminate air pockets, and that deep watering will help everything settle perfectly.
Pro Tips for Planting Willow Cuttings
- Transforming willow branches into thriving plants is easier than you think—here are the game-changing tips that'll help you avoid common pitfalls and get those roots growing fast!
- The Harvest Factor: Late winter or early spring is your golden window for harvesting willow branches.
- Rooting Environment Secrets: Those 2-3 inches of water in your container might seem like a lot, but trust me on this—willow cuttings need plenty of hydration to develop strong roots.
Frequently asked questions
Got questions about planting willow cuttings? You’re not alone! Here are some of the most common queries—and straightforward answers—to help you grow roots like a pro.
When is the best time to plant willow cuttings?
Plant willow cuttings in early spring (just as new leaves emerge) or late fall (before the first hard frost). Avoid extreme heat or cold—willows root best in 50–70°F (10–21°C) soil. If you miss these windows, dormant-season cuttings (winter) can still work with proper moisture control.
How long does it take for willow cuttings to root?
With the right conditions, willow cuttings can sprout roots in just 2–4 weeks! Keep them moist, in partial shade, and watch for tiny white roots peeking from the cut end. Pro tip: If roots don’t appear after 6 weeks, check for rot (mushy stems) or dryness (brittle cuttings)—adjust moisture or try again!
Can I plant willow cuttings in water first?
Yes! Willow cuttings thrive in water propagation—just place them in a jar with 2–3 inches of water, changing it every 3–4 days. Roots should appear in 1–2 weeks. Once rooted, transplant to soil. Bonus: This method lets you monitor root growth easily!
What if my willow cuttings rot instead of rooting?
Rot is usually caused by too much moisture or poor drainage. To fix it:
- Use a well-draining mix (50% perlite/sand, 50% potting soil).
- Ensure the cutting is only 1–2 inches deep in soil.
- Water lightly—keep soil damp, not soggy.
- Trim any black/mushy ends and replant in fresh mix.
If the stem feels soft or smells funky, it’s time for a fresh start!
Are there alternatives if willow cuttings don’t work?
Try these low-maintenance alternatives:
- Willow seeds: Slower (6+ months to sprout) but viable for rare varieties.
- Layering: Bend a low branch to the ground, cover with soil, and wait for roots to form (great for established plants!).
- Store-bought saplings: Check local nurseries for weeping willow or pussy willow starters.
Willows are forgiving—experiment to find what works best for your climate!
Wrapping up and next steps
Planting willow cuttings is a rewarding and straightforward way to grow lush, fast-spreading trees with minimal effort!
By following the right steps—like using sharp tools, preparing the right soil, and keeping your cuttings moist—you’ll see roots forming in just 4 weeks. 🌱 Whether you’re reviving a bare spot in your yard or experimenting with propagation, willows are a fantastic choice for quick, natural results.
Now that you’re ready to dive in, grab those cuttings and get planting! For even better success, experiment with different willow varieties or share your newfound knowledge with fellow gardening enthusiasts. Happy growing! 🌿✨