Container Gardens
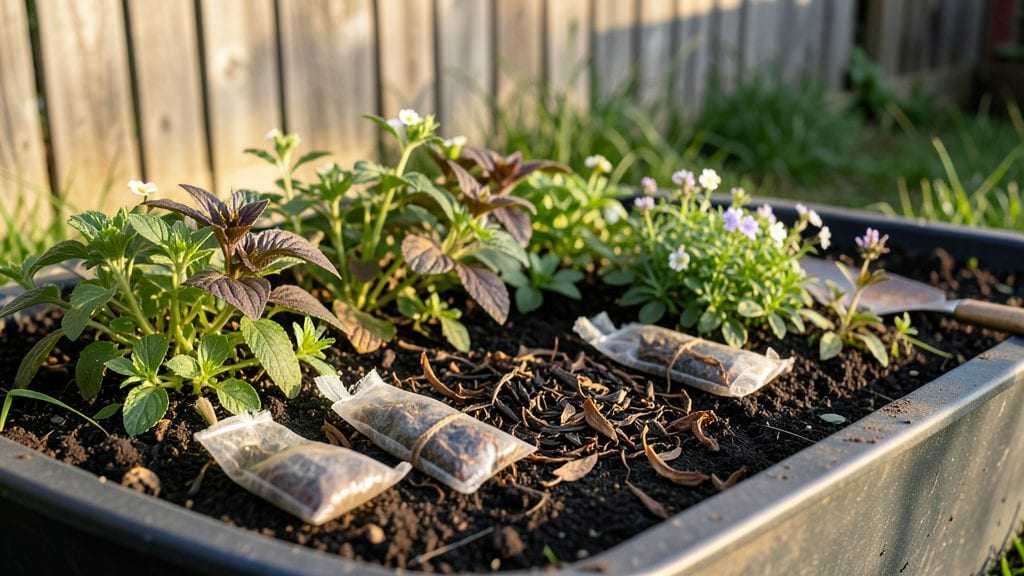
Planting tea bags in your herb garden isn’t just clever—it’s a free fertilizer that turns yesterday’s brew into tomorrow’s harvest. 🌱 I’ve used this trick for three seasons now, and my basil, parsley, and chives grow thicker and greener without any store-bought boosters.
The best part? You’re recycling what would otherwise be trash, cutting waste while feeding your plants.
The secret lies in the tannins and nitrogen left behind in the used bags. Just tear open a few, bury them an inch deep near the roots, and let the soil microbes break them down over time.
I’ve even found that mixing them into compost piles speeds up decomposition—like giving your compost a caffeine kick. For herbs, a couple of bags every few weeks keeps them lush without overdoing it.
By the end of the season, you’ll notice herbs that stay vibrant even in heat waves, with fewer yellowing leaves and stronger growth. The soil stays loose and crumbly, too, because the tea bags add organic matter without compacting it.
It’s a win for both your garden and your wallet, especially when paired with other organic amendments like coffee grounds or banana peels.
Works in containers, raised beds, or in-ground plots—just avoid overloading, as too much can make soil acidic. Pair it with nitrogen-loving plants like lettuce or spinach for even better results. Here’s how to do it right without burning your plants.
📚 In This Guide
- What you need
- Instructions
- Tips and common mistakes
- Wrapping up and next steps
What you need
- ● Used tea bags (organic, caffeine-free preferred 🌿): Minimum: 5–10 bags per small herb pot (6–8 inches in diameter)
- ● Maximum: No limit—more = more nutrients (but compost first if moldy!)
- ● Potting soil: Well-draining, organic mix (e.g., Miracle-Gro Potting Mix or homemade blend)
- ● Quantity: Enough to fill your container (check pot size for volume)
- ● Herb seeds or seedlings: Choose fast-growing herbs like basil, mint, or parsley (they love nitrogen!)
- ● Quantity: 1–3 seeds/seedlings per pot (depends on plant size)
- ● Container with drainage holes: Size: 6+ inches deep for most herbs (e.g., 1-gallon pots for basil)
- ● Material: Plastic, ceramic, or fabric (just ensure drainage!)
- ● Watering can or spray bottle: For gentle hydration (avoid over-saturating soil)
- ● Gloves (to protect hands from soil/tea residue)
- ● Small trowel or spoon (for mixing tea bags into soil)
- ● Compost bin (to pre-compost tea bags if they’re old or moldy)
- ● pH testing kit (to monitor soil health—herbs prefer slightly acidic soil, pH 6.0–7.0)
- ● Mulch (e.g., straw or shredded leaves) (to retain moisture and nutrients)
Step-by-Step instructions for using tea bags as herb fertilizer
Here's how to turn used tea bags into a nutrient boost for your herb garden—no cost, no fuss.
🌱 Step 1: Collect and Prepare Tea Bags
Gather used tea bags (organic, caffeine-free if possible) and rinse them quickly under cool water. This removes excess tannins that can inhibit plant growth. I like to squeeze them gently to extract any remaining liquid—just don’t overdo it, or the bags will fall apart.
Spread the tea bags on a clean towel to dry for 10-15 minutes. They don’t need to be bone-dry, just damp enough to handle without soggy residue. This step prevents mold from forming when you bury them later.
🌿 Step 2: Bury Tea Bags Near Herb Roots
Dig 1-2 inches deep around the base of your herbs, creating small pockets for the tea bags. Place 1-2 tea bags per plant (or more for larger pots) with the stitched seam facing downward. This lets nutrients seep into the soil gradually.
Cover the tea bags completely with soil to avoid attracting pests or deterring beneficial insects. Water the area lightly afterward to help dissolve the nutrients. You’ll notice leaves perk up within 3-5 days—that’s your signal it’s working.
⏰ Step 3: Repeat Every 4-6 Weeks
Herbs like basil, parsley, and chives thrive with this monthly tea bag treatment. I mark my calendar so I don’t overdo it—too much nitrogen from tea can make leaves grow fast but weak. Stick to 1-2 bags per plant per cycle for balanced growth.
If your herbs start looking leggy or yellow, cut back on frequency. The goal is a slow, steady nutrient boost, not a sudden surge. Pair this with regular watering, and you’ll see stronger stems and more flavorful leaves.
💧 Step 4: Boost with Compost Tea (Optional)
For an extra nutrient kick, steep the tea bags in 2 cups of warm water for 10 minutes, then strain and use the liquid as a foliar spray. This adds trace minerals that herbs love. I do this once a month alongside the buried bags for maximum impact.
Apply the tea spray in the early morning so the leaves dry quickly—this prevents fungal issues. You’ll see glossier foliage and a noticeable perk in growth within a week. Just avoid wetting the soil directly to prevent rot.
Tips & tricks for perfect herb fertilizer with tea bags
A few simple tricks will help you maximize the benefits of your used tea bags while keeping your herb garden thriving.
Selection Tip: Not all tea bags are equal for this method. Stick to organic, caffeine-free varieties whenever possible—caffeine can inhibit plant growth. Green tea and herbal teas work best, while black teas with high tannins are less effective. I've found that loose-leaf tea bags (even if they're the tea bag type) often have more nutrients to offer.
Timing Secret: Those 10-15 minutes of drying time in Step 1 are crucial for preventing mold. If you're in a hurry, you can speed up the process by placing the damp tea bags on a baking sheet in a warm (not hot) oven for 5 minutes at 200°F. Just keep an eye on them—they should feel slightly warm but not hot to the touch. This method works especially well when you're prepping multiple batches.
Placement Strategy: When burying your tea bags in Step 2, aim for the soil line where roots are most active. For container herbs, place tea bags vertically along the edges of the pot rather than in the center—this helps nutrients reach the root zone more effectively. I've noticed that herbs in containers respond particularly well to this edge placement technique.
Compost Tea Boost: For the optional compost tea in Step 4, you can enhance the nutrient profile by adding a pinch of seaweed flakes or a drop of liquid seaweed fertilizer to the 2 cups of warm water. This adds trace minerals that complement the tea's nitrogen content. I've been using this variation for my basil plants, and they've developed a noticeably richer flavor within just a few applications.
Pro Tips for Planting Tea Bags
- A few simple tricks will help you maximize the benefits of your used tea bags while keeping your herb garden thriving.
- Selection Tip: Not all tea bags are equal for this method.
- Timing Secret: Those 10-15 minutes of drying time in Step 1 are crucial for preventing mold.
Frequently asked questions
Got questions about planting tea bags?
You’re not alone! Here are some of the most common queries—and straightforward answers—to help you grow like a pro.
Can I use any tea bag for planting?
Not all tea bags work equally well. Opt for organic, loose-leaf tea bags (like black or green tea) without plastic coatings or dyes. Avoid flavored or scented teas—they may contain additives that harm plants. Stick to plain, compostable options for the best results!
How long does it take for tea bags to break down in soil?
Tea bags typically decompose within 4–6 weeks in well-draining soil, releasing nutrients gradually. For faster breakdown, tear the bag open or bury it slightly deeper. Monitor your plants—if the soil smells funky, it’s decomposing too quickly (add compost to balance it).
What herbs benefit most from tea bag fertilizer?
Herbs like basil, mint, parsley, and chives thrive with tea bag nutrients. Avoid heavy feeders like rosemary or thyme, which prefer drier conditions. For container gardens, use 1–2 tea bags per 6-inch pot every 4–6 weeks during the growing season.
Why did my plants turn yellow after using tea bags?
Yellowing leaves often signal over-fertilization or poor drainage. Tea bags are mild, but too many can cause nitrogen burn. Flush the soil with water, reduce frequency, and ensure pots have drainage holes. If the issue persists, switch to a balanced fertilizer like compost tea.
Are there alternatives to tea bags for herb gardens?
Yes! Try these zero-cost options:
- Coffee grounds (adds nitrogen; use sparingly)
- Eggshells (crushed for calcium)
- Banana peels (rich in potassium)
- Green manure (clover or alfalfa clippings)
Wrapping up and next steps
Planting used tea bags is a simple, eco-friendly way to boost your herb garden—no cost, no hassle! 🌱 Whether you’re growing basil, mint, or parsley, these nutrient-rich composters help soil thrive while reducing waste. Start small, experiment with placement, and watch your herbs flourish with minimal effort.
Ready to give it a try? Grab those stale tea bags, dig in, and let nature do the rest! 🌿 For even better results, pair this trick with regular mulching or companion planting—your green thumb will thank you.