Picking
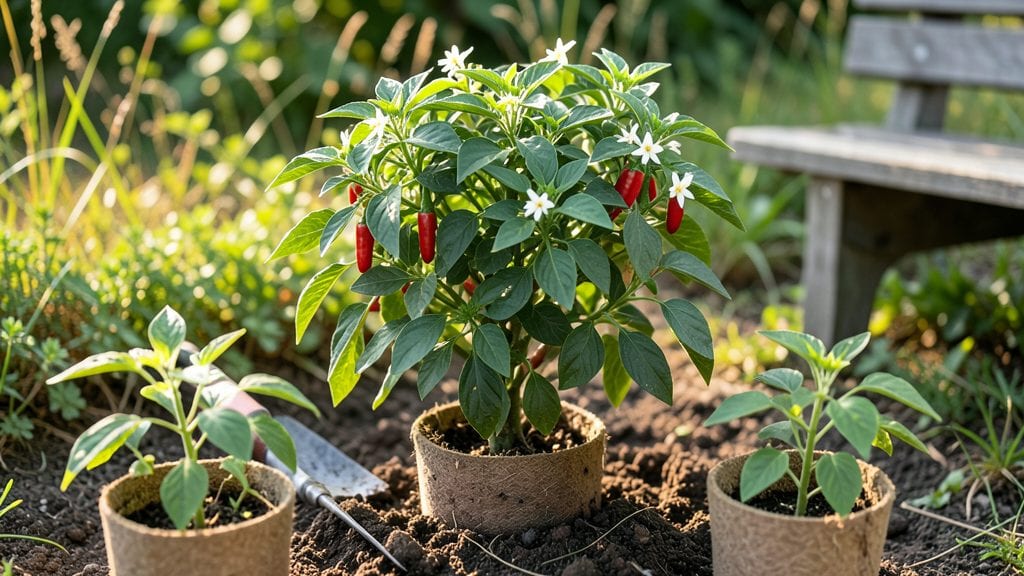
Planting Tabasco peppers is the fastest way to turn a sunny patch into a fireworks display of heat. 🌱 I’ve grown them for years, and the secret isn’t just patience—it’s knowing when to plant, how deep to bury those seeds, and when to stop watering like a nervous first-timer.
The payoff? Tiny, fiery peppers ready to pickle or dry in just 90 days, with enough heat to wake up even the sleepiest salsa.
Start with well-draining soil and full sun—Tabascos hate soggy feet. If you’re sowing seeds indoors, do it 8-10 weeks before last frost (or buy sturdy seedlings to transplant after warm soil arrives). Space them 18-24 inches apart—crowding turns your plants into leggy, sad shadows chasing sunlight.
And here’s the kicker: these peppers need heat to thrive, so wait until nighttime temps stay above 55°F before planting outside.
You’ll know you’re on track when seedlings hit 4-6 inches tall and sport their first true leaves. That’s when you can start hardening them off—just 10-15 minutes a day outside for a week, gradually increasing time.
Water at the base (never the leaves) and watch for yellowing—usually a sign of overwatering or poor drainage. With the right care, you’ll be harvesting bright red, pencil-sized peppers by midsummer, each one packing a punch.
Bonus: Tabascos are self-pollinating, so no need to shake plants like a bumblebee. But if you’re growing multiple varieties, a gentle tap on the stems helps ensure fruit set.
The real magic happens when you dry them into the iconic red flakes—just don’t blame me if your neighbors start asking for “a little spice” next summer.
📚 In This Guide
- What you need
- Instructions
- Tips and common mistakes
- Wrapping up and next steps
What you need
- ● Tabasco pepper seeds: 10–20 seeds (or 3–5 starter plants if buying seedlings). Choose Capsicum frutescens varieties like 'Tabasco Red' or 'Tabasco Green'.
- ○ Containers or garden bed: Containers: 5–10 gallon pots (1–2 per plant) with drainage holes. Optional: Fabric grow bags for better root aeration.
- ● Garden bed: Full sun (6+ hours/day), well-draining soil with a pH of 5.8–6.5.
- ● Potting mix: 5–10 gallons of high-quality, sterile potting soil (or a mix of 60% compost, 30% coconut coir, 10% perlite).
- ● Fertilizer: Balanced fertilizer (10-10-10 or 5-5-5): 1–2 tbsp per plant at planting.
- ○ High-phosphorus fertilizer (5-10-10): 1 tbsp per plant during flowering (optional but recommended).
- ● Watering can or hose: With a gentle spray nozzle to avoid disturbing seedlings.
- ● Mulch: Straw or shredded leaves (1–2 inches) to retain moisture and suppress weeds.
- ● Grow lights (if starting indoors before last frost).
- ● Plant supports (small stakes or cages) for taller varieties.
- ● Pruning shears for harvesting and shaping plants.
- ● Glove spray (to protect hands from capsaicin if you’re sensitive!).
- ● pH test kit to monitor soil acidity.
Step-by-Step instructions for planting Tabasco peppers
Ready to grow fiery Tabasco peppers? Here's my foolproof method for planting them from seed to harvest.
🌱 Step 1: Start Seeds Indoors 8-10 Weeks Before Last Frost
Fill 2-3 inch deep seedling trays with the seed-starting mix and moisten it until evenly damp. Tabasco seeds germinate best at 75-85°F, so use a seedling heat mat if your home stays cooler. Press 1-2 seeds per cell just below the soil surface—no deeper than ¼ inch—since they need light to germinate properly.
Cover the tray with plastic wrap to retain moisture and warmth, then place it in a bright spot (not direct sun yet). Germination takes 7-14 days, but don't water again until you see tiny sprouts breaking through. Overwatering now will smother them before they emerge.
☀️ Step 2: Provide Optimal Light and Transplant After True Leaves Form
Once seedlings emerge, remove the plastic wrap and move them under grow lights or to a south-facing window. Tabasco peppers need 14+ hours of light daily to prevent leggy growth. Keep lights 2-3 inches above the seedlings and raise them gradually as plants grow.
When seedlings develop their first true leaves (not the initial seed leaves), transplant them into 4-inch pots using the same seed-starting mix. Handle gently—Tabasco roots are tender. After transplanting, water lightly to settle the soil and place them back under grow lights.
🪴 Step 3: Harden Off and Plant Outdoors After Frost
Two weeks before your last frost date, begin hardening off seedlings by placing them outside in a sheltered spot for 1-2 hours the first day. Gradually increase their outdoor time over 7-10 days, exposing them to more sun and wind each day. This prepares them for the garden and prevents transplant shock.
Plant Tabasco peppers 12-18 inches apart in a location with full sun (6+ hours daily). Mix compost into the planting hole to enrich the soil, then place the seedling in, firming soil around the base. Water deeply to eliminate air pockets and keep soil moist for the first 2 weeks.
💧 Step 4: Water and Fertilize for Maximum Heat
Tabasco peppers prefer consistent moisture—water when the top 1-2 inches of soil feel dry. Avoid wetting the leaves to prevent disease. Once plants reach 6 inches tall, begin fertilizing every 2-3 weeks with balanced fertilizer (10-10-10 ratio) to encourage robust growth and spice development.
Prune suckers (the small shoots that form in the leaf axils) to direct energy into fruit production. You'll see peppers forming 60-90 days after transplanting, but heat and sunlight levels will determine their final spice intensity.
Tips & tricks for perfect Tabasco pepper planting
A few strategic moves will help you grow Tabasco peppers that pack serious heat and produce abundantly. Here's what I've learned from years of growing these fiery beauties.
Germination Temperature: Maintaining that 75-85°F range during germination (Step 1) is absolutely critical. I've found that placing the seedling tray on top of a refrigerator works perfectly if you don't have a heat mat. The heat from the fridge's condenser coil creates that ideal environment without needing special equipment. The moment you see those first sprouts, remove the plastic wrap immediately to prevent mold growth.
Light Management: In Step 2, those 14+ hours of light daily are non-negotiable for preventing leggy seedlings. If you don't have grow lights, position your seedlings within 6 inches of a south-facing window during winter months. I've noticed that supplementing with a simple LED desk lamp on a timer can make all the difference when natural light is insufficient. Rotate your trays daily to ensure even growth.
Transplanting Technique: When transplanting to 4-inch pots (Step 2), I've found that using a pencil to create small holes in the bottom of the pots before transplanting improves drainage dramatically. This prevents waterlogged roots which can lead to damping-off disease. After transplanting, give the seedlings a light misting rather than a deep watering to avoid disturbing the delicate root system.
Harden Off Gradually: The 7-10 day hardening off process (Step 3) is where most people make mistakes. Start with just 1-2 hours on day one in a sheltered spot, then increase by about 30 minutes each subsequent day. I've seen seedlings go into shock when moved too quickly—look for leaves that stay firm and green rather than wilting. This gradual approach builds their resilience for the garden environment.
Pro Tips for Planting Tabasco Peppers
- A few strategic moves will help you grow Tabasco peppers that pack serious heat and produce abundantly.
- Germination Temperature: Maintaining that 75-85°F range during germination (Step 1) is absolutely critical.
- Light Management: In Step 2, those 14+ hours of light daily are non-negotiable for preventing leggy seedlings.
Frequently asked questions
Got questions about growing your own fiery Tabasco peppers? You’re not alone! Here are some common concerns—and quick, spice-tested answers—to help you grow a thriving harvest.
When is the best time to plant Tabasco peppers?
Start seeds indoors 8–10 weeks before your last frost date (typically late winter to early spring). Transplant seedlings outdoors after all danger of frost has passed and soil temps reach at least 65°F (18°C). Tabasco peppers thrive in warm weather—they’re frost-sensitive!
How long does it take for Tabasco peppers to mature?
With the right conditions, Tabasco peppers mature in 90–120 days from transplanting. Expect small, glossy red peppers (about 1–2 inches long) packed with heat. Patience is key—rushing harvests can reduce spice intensity!
Can I grow Tabasco peppers in containers?
Use a 5-gallon container or larger with well-draining soil. Ensure it has drainage holes and place it in full sun (6+ hours/day). Container-grown peppers may need more frequent watering and fertilizer to compensate for limited root space.
What should I do if my Tabasco plants get pests?
Common pests include aphids, spider mites, and hornworms. Act fast! Spray plants with neem oil or insecticidal soap for mild infestations. For hornworms, handpick them (they’re big and easy to spot!). Healthy plants resist pests better—water consistently and prune for airflow.
Can I save seeds from store-bought Tabasco peppers?
Technically yes, but results aren’t guaranteed. Store-bought peppers may be hybrids (F1 varieties) or treated to prevent germination. For reliable seeds, buy from a reputable seed supplier or save seeds from your own homegrown peppers. Let them dry completely before storing in a cool, dark place.
Wrapping up and next steps
Growing your own Tabasco peppers is a rewarding journey that brings bold flavors and fiery satisfaction to your kitchen! With the right soil, sunlight, and care, you’ll be harvesting spicy treasures in just 90 days—perfect for homemade hot sauce, salsas, or bold dishes.
Whether you're a seasoned gardener or a curious beginner, every seed planted is a step toward delicious success.
Now that you’re armed with tips and tricks, grab those gloves and get growing! Start small, experiment with varieties, and enjoy the thrill of watching your plants thrive. Happy planting—and may your harvest be extra hot! 🌶️🔥