Planting
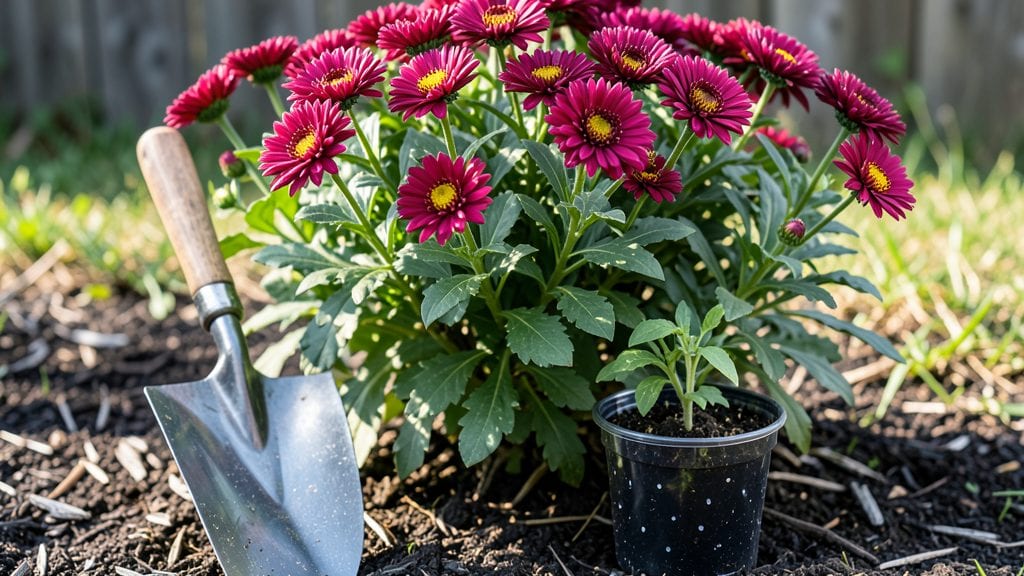
Planting mums outdoors transforms your fall garden into a riot of color that lasts until frost. 🌿 I’ve planted these tough perennials for years, and the secret isn’t just timing—it’s giving them the right start in well-draining soil with plenty of sunlight.
Most people rush the process, but taking an extra 10 minutes to prep the bed makes all the difference in how long those blooms last.
The best time to plant is 4-6 weeks before your first frost, when daytime temps stay above 60°F. Choose a spot with 6+ hours of sun and soil that drains well—mums hate soggy feet. Amend heavy clay with compost or sand, and space plants 18-24 inches apart for airflow.
Dig holes twice as wide as the root ball but only as deep as the container’s base, then water deeply before settling them in.
After planting, keep the soil consistently moist for the first 2-3 weeks—not soggy, just damp. Once established, mums are drought-tolerant, but they’ll reward you with bold blooms from September through hard frost if you mulch around the base to protect roots.
The key is patience: skip the fertilizer until spring, and avoid heavy pruning until after flowering.
Here’s where it gets interesting—these plants actually get hardier with age. My oldest mums (planted 5 years ago) bounce back every fall with even more vibrant color. The biggest mistake?
Overcrowding or planting in shade. Give them room, full sun, and good drainage, and you’ll have cut flowers well into winter. Let’s get those roots in the ground!
📚 In This Guide
- What you need
- Instructions
- Tips and common mistakes
- Wrapping up and next steps
What you need
- ● Mums (Chrysanthemums): 3–5 healthy, cold-hardy varieties (e.g., 'Dynasity' or 'Bonanza'). Check plant tags for Zone 5–9 hardiness.
- ● Garden soil or potting mix: 1–2 bags (1 cubic foot each) for amending clay or poor soil. Aim for well-draining soil with pH 6.0–7.0.
- ● Organic compost: 1–2 gallons to enrich soil and retain moisture.
- ● Slow-release fertilizer (10-10-10 or 5-10-5): 1–2 cups per 10 sq. ft. for nutrient boost.
- ● Garden trowel or shovel: For digging holes (6" wide, 6" deep).
- ● Watering can or hose with nozzle: For gentle hydration (avoid overhead watering after planting).
- ● Mulch (straw, pine bark, or shredded leaves): 2–3 inches to protect roots and retain moisture.
- ● Plant stakes or cages: For tall varieties (e.g., 'Mammoth' mums) to prevent flopping.
- ● Epsom salt (magnesium sulfate): 1 tbsp per plant for lush foliage (mix into soil).
- ● Disease-resistant spray (e.g., neem oil): Preemptive treatment for powdery mildew in humid climates.
- ● Garden gloves: To protect hands while handling soil or thorny stems.
- ● Soil moisture meter: To monitor watering needs (especially for container-grown mums).
Step-by-step instructions for planting mums outdoors
Here's how to plant cold-hardy mums for vibrant color that lasts from summer through frost.
🌱 Step 1: Choose the Perfect Planting Spot
Mums thrive in full sun to partial shade, with at least 6 hours of sunlight daily. I always pick a location with morning sun and afternoon shade—this prevents wilting in hot climates while ensuring enough light for blooms. Avoid low spots where cold air settles, as mums can tolerate down to 10°F but prefer good drainage.
Test your spot by observing how long sunlight lingers. If leaves stay dry for 6+ hours, it's ideal. Amend heavy clay soil with 2 inches of compost (from your materials) to improve drainage. Mums hate soggy roots, so if your soil feels compacted when squeezed, add extra organic matter.
🪴 Step 2: Prepare the Planting Holes
Dig holes twice as wide as the mum's root ball but only as deep as the container's base. This prevents burying the plant too deep, which can rot stems. For 4 plants, you'll need 4 holes spaced 12-18 inches apart—closer spacing works for dwarf varieties, while taller mums need more room.
Loosen the sides of each hole with a trowel to encourage roots to spread. If your soil is sandy, mix in 1 cup of slow-release fertilizer per hole (from your materials) to give plants a nutrient boost. Tap the bottom of each plant's container gently to dislodge it, then slide it out without pulling roots.
💧 Step 3: Plant and Water Thoroughly
Place each mum in its hole so the top of the root ball sits level with the soil surface—burying the crown too deep causes rot. Fill gaps with soil, pressing lightly to remove air pockets. For 4 plants, use all 4 gallons of potting mix (from your materials) to backfill, mixing it with existing soil for better texture.
Water immediately after planting until soil is evenly moist to a depth of 6 inches. You'll know it's right when water pools briefly but drains within 15 minutes. Mulch around each plant with 2 inches of mulch (from your materials) to retain moisture and suppress weeds. Keep mulch 2 inches away from stems to prevent rot.
☀️ Step 4: Maintain for Long-Lasting Blooms
Water 1-2 times weekly until established, focusing on deep watering (1 inch per week) rather than frequent light sprinkles. Mums signal thirst by drooping leaves—water then if soil feels dry 1 inch below the surface. Fertilize every 4-6 weeks with a balanced 10-10-10 formula (from your materials) to encourage continuous blooming.
Deadhead spent blooms by pinching off flowers just above the next set of leaves. This redirects energy to new buds and extends the season. In fall, cut back stems to 4 inches after frost to promote next year's growth. Real talk: If leaves yellow in winter, it's normal—they'll bounce back in spring.
Tips & tricks for planting mums outdoors
Cold-hardy mums are the unsung heroes of fall gardens—here's how to give them the best start for months of vibrant color.
Sunlight Secret: That 6-hour sunlight rule is non-negotiable, but here's the thing: morning sun and afternoon shade is ideal for hot climates. If you're in a cooler zone, you can push to full sun—just monitor leaves for wilting. I've seen mums handle up to 8 hours of sun if they're well-watered, but they'll tell you when they're struggling through drooping.
The Hole Dilemma: Those holes should be twice as wide as the root ball, but don't skimp on depth—only match the container's base. I learned this the hard way when my first batch of mums developed rot from being planted too deep. For sandy soil, that 1 cup of slow-release fertilizer per hole makes all the difference in establishing strong roots quickly.
Watering Wisdom: The 15-minute drainage test is crucial—this ensures you're not creating soggy conditions that invite rot. I always water in the morning so plants have all day to dry slightly before evening. For the first week after planting, check moisture daily—newly planted mums dry out faster than established ones.
Frost Prep: Those cold-hardy mums can handle down to 10°F, but don't let that fool you into skipping fall prep. After your first frost, cut back stems to 4 inches—this might seem drastic, but it actually protects the crown from harsh winter winds and prevents breakage. I've seen mums recover beautifully from this treatment year after year.
Pro Tips for Planting Mums Outdoors
- Cold-hardy mums are the unsung heroes of fall gardens—here's how to give them the best start for months of vibrant color.
- Sunlight Secret: That 6-hour sunlight rule is non-negotiable, but here's the thing: morning sun and afternoon shade is ideal for hot climates.
- The Hole Dilemma: Those holes should be twice as wide as the root ball, but don't skimp on depth—only match the container's base.
Frequently asked questions
Got questions about planting mums outdoors? You’re not alone!
Here are answers to the most common concerns—from timing to troubleshooting—so you can enjoy vibrant blooms all season.
When is the best time to plant mums outdoors?
For spring planting, aim for 4–6 weeks before your last frost date (early spring). If planting in fall, do it 6–8 weeks before the first frost—this gives roots time to establish before winter. Mums thrive in cooler weather, so avoid extreme heat or cold when transplanting.
Can mums survive winter outdoors?
Yes! Many mum varieties (like hardy garden mums) tolerate light frosts and even Zone 5–9 winters with proper care. Mulch heavily (2–3 inches) after the ground freezes to insulate roots. Cut back stems in early spring for fresh regrowth. Pro tip: Avoid tropical mums—they’re not cold-hardy!
What’s the best way to prepare the soil for mums?
Mums love well-draining, slightly acidic soil (pH 5.5–6.5). Amend heavy clay with compost or sand, and ensure the spot gets 6+ hours of sunlight daily. A balanced fertilizer (10-10-10) at planting and mid-season boosts blooms. Bonus: Test soil moisture—mums hate soggy roots!
Why aren’t my mums blooming?
Lack of blooms often stems from over-fertilizing (too much nitrogen), poor sunlight, or stress from transplant shock. Try this:
- Move to sunnier spot if needed.
- Use a low-nitrogen, high-phosphorus fertilizer (like 5-10-5).
- Deadhead spent blooms to encourage new flowers.
Are there cold-hardy alternatives to traditional mums?
Try these low-maintenance, frost-tolerant picks:
- Russian Sage (perennial, drought-resistant, Zone 4–9).
- Coneflowers (long-lasting blooms, Zone 3–9).
- Black-Eyed Susans (cheerful yellow, Zone 3–9).
Wrapping up and next steps
Planting mums outdoors is a rewarding way to add vibrant color and texture to your garden—even in cooler months! 🌸 With the right timing, soil prep, and care, these cold-hardy beauties will thrive and reward you with months of blooms.
Whether you’re a seasoned gardener or just starting out, your effort will pay off in stunning seasonal displays.
Now that you’re ready to plant, take the next step! Grab your mums, pick a sunny spot, and get your hands dirty. Happy gardening—your future garden will thank you! 🌿