Shrubs
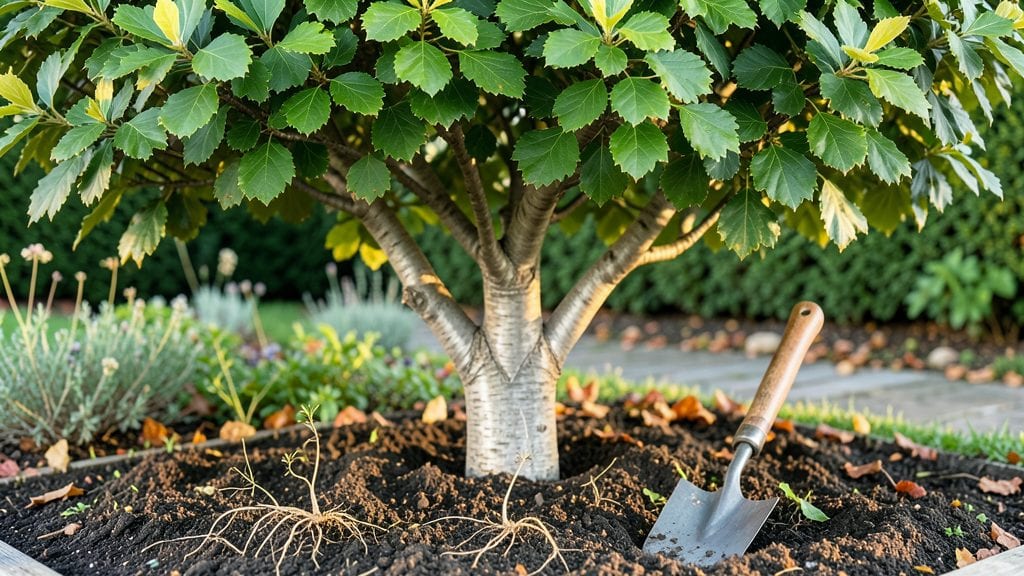
Planting a hornbeam hedge transforms your property into a lush, year-round privacy screen that stays vibrant even in winter. 🌿 I’ve planted mine along the north side of my yard, where it blocks wind and neighbors’ views while keeping its rich green color through every season.
The key isn’t just the planting—it’s the soil prep and spacing that makes the difference between a scraggly hedge and one that grows so densely you’ll forget it’s even there.
You’ll need well-draining soil mixed with compost, young plants spaced 3-4 feet apart, and a sunny to partially shaded spot. Hornbeams tolerate a range of conditions but thrive best in moist, fertile soil.
Dig holes twice as wide as the root ball and water deeply before planting—this helps them establish roots faster. A 5-gallon plant will need about 10 gallons of water right after you set it in the ground.
Within a year, your hedge will fill out beautifully, with glossy leaves that turn a soft bronze in fall. The best part? You can shape it as a formal hedge or let it grow naturally—it handles pruning like a pro.
Just avoid heavy cuts in the first two years while the roots are still settling in. By next summer, you’ll have that privacy screen you’ve always wanted, with minimal upkeep.
Works in zones 4-8, though colder climates may need winter protection for young plants. If your soil is heavy clay, mix in sand to improve drainage. The payoff? A hedge that stays green when other plants go dormant—a true standout in any landscape.
📚 In This Guide
- What you need
- Instructions
- Tips and common mistakes
- Wrapping up and next steps
What you need
- ● Hornbeam plants (Carpinus betulus): 1 plant per foot of hedge (e.g., 10 plants for a 10-foot hedge).
- ● Size: 1–2 gallon pots (for faster establishment) or bare-root (budget-friendly).
- ● Soil amendments: Compost or well-rotted manure (1–2 bags per 10 plants).
- ● Garden lime (if soil pH is <6.0; test kit recommended).
- ● Tools: Shovel or spade (for digging).
- ● Garden trowel (for precision planting).
- ● Measuring tape or string line (to mark hedge layout).
- ● Pruners (for trimming roots or shaping).
- ● Gloves (to protect your hands!).
- ● Mulch (2–3 inches of wood chips or straw to retain moisture).
- ● Erosion control fabric (for slopes or sandy soil).
- ● Plant stakes or garden twine (to guide straight rows).
- ● Slow-release fertilizer (for nutrient boost during planting).
- ● Test soil pH (ideal: 6.0–7.0; hornbeams tolerate acidic to neutral soil).
- ● Choose a sunny to partially shaded spot (6+ hours of sun daily).
- ● Space plants 3–4 feet apart (closer for denser growth, but allow pruning room!).
- ● Plan for year-round watering (especially in the first 2 years).
Step-by-Step guide to planting a hornbeam hedge
Here's my proven method for establishing a lush, evergreen hedge that thrives year-round.
🌱 Step 1: Choose and Prepare the Planting Site
Hornbeams tolerate a range of conditions but thrive best in partial shade to full sun with well-draining soil. Test your site first—if the soil feels compacted or stays soggy after watering, amend it with 2-3 inches of compost mixed into the top 12 inches of soil. I always dig a 12-inch deep trench along the hedge line to loosen roots and improve drainage.
Mark your planting line with stakes every 3-4 feet—this ensures straight rows and proper spacing. Hornbeams need 4-6 feet between plants for mature growth. Use a string line to keep your stakes perfectly level; uneven rows will show as you trim over time. Real talk: Skipping this step leads to a lopsided hedge later.
🪴 Step 2: Dig Holes and Plant Bare-Root or Container-Grown Saplings
Dig holes twice as wide as the root ball but only as deep as the container height (or just below the root flare for bare-root plants). Gently remove each sapling from its container, loosen any circling roots with your fingers, and place it in the hole so the top of the root ball sits 1 inch below ground level. This prevents stem rot from sitting too high.
Fill the hole with soil, pressing lightly around the edges to remove air pockets. Water deeply to settle the soil—1 gallon per plant is ideal. I always check the depth again after watering; settling can bury the root flare deeper than intended. For a 4-plant hedge, this means 4 gallons total of initial watering.
☀️ Step 3: Mulch and Water for Establishment
Spread 2-3 inches of mulch (like shredded bark or wood chips) over the soil surface, keeping it 6 inches away from plant stems to prevent rot. Mulch conserves moisture and regulates soil temperature—critical for young hornbeams. Water deeply every 2-3 days until new growth appears, then taper to once a week during dry spells.
Watch for first true leaves—this signals the plant has rooted. Until then, keep soil consistently moist but never soggy. Overwatering at this stage suffocates roots and invites fungal diseases. I set a reminder to check soil moisture by digging 1 inch deep; if it’s dry, it’s time to water.
✂️ Step 4: Prune for Shape and Encourage Density
Wait until spring of the second year before pruning—this gives roots time to establish. Trim 1/3 of the new growth in early spring to encourage bushiness. Use clean, sharp shears and cut just above a leaf bud. Avoid cutting into old wood; hornbeams respond poorly to heavy pruning when young.
Shape the hedge by trimming the top and sides evenly. I like to trim in late spring or early summer when growth is active. You’ll see new shoots fill in within 4-6 weeks—this is your cue that the hedge is thickening. Never trim into bare wood; always leave some foliage to protect the plant.
🌿 Step 5: Maintain Through the First Year
Fertilize lightly in early spring with a balanced, slow-release fertilizer (like 10-10-10) to support root and foliage growth. Apply 1/4 cup per plant and water deeply afterward. Over-fertilizing burns tender roots, so less is more here. Monitor for pests like spider mites—hose them off immediately with water if you spot webbing.
By the end of the first year, your hornbeam hedge should show compact, dense growth with no large gaps. If some plants lag, give them a little extra water during dry spells. Patience is key—hornbeams grow slowly but reward you with year-round privacy once established.
Tips & tricks for perfect hornbeam hedge planting
These practical tips will help you avoid common mistakes and create a thriving hedge that provides year-round privacy.
Soil Preparation is Key: In Step 1, when amending your soil with 2-3 inches of compost, don't just sprinkle it on top. Mix it thoroughly into the top 12 inches of soil where roots will grow. I've seen many gardeners skip this step, only to have their hornbeams struggle with poor drainage. The 12-inch deep trench you dig along the hedge line helps break up compacted soil and creates better root pathways. Think of it as creating a highway for your plants' roots to spread out comfortably.
Root Ball Placement Matters: When planting in Step 2, pay close attention to the root flare—the swollen area at the base of the trunk where roots emerge. The instructions say to place the top of the root ball 1 inch below ground level, but what's critical is that the root flare sits just above soil level. This prevents stem rot while allowing roots to access moisture. I've had to replant several hornbeams where the root flare was buried too deep—don't make my mistake!
Watering Wisdom: The instructions mention watering deeply every 2-3 days until new growth appears, but here's what nobody tells you: Morning watering is best because it allows foliage to dry before evening. Wet leaves at night invite fungal diseases. Also, when you water those 4 gallons for a 4-plant hedge, split it between two watering sessions—this prevents soil compaction around the roots. The first true leaves you're watching for in Step 3 should appear within 4-6 weeks if your watering is consistent.
Pruning Precision: In Step 4, when you trim 1/3 of the new growth, focus on cutting just above a leaf bud. This encourages bushier growth from that point. I like to make my cuts at a 45-degree angle to prevent water from sitting on the cut surface. And here's a pro tip: If you accidentally cut into old wood, don't panic—just make a new cut at the correct angle above the leaf bud. The plant will still recover, but you'll get better regrowth from the fresh cut.
Pro Tips for Planting Hornbeam Hedge
- These practical tips will help you avoid common mistakes and create a thriving hedge that provides year-round privacy.
- Soil Preparation is Key: In Step 1, when amending your soil with 2-3 inches of compost, don't just sprinkle it on top.
- Root Ball Placement Matters: When planting in Step 2, pay close attention to the root flare—the swollen area at the base of the trunk where roots emerge.
Frequently asked questions
Got questions about planting a hornbeam hedge? You’re not alone—this fast-growing, low-maintenance privacy screen has plenty of curious gardeners! Here are the answers to the most common questions to help you get started with confidence.
When is the best time of year to plant a hornbeam hedge?
The ideal time to plant hornbeam hedges is in early spring or fall when temperatures are mild. Spring planting (March–April) allows roots to establish before summer heat, while fall planting (September–October) gives them time to settle before winter dormancy. Avoid planting in extreme heat or frost—hornbeams dislike stress!
How far apart should I space hornbeam plants when planting?
For a dense, fast-growing hedge, space hornbeam plants 3–4 feet apart if you want a thick screen in 3–5 years. If you’re okay with slower filling, stretch spacing to 4–5 feet. Remember: hornbeams grow upright and dense, so tighter spacing = quicker privacy!
Do hornbeam hedges need full sun, or can they grow in shade?
Hornbeams are versatile—they thrive in full sun to partial shade. For the best growth and dense foliage, aim for at least 4–6 hours of sunlight daily. In deep shade, growth may slow, but they’ll still survive. Just expect a slightly less lush hedge!
What are some common problems with hornbeam hedges, and how do I fix them?
Hornbeams are tough, but watch for:
- Leaf spot fungus: Prune infected leaves and improve airflow.
- Deer browsing: Use repellents or protective netting.
- Slow growth in clay soil: Amend soil with compost for better drainage.
Can I use hornbeam as a replacement for other hedges like boxwood or privet?
Hornbeams are a hardier, faster-growing alternative to boxwood (which struggles with pests) or privet (which can be invasive). They handle urban pollution, drought, and poor soil better, making them a low-fuss, long-term solution for hedges.
Wrapping up and next steps
Planting a hornbeam hedge is a fantastic way to create a lush, year-round privacy screen that thrives with minimal fuss. With its dense growth, adaptability, and striking foliage, it’s a winner for both aesthetics and functionality.
Whether you’re a seasoned gardener or just starting out, this hedge delivers beauty and practicality—so roll up your sleeves and enjoy the process!
🌱 Next step: Mark your planting area, gather your tools, and start digging! For extra confidence, sketch a quick layout or watch a few planting tutorials—you’ve got this! 🌿