Shrubs
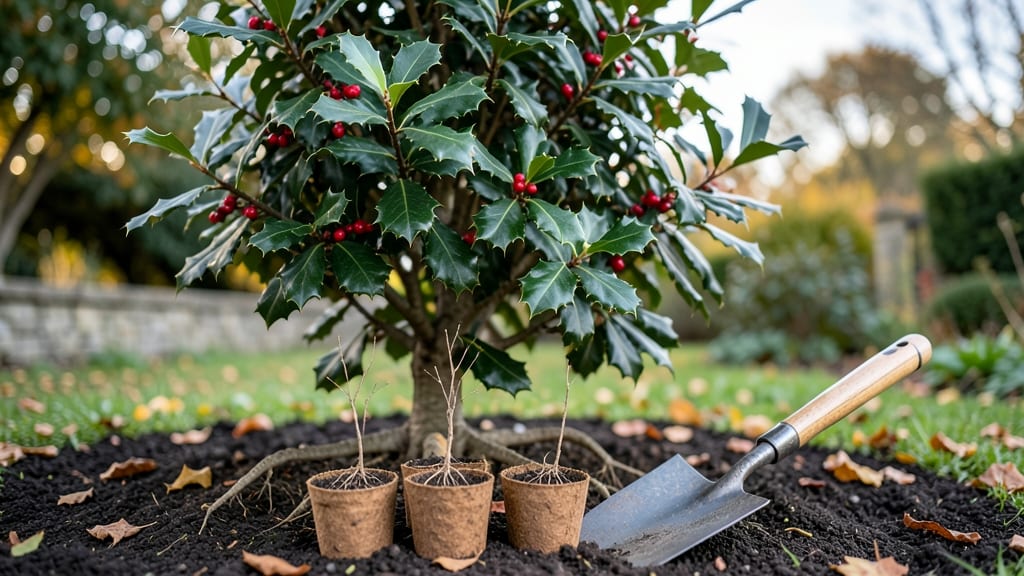
Planting holly bushes transforms bare spaces into lush, year-round privacy screens that stay green even in winter. 🌿 I planted mine last fall, and within three years, they formed an impenetrable hedge that neighbors envy.
The key is starting with healthy plants and giving them the right conditions from day one.
You’ll need well-draining soil, full sun to partial shade, and space to grow—about 3-4 feet apart for mature bushes. Dig holes twice as wide as the root ball but only as deep, then mix in compost to give them a nutrient boost.
Water deeply after planting, and mulch around the base to lock in moisture and keep weeds at bay.
By the second year, you’ll see glossy new leaves filling out, and by year three, those signature red berries will add color and wildlife appeal. The best part? Hollies thrive with minimal fuss—just consistent watering for the first year and an occasional pruning to shape them.
Perfect for fences, property lines, or foundation plantings. Whether you’re starting from bare-root plants in fall or containers in spring, these steps ensure your holly hedge grows strong and stays stunning all year. Let’s get those roots in the ground!
📚 In This Guide
- What you need
- Instructions
- Tips and common mistakes
- Wrapping up and next steps
What you need
- ● Holly bushes: 3–5 plants per 5-foot section (depending on desired density). Look for Ilex opaca (American holly) or Ilex × 'Nellie R. Stevens' for faster growth.
- ● Shovel or trowel: A 6-inch garden trowel for small holes or a heavy-duty shovel for multiple plants.
- ● Measuring tape: To mark spacing (6–10 feet apart for full coverage).
- ● Compost or well-aged manure: 2–3 gallons per plant to enrich soil.
- ○ Mulch (optional but recommended): 2–3 inches of pine straw or shredded bark to retain moisture.
- ● Watering can or hose with a gentle spray nozzle: For consistent hydration.
- ● Gloves: Heavy-duty garden gloves to protect your hands.
- ● Soil test kit: To check pH (holly thrives in acidic soil, pH 5.0–6.0).
- ● Slow-release fertilizer: 10-10-10 or iron sulfate for nutrient boosts.
- ● Plant supports (for young bushes): Stakes or cages if your area gets windy.
- ● Pruning shears: For shaping after planting (sterilize with rubbing alcohol!).
Step-by-Step instructions for planting holly bushes
Here's the foolproof method I use to establish a lush, evergreen privacy screen that stays dense year-round.
🪴 Step 1: Choose and Prepare Planting Sites
Holly bushes thrive in full sun to partial shade—at least 6 hours of sunlight daily for best berry production. Mark your planting spots 12-15 feet apart for a tight, natural hedge (closer spacing = faster fill-in). I always test soil drainage first by digging a 12-inch deep hole—if water pools after 30 minutes, amend with 2 inches of compost or plant on a slight mound.
For 4 bushes, you'll need 4 planting holes—each 2-3 times wider than the root ball. Loosen the sides of each hole with a shovel to encourage root spread. The reason we go wide? Holly roots spread horizontally first, and compacted soil will strangle them before they establish.
🌱 Step 2: Plant with Proper Spacing and Support
Remove each bush from its container and tease the roots gently if they're circling. Place the plant in its hole so the top of the root ball sits 1 inch above ground level—holly hates having its crown buried. Backfill with the native soil (no need for amendments unless your soil is extremely poor), tamping lightly every 2 inches to eliminate air pockets.
I stake each bush immediately with 2-foot tall supports—holly can get top-heavy before roots establish. Tie the main stem loosely with soft garden twine (not wire—it cuts into bark). Water deeply right after planting to settle the soil, then let it drain completely before watering again.
💧 Step 3: Water and Mulch for First-Year Establishment
Water each bush deeply twice weekly for the first 3 months, then taper to once weekly once new growth appears. You'll know you're doing it right when the soil feels moist 2 inches down but not soggy. Overwatering in the first year is the #1 killer—holly roots rot faster than they establish.
Spread 3 inches of mulch (wood chips or pine straw) in a 3-foot diameter circle around each bush, keeping it 6 inches away from the stem. This conserves moisture, suppresses weeds, and protects roots from temperature swings. Replenish mulch annually in late winter—never let it pile against the trunk.
☀️ Step 4: Prune for Shape and Density
Wait 12 months before pruning—holly needs that first year to build roots. After the first growing season, prune in late winter (just before new growth starts) to shape. Cut back overly long branches by 1/3 to encourage bushier growth. For a hedge effect, trim the outer 1/4 of growth annually in early spring before buds swell.
Here's the thing—I avoid heavy pruning the first few years. Holly responds slowly to cuts, and aggressive shaping too soon leads to sparse growth. Instead, focus on removing dead or crossing branches and thinning the center to improve airflow. You'll see that 3-year privacy screen fill in beautifully if you let the bush establish first.
Tips & tricks for perfect holly bush planting
A few key tricks will help you establish a thriving holly hedge that stays lush for years. Here's what I've learned after planting dozens of these beautiful evergreens.
Soil Drainage Test: In Step 1, when you dig that 12-inch deep hole to test drainage, pay close attention to how quickly water drains. If it pools after 30 minutes, you're dealing with heavy clay soil. My solution? Create a slight mound when planting—this elevates the roots and prevents waterlogging, which is especially critical during those first 3 months of establishment. I've seen holly roots rot when planted in low spots where water pools.
Root Ball Prep: Before planting each bush in Step 2, run your fingers through the root ball to gently separate any circling roots. This simple step prevents "pot-bound" roots from strangling new growth. I like to make a few small cuts around the root ball with a knife if it's particularly tight—just enough to encourage outward growth. The wider the roots spread in that first year, the stronger your hedge will be.
Staking Strategy: Those 2-foot tall supports in Step 2 aren't just for show—they're essential for the first growing season. I've seen too many holly bushes lean dramatically after heavy rain because their roots weren't established enough to support the top growth. Use soft garden twine (never wire) and tie it loosely—you want to support without constricting. Check the ties every few weeks and loosen them as the stem thickens.
Watering Wisdom: The twice-weekly watering in Step 3 is non-negotiable during those first 3 months, but here's the secret: water deeply enough that it soaks down to 6 inches—not just the top 2 inches. I use a long-handled trowel to check moisture after watering. If it's dry at 6 inches, you need to water again. This deep watering encourages roots to grow downward while still spreading horizontally.
Pro Tips for Planting Holly Bushes
- A few key tricks will help you establish a thriving holly hedge that stays lush for years.
- Soil Drainage Test: In Step 1, when you dig that 12-inch deep hole to test drainage, pay close attention to how quickly water drains.
- Root Ball Prep: Before planting each bush in Step 2, run your fingers through the root ball to gently separate any circling roots.
Frequently asked questions
Got questions about planting holly bushes? You’re not alone! Here are some of the most common concerns—and their straightforward answers—to help you grow a lush, year-round privacy screen with confidence.
When is the best time to plant holly bushes?
The ideal window is fall or early spring (September–April in most climates). Planting in fall gives roots time to establish before summer heat, while spring planting avoids winter stress. Avoid extreme temperatures—never plant during frost or scorching summer days!
How far apart should I space holly bushes for a privacy screen?
Space them 4–6 feet apart for a dense screen in 3–5 years. If you want faster coverage, plant them 3–4 feet apart but be ready to prune annually. For taller varieties (like Ilex × ‘Nellie R. Stevens’), increase spacing to 6–8 feet.
Why aren’t my holly bushes growing berries?
Holly bushes are dioecious, meaning you need both male and female plants for berries. Plant at least one male for every 5–6 females (e.g., ‘Southern Gentleman’ males pair well with ‘Savannah’ females). Patience too—berries may take 3–5 years to appear!
Can I plant holly bushes in containers instead of the ground?
Yes! Use a large container (at least 18–24 inches wide) with drainage holes and well-draining potting mix. Choose dwarf varieties like ‘Dwarf Burford’ (3–4 ft tall) for containers. Repot every 2–3 years and fertilize monthly in growing seasons for best results.
How do I protect my holly bushes from pests like spider mites or scale?
Prevent pests with regular watering (keep soil moist but not soggy) and mulch to retain moisture. For infestations, spray with neem oil or insecticidal soap. Prune affected branches early to stop spread. Healthy soil (rich in compost) also deters pests!
Do holly bushes need winter care in cold climates?
Most hollies are hardy to USDA Zones 5–9, but young plants benefit from mulch (3–4 inches) around the base to insulate roots. In Zone 4 or colder, choose cold-resistant varieties like Ilex glabra (‘Inkberry’) or wrap tender branches with burlap in harsh winters.
Wrapping up and next steps
Planting holly bushes is a rewarding way to create a lush, evergreen privacy screen that thrives year-round! With the right soil, spacing, and care, you’ll enjoy vibrant foliage and stunning berries in just three years.
Whether you’re a gardening pro or a beginner, these tips make the process simple and satisfying.
Now that you’re ready, roll up your sleeves and get planting! 🌱 Start by marking your spots, prepping the soil, and choosing the perfect variety for your climate. Before you know it, your holly bushes will be the star of your landscape—and your neighbors will be jealous!