Shrubs
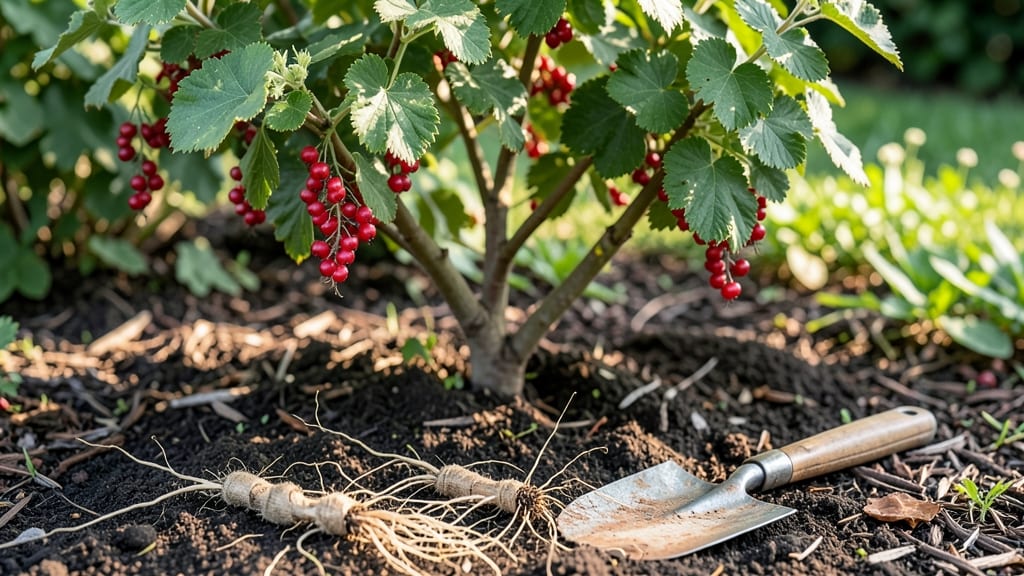
Planting currant bushes delivers year-round harvests with less fuss than most berry plants. I’ve grown them for five years now, and the secret isn’t fancy pruning—it’s choosing the right spot and giving them consistent moisture.
The first batch of berries appears in early summer, with a second wave in fall, and the bushes stay productive with almost no upkeep.
The real game-changer is their adaptability: currants thrive in zones 3-7, handle partial shade better than most berries, and even tolerate damp soil. You’ll need well-draining earth, a sunny patch (or dappled shade), and 3-4 feet of space between plants to prevent crowding.
The roots spread wide but shallow, so don’t dig deeper than 12 inches when planting—just loosen the soil and mix in compost.
By late summer, you’ll see strong canes with glossy leaves, and within two years, those branches will sag under the weight of deep red or black berries. The birds might get there first, but a few strategically placed bird netting keeps enough for jam, fresh eating, or freezing.
The bushes live for decades, so this is a once-and-done investment that pays off every season.
Here’s the twist: currants reward patience. Skip the heavy pruning—just remove dead wood in early spring and thin out crowded canes. The real maintenance is watering deeply once a week during dry spells.
That’s it. No chemicals, no fuss, just harvest after harvest with almost no effort after the first year.
📚 In This Guide
- What you need
- Instructions
- Tips and common mistakes
- Wrapping up and next steps
What you need
- ● Currant bushes: 3–5 healthy, disease-resistant plants (red, black, or white currants). Opt for 1-year-old bare-root or container-grown varieties.
- ● Shovel or trowel: A garden spade (for digging holes) and a hand trowel (for precision planting).
- ● Compost or well-aged manure: 5–10 lbs per bush to enrich the soil.
- ● Organic mulch: 2–3 inches of wood chips, straw, or pine needles to retain moisture and suppress weeds.
- ● Garden hose or watering can: With a spray nozzle for gentle watering.
- ● Pruning shears: Bypass pruners (sterilized with rubbing alcohol) for shaping and cleanup.
- ● Garden gloves: Heavy-duty to protect against thorns and soil.
- ● Soil test kit: To check pH (currants thrive in slightly acidic soil, 5.5–6.5).
- ● Fertilizer: Balanced 10-10-10 or organic fertilizer (apply sparingly, as currants are low-maintenance!).
- ● Row cover or frost cloth: For young plants in early spring or late fall.
- ● Stakes or trellis: If your currant variety (like red currants) benefits from support.
- ● Mulch ring: A plastic or metal ring to keep mulch contained.
Step-by-Step instructions for planting currant bushes
Here's how to establish healthy currant bushes that reward you with fruit for years.
Choose the Right Location and Prepare the Soil
Currants thrive in full sun—select a spot that receives at least 6-8 hours of direct sunlight daily. They also need well-draining soil with a slightly acidic to neutral pH (6.0-7.0). If your soil is heavy clay or sand, mix in 2-3 inches of compost from your materials list to improve texture and fertility.
Before planting, loosen the soil to a depth of 12 inches using a garden fork. This helps roots penetrate easily. Avoid planting in low-lying areas where water pools, as currants hate soggy roots. If your site is prone to wetness, consider building a 6-inch high mound to improve drainage.
Dig Holes and Plant the Bushes
Dig holes twice as wide as the root ball but only as deep as the container. Gently remove each currant bush from its container and loosen the roots if they’re tightly bound. Place the plant in the hole so the top of the root ball sits level with the surrounding soil—burying too deep can suffocate the plant, while planting too high may expose roots to drying.
Backfill the hole with soil, pressing lightly around the edges to eliminate air pockets. Water deeply to settle the soil and encourage root contact. Space bushes 6-8 feet apart to allow airflow and prevent disease. If planting in rows, maintain a 6-foot spacing between rows for easy maintenance.
Mulch and Water for Establishment
Spread 2-3 inches of mulch over the soil surface, keeping it 3-4 inches away from the stem to prevent rot. Mulch helps retain moisture, suppress weeds, and regulate soil temperature. Use wood chips or straw from your materials list, but avoid fresh mulch that may draw nitrogen from the soil.
Water the bushes deeply once a week during the first growing season, ensuring the soil stays evenly moist but not waterlogged. You’ll know it’s time to water again when the top 2 inches of soil feel dry to the touch. Avoid overhead watering to reduce fungal risks—direct water at the base instead.
Prune for Shape and Health
Currants benefit from minimal pruning, but removing dead, diseased, or crossing branches in early spring keeps them productive. Use clean, sharp pruners to make cuts just above a bud or branch junction. Start by thinning out weak or crowded stems to improve airflow and sunlight penetration.
If your bushes are overgrown, prune back one-third of the oldest canes to encourage new growth. Avoid heavy pruning in the first year—focus on shaping rather than reducing size. Currants produce fruit on both old and new wood, so pruning too aggressively can reduce yields.
Tips & tricks for planting currant bushes
These simple yet game-changing tips will help you establish thriving currant bushes that produce fruit for years with minimal effort.
Soil Preparation Secret: When loosening the soil to 12 inches in Step 1, don't just dig—work in a handful of compost into the bottom of each hole before planting. This gives roots immediate access to nutrients as they establish. For heavy clay soil, I've found mixing in a bit of coarse sand helps break up compaction even more effectively than just compost alone.
Root Ball Handling: In Step 2, if you notice roots circling tightly around the root ball, gently tease them apart with your fingers before planting. This prevents girdling, where roots grow in a circle and eventually strangle themselves. Don't worry about damaging roots—currants are surprisingly resilient once they're in the ground.
Watering Wisdom: The once-weekly deep watering in Step 3 works best if you water in the morning. This allows the soil to absorb moisture before evening temperatures drop, reducing evaporation. I've seen currants struggle when watered in the evening because the leaves stay wet overnight, increasing fungal risks.
Pruning Precision: When pruning in Step 4, make your cuts at a 45-degree angle just above an outward-facing bud. This encourages new growth to develop away from the center of the bush. I always sterilize my pruners with rubbing alcohol between cuts to prevent spreading disease from any infected branches you might encounter.
Pro Tips for Planting Currant Bushes
- These simple yet game-changing tips will help you establish thriving currant bushes that produce fruit for years with minimal effort.
- Soil Preparation Secret: When loosening the soil to 12 inches in Step 1, don't just dig—work in a handful of compost into the bottom of each hole before planting.
- Root Ball Handling: In Step 2, if you notice roots circling tightly around the root ball, gently tease them apart with your fingers before planting.
Frequently asked questions
Got questions about planting currant bushes? You’re not alone—these hardy shrubs are full of surprises! Whether you're a first-time gardener or a seasoned pro, here are some of the most common queries (and answers) to help you grow thriving currant bushes with confidence.
When is the best time to plant currant bushes?
Plant currant bushes in early spring (just as new growth starts) or early fall (4-6 weeks before the first frost). Avoid planting in extreme heat or cold—roots need time to establish without stress. For container-grown bushes, you can plant year-round in mild climates, but spring/fall still give the best results.
How long does it take for currant bushes to bear fruit?
Be patient! Currant bushes typically take 2-3 years to produce fruit after planting. Some varieties may fruit earlier, but consistent care (watering, pruning, and soil health) speeds up the process. Choose self-pollinating varieties (like 'Consort' or 'Red Lake') to avoid waiting for pollinators.
What pests or diseases should I watch for when growing currant bushes?
Currants are generally low-maintenance, but keep an eye out for:
- Aphids: Suck sap from leaves (spray with water or neem oil).
- White pine weevils: Bore into stems (prune infested branches early).
- Powdery mildew: White fungal spots (improve airflow, avoid overhead watering).
Resistant varieties like 'Pacific' or 'Chamberlain' can help reduce issues.
Can I grow currant bushes in containers, or do they need a garden bed?
Yes! Currant bushes thrive in large containers (at least 15-20 gallons) with well-draining soil. Use a mix of potting soil and compost, and ensure the pot has drainage holes. Dwarf varieties (like 'Titan') are ideal for containers. Just repot every 2-3 years and fertilize regularly for best results.
Do I really need to prune currant bushes, or is it optional?
Pruning is minimal but beneficial! Focus on:
- Removing dead or crossing branches in late winter.
- Thinning out overcrowded growth to improve airflow.
- Cutting back last year’s fruit-bearing stems to encourage new growth.
With just 10-15 minutes yearly, you’ll keep bushes healthy and productive—no green thumb required!
Wrapping up and next steps
Planting currant bushes is a rewarding way to enjoy a year-round harvest with minimal effort—especially when you focus on the right location, soil prep, and smart pruning.
Whether you’re growing red, black, or white currants, these hardy shrubs thrive with just a little care, offering sweet, tangy berries that are perfect for jams, snacks, or fresh eating. Now’s the perfect time to roll up your sleeves and get growing!
Ready to dive in? Start by marking your spot in a sunny, well-drained area, gather your supplies, and follow the steps above. Before you know it, you’ll be savoring homegrown currants straight from your own backyard. Happy planting! 🌱✨