Orchid Care
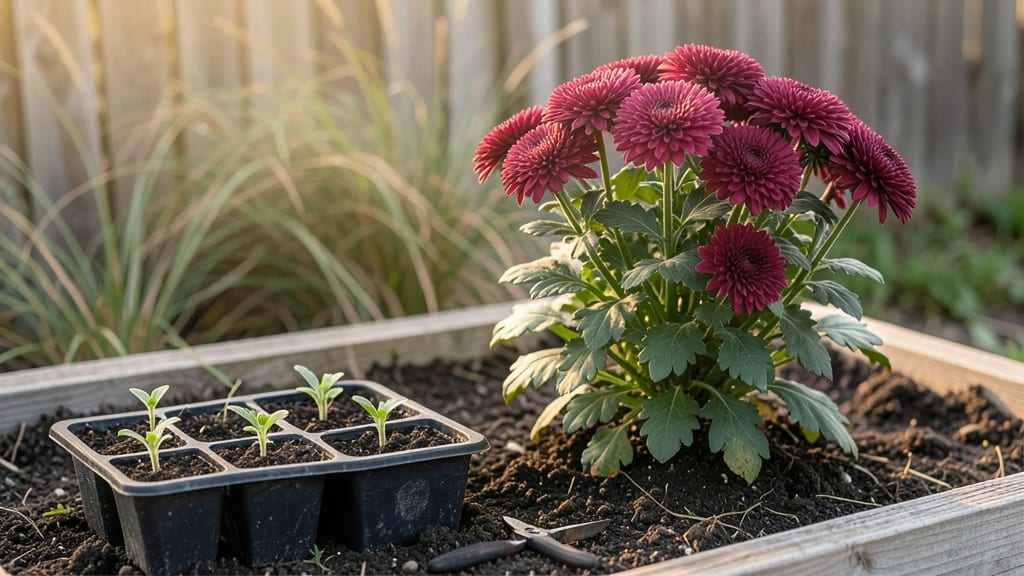
Planting chrysanthemums outdoors transforms your fall garden into a bold, foolproof showstopper—just when most flowers call it quits. 🌻 I’ve planted them for years, and the secret to their shockingly lush blooms lies in the spacing, soil, and timing.
Most gardeners rush this step, but taking 20 minutes to prep now means nonstop color from September until frost.
Start with well-draining soil mixed with compost—chrysanthemums hate soggy roots. Space them 18-24 inches apart in full sun (they’ll sulk in shade), and plant crowns just below soil level. Water deeply after planting, but don’t drown them; these plants thrive on consistency, not excess.
The first year might feel slow, but by autumn, you’ll have neighbor-jealousy levels of blooms.
Here’s the game-changer: pinch back stems in early summer to encourage bushier growth. It’s counterintuitive, but trust me—this simple step doubles your flower count. Mulch around plants to retain moisture, and watch them rebound from heat waves or late-season rains.
By October, your garden will be a velvety sea of color that lasts until winter.
Works in zones 5-9, whether you’re filling borders, containers, or mass plantings. The key is patience—chrysanthemums reward careful planting with years of effortless beauty. Let’s get those roots in the ground right.
📚 In This Guide
- What you need
- Instructions
- Tips and common mistakes
- Wrapping up and next steps
What you need
- ● Chrysanthemum plants: 3–5 mature plants (or 12–15 young nursery starts) per 10 sq. ft. of space. Choose hardy varieties (e.g., 'Bonanza,' 'Mammoth') for best outdoor success.
- ● Well-draining potting mix: 1–2 bags (2–3 cubic feet each) of garden soil + compost blend (60/40 ratio). Avoid heavy clay soils.
- ● Organic fertilizer: 1 lb of balanced 10-10-10 or slow-release bloom booster (e.g., 5-10-5).
- ● Mulch: 2–3 inches of straw, shredded bark, or pine needles to retain moisture and regulate soil temp.
- ● Watering can or hose with nozzle: 1–2 gallons capacity for gentle watering.
- ● Garden trowel or hand shovel: Medium-sized (6–8 inches) for digging holes.
- ● Gloves: 1 pair of gardening gloves (water-resistant for comfort).
- ○ Pruners (optional but helpful): Bypass pruners for trimming dead foliage post-planting.
- ● Measuring tape or ruler: To ensure 12–24-inch spacing between plants (check variety tags!).
- ○ Stakes or cages (optional): For tall varieties (e.g., 'Ruby Mound'), use 1–2 stakes per plant for support.
- ● Sunlight: Full sun (6+ hours/day). Partial shade (4–6 hours) works for cooler climates.
- ● Soil pH: Slightly acidic to neutral (6.0–7.0). Test soil or amend with lime/sulfur if needed.
- ● Timing: Plant 4–6 weeks before your first frost (e.g., late summer/early fall in most zones).
- ● Weather watch: Avoid planting during extreme heat or rain—aim for mild, overcast days.
Step-by-Step instructions for planting chrysanthemums outdoors
Here's how I plant these hardy beauties for vibrant autumn blooms—every time.
🪴 Step 1: Choose the Perfect Planting Location
Chrysanthemums thrive in full sun with at least 6 hours of direct light daily. I always select a spot that gets morning sun and afternoon shade in hotter climates, as this prevents the flowers from scorching. The soil should drain well—these plants hate soggy roots, which leads to root rot.
Test your soil by digging a 6-inch deep hole. If water pools at the bottom after 15 minutes, amend the area with 2-3 inches of compost mixed into the top 12 inches of soil. Chrysanthemums prefer slightly acidic to neutral soil (pH 6.0-7.0), so a soil test kit ensures you're in the right range.
🌱 Step 2: Prepare the Soil and Planting Holes
For 4 plants, dig 4 holes spaced 18-24 inches apart—this gives them room to spread without crowding. The holes should be just as deep as the root ball and twice as wide. Loosen the soil at the bottom with a fork to encourage root penetration.
If your soil is heavy clay, I blend in 1 part perlite or coarse sand with 3 parts native soil to improve drainage. This prevents the roots from suffocating, especially during autumn rains. Gently tease apart the roots of container-grown plants before placing them in the holes to encourage outward growth.
💧 Step 3: Plant and Water Thoroughly
Place each chrysanthemum in its hole, ensuring the top of the root ball sits 1 inch below soil level. This helps stabilize the plant and encourages new root growth. Fill the hole with soil, pressing lightly to remove air pockets, but don’t compact it too tightly—roots need room to breathe.
Water deeply right after planting, using 1 gallon of water per plant. This settles the soil and removes air gaps around the roots. Mulch the base with 2-3 inches of organic mulch (like shredded bark) to retain moisture and suppress weeds. Keep the mulch 2 inches away from the stem to prevent rot.
☀️ Step 4: Maintain for Optimal Growth and Blooms
Water 1-2 times per week during the first month, ensuring the soil stays consistently moist but not waterlogged. You’ll know it’s right when the top 2 inches of soil feel slightly damp. Once established, chrysanthemums are drought-tolerant, but they reward consistent moisture with lush foliage and abundant blooms.
Fertilize lightly with a balanced, slow-release fertilizer (like 10-10-10) at planting and again in early autumn. Too much nitrogen now will produce leafy growth at the expense of flowers. Deadhead spent blooms regularly to encourage more flowers and prolong the season.
⏰ Step 5: Prepare for Winter and Next Season
In colder climates, cut back the foliage to 4-6 inches after the first hard frost. This prevents the plant from heaving out of the ground during freeze-thaw cycles. In milder zones, leave the foliage for natural winter interest and cut back in early spring.
Chrysanthemums are perennial in USDA zones 5-9, so with proper care, they’ll return year after year. Divide clumps every 3-4 years in early spring to rejuvenate growth. You’ll know it’s time when the center of the plant becomes woody and produces fewer blooms.
Tips & tricks for perfect chrysanthemum planting
These hard-earned insights will help you avoid common pitfalls and achieve that showstopping autumn display every gardener dreams of.
Soil Test Timing: That 15-minute water test in Step 1 is your best indicator of drainage. If water disappears within 5 minutes, your soil drains too quickly—amend with 1-2 inches of organic matter to retain moisture. If it still pools after 15 minutes, you need more compost or sand to improve aeration. I've learned this the hard way after watching soggy roots kill otherwise healthy plants.
Root Ball Placement: The 1-inch-deep positioning in Step 3 isn't just about aesthetics—it creates a natural barrier that prevents the plant from heaving out during freeze-thaw cycles in winter. Gently press the soil around the edges to eliminate air pockets, but resist the urge to compact tightly. Roots need that air space to breathe and establish properly.
Spacing Strategy: The 18-24 inch spacing in Step 2 might seem generous, but trust me on this—it prevents fungal diseases by improving air circulation. In tight spaces, I've seen powdery mildew develop within weeks. For larger gardens, you can stretch this to 30 inches for even better airflow, especially in humid climates.
Winter Prep Secret: When cutting back to 4-6 inches in Step 5, leave the stems slightly uneven—this creates a natural water-shedding surface that prevents rot during winter rains. In milder zones, I leave the foliage for winter interest, but always cut back in early spring before new growth begins to avoid disease carryover.
Pro Tips for Planting Chrysanthemums Outdoors
- These hard-earned insights will help you avoid common pitfalls and achieve that showstopping autumn display every gardener dreams of.
- Soil Test Timing: That 15-minute water test in Step 1 is your best indicator of drainage.
- Root Ball Placement: The 1-inch-deep positioning in Step 3 isn't just about aesthetics—it creates a natural barrier that prevents the plant from heaving out during freeze-thaw cycles in winter.
Frequently asked questions
Got questions about planting chrysanthemums outdoors? You’re not alone! Here are some of the most common concerns—plus expert answers to help you grow stunning blooms with confidence.
When is the best time to plant chrysanthemums outdoors?
Plant chrysanthemums 4–6 weeks before your first frost date (typically late summer to early fall). This gives roots time to establish before winter. For spring planting, wait until after the last frost when soil temps are above 60°F (15°C). Early planting ensures vibrant blooms!
Can I plant chrysanthemums in fall for winter blooms?
Fall-planted chrysanthemums often bloom earlier and more prolifically in winter. Just ensure they’re in well-draining soil and protected from harsh winds. In cold climates, mulch heavily to shield roots from freezing. Bonus: Late-season blooms add color to dreary winter gardens!
How do I protect chrysanthemums from pests and diseases?
Chrysanthemums are tough, but watch for aphids, spider mites, and powdery mildew. Prevent issues with:
- Neem oil sprays (for pests)
- Good airflow (space plants 12–18” apart)
- Watering at the base (avoid wetting leaves)
What’s the best spacing for chrysanthemums in the garden?
Space plants 12–18 inches apart for dwarf varieties and 24–36 inches for standard types. Crowding leads to poor airflow (fungal risks) and weaker stems. Pro tip: Group odd-numbered plants (3, 5, or 7) for a natural, fuller look!
Can I grow chrysanthemums in containers?
Yes! Use 5–7 gallon pots with drainage holes and a balanced fertilizer. Place in full sun and water consistently. Container-grown chrysanthemums thrive in patios or balconies—just repot every 2–3 years to refresh soil. Perfect for small spaces or renters!
Wrapping up and next steps
Planting chrysanthemums outdoors can transform your garden into a vibrant autumn masterpiece—with the right spacing, soil prep, and care. 🌸 Whether you’re a seasoned gardener or a beginner, these hardy blooms thrive when given proper attention to light, drainage, and companionship.
Now that you’re armed with foolproof tips, it’s time to roll up your sleeves and get growing!
Your next step? Mark your calendar for late summer or early fall planting—chrysanthemums reward patience with months of stunning color. Sketch a quick layout or grab your shovel and dive in. Happy gardening!