Flowers
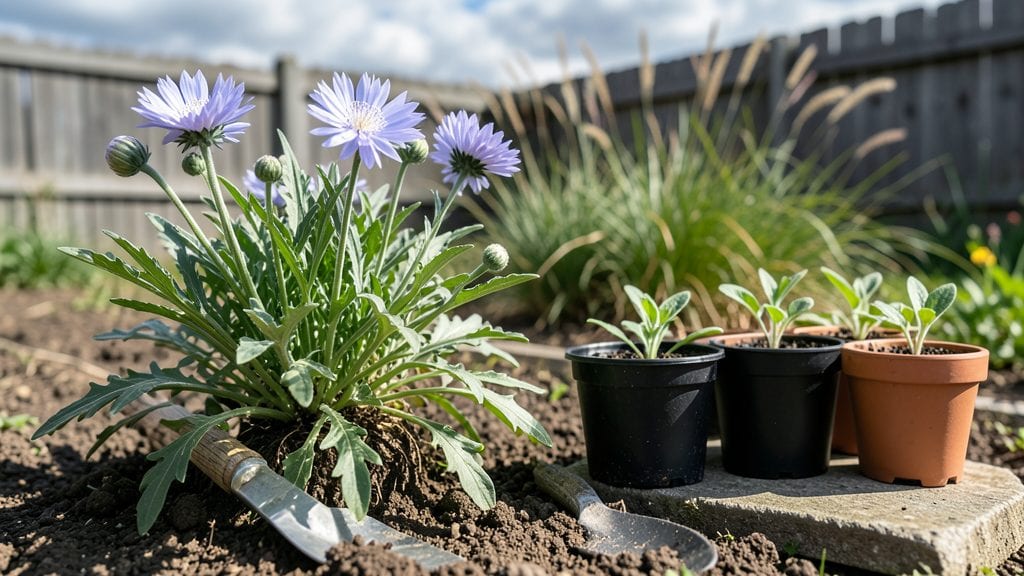
Planting balloon flowers transforms your garden into a vibrant springtime display that keeps coming back stronger every year. ✨ I’ve grown these sun-loving perennials for five seasons now, and their unique, globe-shaped blooms—ranging from deep purples to soft whites—always steal the show.
The key isn’t just sticking them in the ground; it’s matching their love of full sun, well-draining soil, and that perfect moment when the soil warms up.
You’ll need a spot with at least 6 hours of sunlight daily, loose soil with good drainage, and a little patience for the first year while roots establish. Most beginners overlook spacing—plant them 12-18 inches apart—or dig too deep, which can rot the crown.
The payoff? Once settled, they’ll naturalize and spread, returning with bold color year after year with almost no fuss.
By late summer, you’ll have plants packed with those signature balloon-shaped buds that pop open into starry blooms. The foliage stays neat and tidy, and deer tend to leave them alone, making them a low-maintenance star.
Just deadhead spent blooms in fall to encourage next year’s flowers, and you’ll have a perennial that outshines annuals every season.
Works equally well in borders, cottage gardens, or even containers—just ensure the roots don’t sit in soggy soil. Here’s how to get them thriving from day one, without the common mistakes that leave other gardeners frustrated.
📚 In This Guide
- What you need
- Instructions
- Tips and common mistakes
- Wrapping up and next steps
What you need
- ● Balloon flower plants: Seeds: 10–20 seeds (start indoors 8–10 weeks before last frost)
- ● OR Nursery transplants: 3–5 plants (hardy zones 3–9)
- ● OR Bare-root bulbs (if available in your region)
- ● Well-draining soil: Amend with compost (2–3 inches mixed into top 6–12 inches of soil)
- ● Sunlight: Full sun (6+ hours daily) or light shade (partial sun works in hot climates)
- ● Watering tools: Garden hose with adjustable nozzle or drip irrigation system
- ● Garden tools: Trowel or hand shovel (for digging)
- ● Gloves (to protect hands from soil)
- ● Pruners (for deadheading spent blooms)
- ● Fertilizer: Balanced 10-10-10 or slow-release granular fertilizer (sprinkle lightly at planting)
- ● Mulch: Organic mulch (straw or shredded bark) to retain moisture
- ○ Stakes or cages (optional): For taller varieties (e.g., ‘Astra Blue’) to prevent flopping
- ● Seed-starting tray (if sowing indoors): With drainage holes + seed-starting mix
Step-by-Step instructions for planting balloon flowers
Here's how to establish these tough, cheerful perennials for years of low-maintenance blooms.
🌱 Step 1: Choose the Perfect Planting Spot
Balloon flowers thrive in full sun—at least 6 hours daily—but they tolerate 4-5 hours in hotter climates. I always scout the site first: look for areas where other sun-lovers like lavender or coneflowers already flourish. The soil should drain well; these plants hate soggy roots.
Test drainage by digging a 6-inch deep hole and filling it with water. If it doesn't drain within 1 hour, amend the soil with 2-3 inches of compost to improve texture. Balloon flowers also appreciate slightly alkaline soil (pH 6.5-7.5), so a sprinkle of crushed limestone helps if your soil tests acidic.
🌿 Step 2: Prepare the Soil and Plant Crowns Correctly
Loosen the soil to a depth of 12 inches around the planting area with a garden fork. This breaks up compaction and encourages root spread. For each plant, dig a hole just as deep as the root ball but twice as wide—balloon flowers need room to establish.
Place the plant so the crown (where roots meet stems) sits 1 inch below soil level. This prevents rot while allowing roots to anchor properly. Gently tease out any circling roots before positioning. Backfill with native soil mixed with 1 cup of compost per plant—this jumpstarts growth without overwhelming the roots.
💧 Step 3: Water Deeply and Mulch for Retention
Water immediately after planting to settle the soil and eliminate air pockets. Give each plant 1 gallon of water—enough to soak the root zone to 6 inches deep. You'll see water pooling at the surface before it drains; that's your cue it's reached the roots.
Apply 2-3 inches of mulch (like shredded bark or straw) around the base, keeping it 2 inches away from stems. This conserves moisture and regulates soil temperature. Mulch also suppresses weeds, which compete for nutrients balloon flowers need to rebound after their first year. Replenish mulch annually as it breaks down.
☀️ Step 4: Maintain Through the First Growing Season
Water 1-2 times per week during the first growing season, depending on rainfall. Let the soil dry slightly between waterings—balloon flowers develop deep roots that hate constant moisture. You'll know they're established when they produce 2-3 sets of leaves before flowering.
Fertilize lightly in early spring with a 10-10-10 balanced fertilizer (use ½ teaspoon per plant). Too much nitrogen encourages leafy growth at the expense of blooms. Deadhead spent flowers to encourage a second flush of blooms, but leave some seed pods for wildlife if you're okay with self-seeding.
✂️ Step 5: Divide Every 3-4 Years for Vigor
Balloon flowers form dense clumps over time. In early spring, dig up the entire plant and separate it into sections with 3-5 shoots each. Replant the divisions immediately, following the same depth guidelines. This rejuvenates growth and prevents the center from dying out.
Here's the thing—balloon flowers are tough but not indestructible. If you notice leaves yellowing in summer, it's often due to overwatering or poor drainage**. Adjust your care, and they'll bounce back. With proper placement and minimal care, these perennials will reward you with cheerful blooms for decades.
Tips & tricks for planting balloon flowers
These simple tricks will help you establish healthy, thriving balloon flowers that come back stronger each year.
The Sunlight Secret: In Step 1, when choosing your planting spot, remember that balloon flowers are sun-worshippers. If your garden only gets 4-5 hours of sun, plant them in the sunniest part of the day rather than spreading them out evenly. I've seen them thrive with just 4 hours if they get morning sun—it's the most intense light that matters most.
Drainage Test Tip: The 1-hour drainage test in Step 1 is your best friend. If water pools for more than an hour, don't just add compost—consider raising the bed or planting on a slope. Balloon flowers will forgive many mistakes, but soggy roots won't. I've had to replant three times because I ignored this step, and trust me, the plants will thank you for proper drainage.
Crown Depth Matters: When planting in Step 2, that 1-inch crown depth is critical. Too deep and you risk rot; too shallow and the plant won't anchor properly. I like to make a small mound of soil first, then place the plant on top before backfilling. This gives you a visual reference to ensure perfect positioning every time.
Mulch Placement Strategy: In Step 3, keeping that 2-3 inches of mulch 2 inches away from stems prevents rot while still protecting roots. I've seen gardeners pile mulch right against stems, which leads to moisture buildup and fungal issues. Think of it like a donut—cover the roots but leave the center clear.
Pro Tips for Planting Balloon Flowers
- These simple tricks will help you establish healthy, thriving balloon flowers that come back stronger each year.
- The Sunlight Secret: In Step 1, when choosing your planting spot, remember that balloon flowers are sun-worshippers.
- Drainage Test Tip: The 1-hour drainage test in Step 1 is your best friend.
Frequently asked questions
Got questions about growing these eye-catching perennials? Here are answers to the most common ones—so you can plant with confidence!
When is the best time to plant balloon flowers?
Plant Platycodon grandiflorus in early spring or early fall for optimal root establishment. Avoid extreme heat—summer planting can stress young plants. If starting from seeds, sow them indoors 8–10 weeks before the last frost for transplants.
How long does it take for balloon flowers to bloom?
With patience, you’ll see blooms 1–2 years after planting from seeds or the same year if transplanting mature plants. First-year seedlings focus on root growth, but established plants reward you with vibrant flowers in late summer to fall.
Can balloon flowers grow in partial shade?
While they tolerate partial shade (4–6 hours of sun), they thrive best in full sun (6+ hours). In shadier spots, expect fewer blooms and leggier stems. If your garden is shady, choose a sunnier corner or pair them with shade-loving companions like hostas.
What pests or diseases should I watch for?
Keep an eye out for aphids, slugs, and powdery mildew—common issues for balloon flowers. Use neem oil for pests and ensure good airflow to prevent mildew. Remove diseased leaves promptly, and mulch to deter slugs. Most problems are avoidable with proper care!
How do I revive a balloon flower that’s not blooming?
If your plant is healthy but skips blooms, it may need a boost: Cut back dead foliage in early spring, fertilize lightly with balanced 10-10-10, and ensure it gets full sun. Overcrowding or poor soil can also stunt blooms—divide clumps every 3–4 years to rejuvenate growth.
Pro Tip:
For continuous color, plant multiple varieties (like ‘Astra Blue’ or ‘White Dawn’) with staggered bloom times. Their unique, balloon-like buds add whimsy to borders, containers, or cottage gardens—just give them room to spread!
Wrapping up and next steps
Planting balloon flowers is a rewarding way to add vibrant color and resilience to your garden. These sun-loving perennials thrive with minimal fuss, offering year-after-year blooms that brighten up any space.
Whether you're a seasoned gardener or just starting out, their easy care and stunning visuals make them a fantastic choice.
Ready to transform your garden? Start by choosing the perfect spot—full sun and well-draining soil are key—and grab your seeds or plants today! With a little patience, you’ll soon be enjoying a garden bursting with cheerful, long-lasting balloon flowers. 🌸