Vegetables
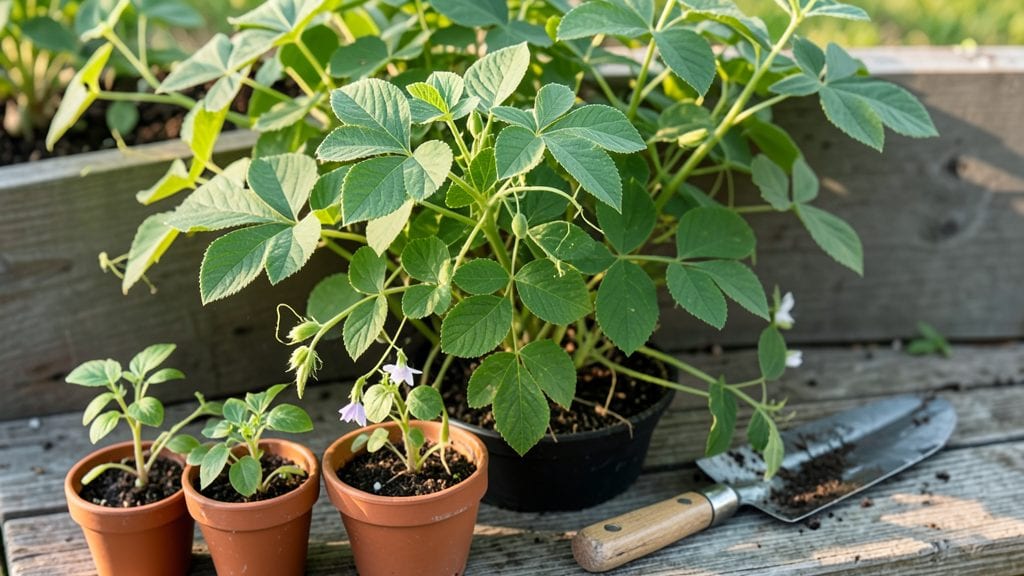
Warm soil in early spring is the secret to fast-growing adzuki beans—those bushy, high-yielding plants that produce sweet, edible beans in just 70-80 days. I learned the hard way that planting too early in cold soil means stunted growth and fewer pods.
The key is waiting until the soil reaches 60°F, even if it means starting a little later in the season.
These beans thrive in full sun and well-draining soil, but they’re surprisingly adaptable. A 3-foot-tall bush fits neatly in small gardens or containers, and they fix nitrogen in the soil—meaning less fertilizer needed for future crops.
The trick is keeping the soil consistently moist but not soggy, especially during flowering when water stress can drop pods.
By mid-summer, you’ll be harvesting tender beans straight from the vine, their rich copper color signaling perfect ripeness. The plants also make stunning ornamental additions, with their vibrant foliage and compact growth habit. Just avoid overcrowding—space them 4-6 inches apart for maximum yield.
Companion plants like cucumbers or corn help shade the soil, while marigolds deter pests. The biggest mistake? Planting too densely or skipping the soil-warming step. With the right timing, you’ll have a bountiful harvest before most beans even think about flowering.
📚 In This Guide
- What you need
- Instructions
- Tips and common mistakes
- Wrapping up and next steps
What you need
- ● Adzuki bean seeds: 1–2 lbs (or ~1 cup) of high-quality, non-GMO seeds (save seeds from organic sources if possible).
- ● Well-draining soil: A mix of 60% topsoil, 30% compost, and 10% perlite or vermiculite (adzuki beans thrive in slightly acidic to neutral soil, pH 6.0–7.0).
- ● Container or garden bed: For containers: 5-gallon pots or larger (minimum 12" deep) with drainage holes.
- ● For in-ground planting: A sunny spot (6+ hours of sunlight daily) with loose, warm soil (60°F+).
- ● Fertilizer: A balanced, organic fertilizer (e.g., 5-5-5 or compost tea) or bone meal (1 tbsp per plant at planting).
- ● Hand trowel or garden fork for digging.
- ● Watering can or hose with a gentle spray nozzle (adzuki beans dislike soggy roots!).
- ○ Row cover or cloches (optional, to warm soil early in the season).
- ○ Trellis or stakes (optional, if growing bush varieties for better air circulation).
- ● Mulch (straw or grass clippings) to retain moisture and suppress weeds.
Instructions for planting adzuki beans with a soil-warmed start
Here’s how to jumpstart your adzuki beans for a rapid, vigorous harvest—no waiting for slow germination.
Prepare the Soil with Warmth and Loose Texture
Adzuki beans thrive when soil temperatures reach 70-80°F, so I always start them in a black plastic mulch tunnel or a warm bed at least 2 weeks before the last frost. Spread the 2 inches of compost evenly across the planting area, then till it in to 6 inches deep—this ensures nutrients are accessible without compacting the soil.
Next, add the 1 cup of bone meal per 4 plants and mix thoroughly. Bone meal provides phosphorus for strong root development, which is critical for bushy growth. Water the area until the soil is evenly moist to 4 inches deep—you’ll know it’s right when a handful of soil holds together but doesn’t drip. Avoid overwatering; soggy soil suffocates roots and invites rot.
Plant Seeds at the Right Depth and Spacing
Using your finger, create 1-inch-deep holes spaced 6 inches apart in rows 18 inches apart. This spacing prevents overcrowding, which leads to weak stems and poor airflow. Drop 2-3 seeds into each hole—adzuki beans have a low germination rate, so extra seeds ensure a full harvest.
Cover the seeds with soil and gently firm the surface so they make good contact with the earth. Water lightly with a spray nozzle to avoid displacing seeds. Place a clear plastic dome or row cover over the bed to trap heat and moisture. Check daily—condensation should form on the inside of the cover, indicating ideal humidity. Remove the cover once 50% of seeds sprout, usually in 7-10 days.
Thin Seedlings for Strong, Bushy Plants
When seedlings reach 2 inches tall, thin them to 1 plant per hole, pulling the weakest stems at the base. This might seem harsh, but crowded adzuki beans produce leggy, spindly plants with fewer pods. Keep the strongest seedling—the one with the darkest green leaves and thickest stem. Water the remaining plants at the base to avoid wetting foliage, which can spread disease.
After thinning, apply a 1-inch layer of straw mulch to retain moisture and suppress weeds. Adzuki beans are drought-tolerant once established, but consistent moisture during flowering (30-45 days after planting) ensures heavy pod set. You’ll know they’re thriving when purple flowers appear in clusters—this is your cue to reduce water slightly to encourage pod development.
Support Vines and Monitor for Pests
As plants grow 12-18 inches tall, install 4-foot bamboo stakes or a light trellis to support vines. Adzuki beans don’t climb aggressively, but staking prevents stems from bending under the weight of pods. Tie vines loosely with soft garden twine every 4-6 inches—too-tight ties restrict growth.
Watch for Mexican bean beetles or aphids, which target adzuki beans. If you spot yellowing leaves or sticky residue, spray plants with neem oil (mix 1 tablespoon per gallon of water) in the evening to avoid harming pollinators. Harvest begins 60-70 days after planting when pods turn dull brown and rattle slightly when shaken. Pick regularly to encourage continuous production.
Tips & tricks for planting adzuki beans with a soil-warmed start
These essential strategies will help you accelerate germination and ensure your adzuki beans grow into bushy, productive plants with minimal waiting.
Soil Temperature is Non-Negotiable: The 70-80°F soil temperature range isn't just ideal—it's critical for fast germination. I've seen adzuki beans sprout in just 5-7 days when soil hits this range, compared to 2-3 weeks in cooler conditions. Use a soil thermometer to verify—if your soil runs cooler, extend the black plastic mulch tunnel or consider a heated seedling mat for stubborn beds. The faster the soil warms, the quicker you'll see those first green shoots.
Planting Depth Precision Matters: Those 1-inch-deep holes might seem shallow, but planting too deep (beyond 1.5 inches) can delay germination by forcing seeds to push through more soil. I've found that using your finger to create holes of consistent depth—about the length of your first knuckle—ensures uniform sprouting. For extra insurance, consider pre-soaking seeds overnight in warm water before planting, which can shave 1-2 days off germination time.
Thinning Strategy for Maximum Yield: When thinning to one plant per hole at the 2-inch mark, focus on selecting the healthiest seedling rather than just the tallest. Look for plants with vibrant, deep green leaves and stems that feel sturdy when gently squeezed. I've noticed that plants with slightly broader leaves at this stage tend to produce more pods later. The key is to thin early—waiting until plants are 4 inches tall can stress the remaining plants and reduce overall yield.
Pest Prevention Starts Early: Mexican bean beetles and aphids are drawn to stressed plants, so maintaining strong, healthy adzuki beans from the start is your best defense. I've had success with a preventative approach: after thinning, spray plants with a neem oil mixture (1 tablespoon per gallon) every 7-10 days during the flowering stage (30-45 days after planting). This creates a protective barrier without harming beneficial insects, and I've seen significantly fewer pest issues when using this schedule consistently.
Pro Tips for Planting Adzuki Beans
- These essential strategies will help you accelerate germination and ensure your adzuki beans grow into bushy, productive plants with minimal waiting.
- Soil Temperature is Non-Negotiable: The 70-80°F soil temperature range isn't just ideal—it's critical for fast germination.
- Planting Depth Precision Matters: Those 1-inch-deep holes might seem shallow, but planting too deep (beyond 1.5 inches) can delay germination by forcing seeds to push through more soil.
Frequently asked questions
When is the best time to plant adzuki beans?
Adzuki beans thrive in warm soil—wait until after the last frost when soil temps hit 60°F (15°C) or higher. In most U.S. regions, this means late spring to early summer. For extended harvests, plant successive batches every 2–3 weeks until mid-summer.
How long do adzuki beans take to grow?
From seed to harvest, adzuki beans typically mature in 70–90 days, depending on the variety. They’re fast growers but need consistent warmth. Check seed packets for specific days-to-maturity—earlier varieties (like Mochi) may be ready in 60 days!
What should I do if my adzuki beans aren’t germinating?
Slow germination often signals cold soil or dry seeds. Soak seeds overnight in warm water before planting, and ensure soil stays consistently moist (not soggy). If planted too early, cover seeds with a mini greenhouse (like a plastic dome) to trap heat.
Can I grow adzuki beans in containers?
Yes! Adzuki beans adapt well to 5-gallon pots or larger, as long as containers have drainage holes. Use a well-draining potting mix and support vines with a trellis (they grow 12–18 inches tall). Just ensure pots get 6+ hours of sun daily.
Are adzuki beans the same as mung beans?
Nope! While both are legumes, adzuki beans (Vigna angularis) have a sweeter, nuttier taste and are smaller and redder. Mung beans (Vigna radiata) are lighter, greener, and often used in sprouts. Adzuki are perfect for red bean paste, soups, and desserts!
Wrapping up and next steps
Growing adzuki beans is a rewarding journey that brings both nutritious harvests and satisfying results—especially when you start with soil-warmed seeds! From selecting the right variety to nurturing your plants with patience, every step leads to a bountiful, bushy crop.
Whether you’re a seasoned gardener or a beginner, your hard work will pay off with sweet, protein-rich beans to enjoy fresh, dried, or in your favorite recipes.
Ready to take the next step? Start small—plant a few seeds this season and watch your garden thrive! 🌱 For even more success, share your progress or explore companion planting to maximize your harvest. Happy growing!