Watering
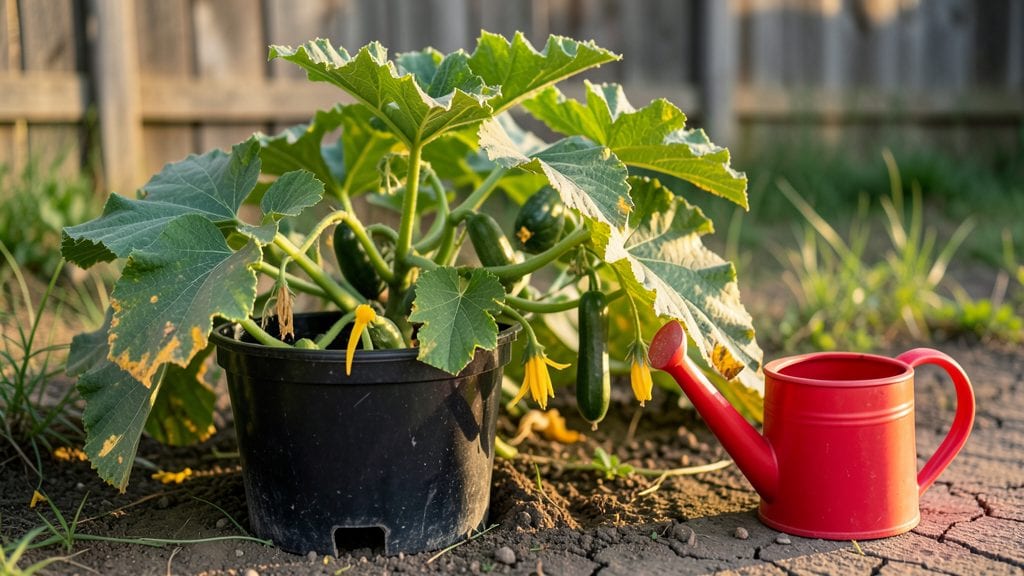
Overwatering squash plants turns your garden into a swamp—yellowing leaves, mushy stems, and that dreaded rot smell. I’ve pulled squash vines back from the brink more times than I’d like to admit, and the fix isn’t complicated once you know the signs.
The key is acting fast before the roots suffocate, because once root rot sets in, even the hardiest plants struggle to recover. That said, squash are resilient when you give them the right conditions, and I’ll show you how to reset their balance in just three focused steps.
Most gardeners overwater because they assume squash plants—with their big, sprawling leaves—need constant moisture. But squash roots actually crave well-drained soil that dries out slightly between waterings. The first step is checking the soil: stick your finger about 1-2 inches deep. If it’s damp, hold off on watering.
If it’s bone-dry, you’ve likely been underwatering, not overwatering. The real giveaway? Leaves that turn yellow while staying soft to the touch, or stems that feel squishy when you gently squeeze them. That’s your plant screaming for air, not water.
Here’s the game-changer: cut back immediately and let the soil dry out completely for a few days. Then, adjust your routine—water only when the top 1-2 inches of soil are dry, and always water deeply but infrequently.
Add 1-2 inches of organic mulch around the base to keep moisture levels steady without smothering the roots. Within a week, you’ll see new growth pushing through, and the plant will start bouncing back. The best part? This method works for zucchini, pumpkins, and winter squash alike.
For long-term prevention, mix coarse sand or perlite into your planting hole to improve drainage, and avoid compacted soil. If your garden has heavy clay, consider planting in raised beds or containers with fast-draining mixes.
Once you’ve reset the watering balance, your squash will reward you with vibrant green leaves, strong vines, and the kind of harvest that makes neighbors jealous. Trust me—your future squash plants will thank you.
Root Rot’s Silent Triggers
Overwatering squash plants isn’t just about giving them too much love—it’s a sneaky science problem. When roots drown in soggy soil, they suffocate, inviting fungal infections and bacterial attacks that turn your garden into a squash graveyard.
But why does this happen in the first place? Let’s break down the real culprits behind the soggy soil syndrome.
Squash plants thrive in well-draining soil, but if your garden beds or containers lack proper drainage, water pools around the roots instead of flowing away. Here’s why this becomes a disaster:
- Clay-heavy soil acts like a sponge, holding onto moisture for days. Even after rain or watering, it stays saturated, cutting off oxygen to roots.
- Compacted soil (from foot traffic or heavy machinery) creates air pockets, but the water still can’t escape fast enough, leading to waterlogged conditions.
- No gravel or sand layers in pots or raised beds means water has nowhere to go but down—straight to the roots.
Pro tip: 💡 Test your soil’s drainage by filling a container with it, adding water, and timing how long it takes to drain. If it’s slower than 30 minutes, amend with perlite, compost, or coarse sand.
Even the best-intentioned gardeners can drown their squash. Here’s how watering gone wrong turns deadly:
- Watering on a schedule instead of checking soil moisture. Squash roots need 1–2 inches of water per week, but daily light sprinkles keep soil perpetually damp.
- Ignoring weather forecasts. A heavy rain followed by more watering = double the disaster. Always pause watering for 24–48 hours after rain.
- Using overhead sprinklers that soak leaves and soil uniformly. This encourages fungal growth (like powdery mildew) while keeping roots wet.
Pro tip: ✨ Use a moisture meter or the finger test—stick your finger 1–2 inches into the soil. If it’s damp, wait. If it’s dry, water deeply but infrequently.
When soil stays too wet, fungal pathogens like Phytophthora and Pythium throw a party in your squash roots. Here’s how they hijack your plants:
- Oxygen deprivation weakens roots, making them easy targets. Fungi release enzymes that digest root cells, turning them mushy.
- Spores thrive in moisture. A single infected plant can spread spores through water splashes, infecting nearby squash in days.
- Warm, humid conditions (common in summer) supercharge fungal growth. Even "light" watering can keep soil damp enough to fuel the problem.
Pro tip: 🌡️ If your area has high humidity, water early in the morning so foliage dries quickly. Avoid evening watering—this keeps leaves wet overnight, inviting fungal feasts.
Potted squash plants are especially vulnerable because their roots have nowhere to go if water accumulates. Common pitfalls include:
- Small or shallow pots dry out fast on top but stay soggy at the bottom. Roots at the container’s base rot while the top layer feels dry.
- No drainage holes. Even "self-watering" pots can trap excess moisture if they lack exits for water to escape.
- Overpotting without amendments. Filling a large pot with pure garden soil creates a waterlogged brick around roots.
Pro tip: 🔥 For containers, use a mix of 50% potting soil + 30% perlite + 20% compost. Elevate pots on feet or saucers to prevent water from pooling underneath.
Now that you know the why, the good news? Fixing these issues is easier than you think. The key is drainage, timing, and observation. Your squash will thank you with bushier vines and healthier fruit!
Fix overwatered squash plants now
If your squash plants are drowning in too much water, don’t panic—there’s still hope! The key is acting fast to prevent root rot and giving your plants a fighting chance.
Below are practical, step-by-step solutions tailored to the most common causes of overwatering, plus prevention tips to keep your garden thriving. Let’s turn this around before it’s too late! 🌱💦
Before doing anything else, halt all watering. Even if your plants look wilted or sad, more water will only worsen root rot by suffocating the roots. Let the soil dry out slightly before taking further action.
- ✅ Check soil moisture by sticking your finger 1–2 inches deep. If it’s damp, wait 24–48 hours before proceeding.
- ✅ Avoid overhead watering (like sprinklers), which can encourage fungal growth. Stick to deep, targeted watering at the base.
- 💡 Pro Tip: If your garden has poor drainage, consider raising beds or adding a layer of gravel or sand to improve airflow.
Root rot thrives in soggy, compacted soil. Loosen the soil and boost drainage to help roots breathe again.
🔪 Dig Out Compacted Soil (For Small Patches)
Use a garden fork or trowel to gently loosen the top 6–8 inches of soil around the plant’s base. Avoid damaging roots—just fluff it up like aerating a lawn.
- 🌡️ Add organic matter: Mix in compost, coconut coir, or perlite (1 part organic matter to 3 parts soil) to improve structure.
- ✨ Prevention Tip: Before planting, amend heavy clay soil with sand or vermiculite to prevent future compaction.
🌱 For Large Areas: Raise the Bed or Use Containers
If your entire garden struggles with drainage, consider:
- 📊 Raised beds: Fill with a mix of 50% garden soil, 30% compost, and 20% perlite/sand for perfect drainage.
- 🥗 Containers: Use pots with drainage holes and a layer of gravel at the bottom.
Once the soil is drier and looser, give your squash plants a boost to recover.
🥘 Prune Damaged Foliage
Trim any yellow, mushy, or blackened leaves (a sign of rot) with clean scissors. This helps the plant focus energy on healthy growth.
- 💡 Pro Tip: Avoid pruning more than 1/3 of the plant at once—too much stress can hinder recovery.
🌡️ Apply a Fungal Treatment (If Needed)
If you spot mold, foul smells, or slimy roots, your plants may have fungal root rot. Treat with:
- 🍄 Copper fungicide (follow label instructions).
- 🥗 Neem oil spray (1 tbsp neem oil + 1 tsp mild soap per quart of water). Spray roots and soil.
- 🎯 Prevention Tip: Rotate crops—don’t plant squash in the same spot year after year to break fungal cycles.
⏰ Gradually Resume Watering
Once the soil is dry and roots show signs of recovery (firm, white-tan roots), water deeply but infrequently.
- 💧 Watering schedule:
- 1–2 times per week (depending on climate).
- Morning watering (reduces evaporation and fungal risk).
- 1–1.5 inches per week (check with a rain gauge).
- 🌱 Mulch lightly with straw or shredded leaves to retain moisture without smothering roots.
Once you’ve rescued your squash, prevent future overwatering with these habits:
Problem
Solution
Poor drainage
Test soil with a permeability test: Dig a 12-inch hole, fill with water, and time how long it drains. If it takes more than 4 hours, amend soil.
Frequent rain
Use drip irrigation on a timer or soaker hoses to control water flow. Avoid watering 24–48 hours before rain.
Overzealous watering
Use a moisture meter or the finger test before watering. Squash prefers consistently moist (not soggy) soil.
Container plants
Ensure pots have drainage holes and empty saucers after watering. Use well-draining potting mix (avoid heavy garden soil).
With these steps, your squash plants should bounce back in 1–2 weeks. Keep an eye on them, adjust as needed, and soon you’ll be harvesting plump, healthy squash instead of dealing with rot! 🎉🍠
Frequently asked questions
How do I know if my squash plants are overwatered?
Check for yellowing leaves that stay soft to the touch, wilting despite damp soil, or stems that feel mushy when gently squeezed. Overwatered squash also develop a foul smell at the base, and roots may appear brown or slimy instead of firm and white.
Can I save squash plants with root rot?
Yes, but act fast! Stop watering immediately, loosen compacted soil, and trim any mushy leaves. For severe cases, repot the plant in fresh, well-draining mix. With proper care, squash can recover in 1-2 weeks, but advanced rot may require removing the plant to prevent spreading.
What’s the best way to water squash plants?
Water deeply but infrequently—about 1-2 inches per week—using a soaker hose or drip irrigation at the base. Avoid overhead watering (like sprinklers) to prevent fungal diseases. Always check soil moisture first: stick your finger 1-2 inches deep; if damp, wait before watering again.
How do I fix poor drainage in my garden?
Amend heavy clay soil with 1-2 inches of compost or perlite, or create raised beds with a mix of 50% soil, 30% compost, and 20% sand. For containers, use pots with drainage holes and a gravel layer at the bottom. Test drainage by filling a hole with water—if it drains in under 30 minutes, your soil is safe.
Will mulch help prevent overwatering?
Mulch helps retain moisture but can also trap excess water if applied too thickly. Use 1-2 inches of straw or shredded leaves around plants, keeping it away from the stem. The key is balance—mulch should keep soil moist without smothering roots or preventing airflow.