Propagation
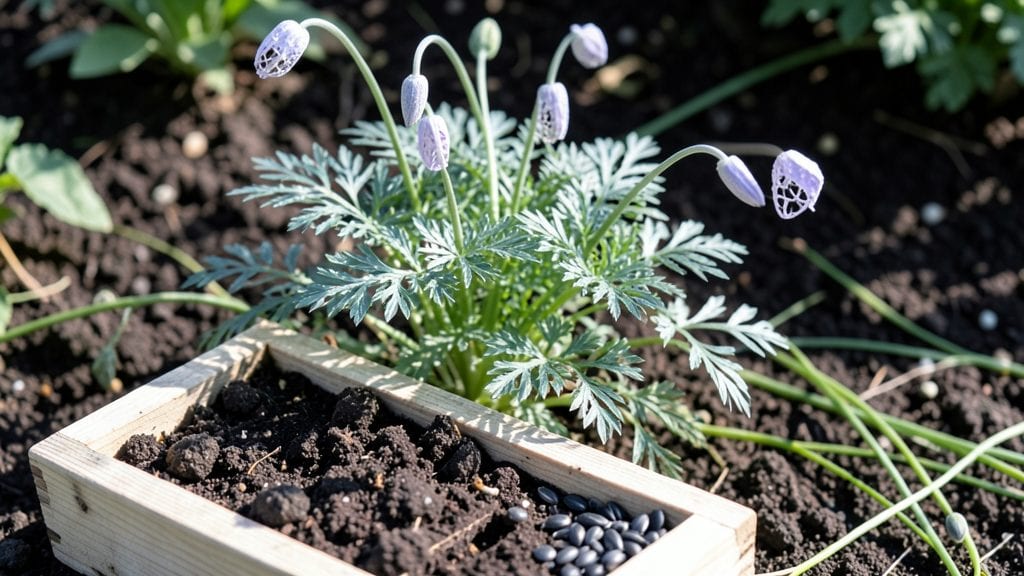
Planting nigella seeds is the fastest way to turn a patch of soil into a pollinator magnet by next summer. 🌿 I’ve watched these delicate blue flowers transform bare ground into a buzzing haven for bees and butterflies—all from seeds that sprout in just days.
The key isn’t just tossing them into the dirt; it’s creating the right conditions so they germinate reliably and grow into those iconic lacy blooms.
You’ll need well-draining soil, a sunny spot (at least 6 hours of light daily), and a light hand with the trowel. Nigella thrives in poor soil—over-fertilizing is the real enemy—but it demands consistent moisture until roots establish.
The seeds themselves are tiny, so scattering them thinly (about 1/4 inch deep) prevents overcrowding. Once up, they’re nearly self-sufficient, handling drought and heat better than most annuals.
By late spring, you’ll have clouds of fragrant blue and white flowers that keep blooming all summer. The best part? Nigella self-seeds like crazy, so you’ll get free plants next year. It’s the kind of annual that rewards patience with minimal effort—just plant, water lightly, and watch the pollinators arrive.
Works perfectly in borders, cottage gardens, or even containers. Here’s how to get those first sprouts popping in under a week—no waiting required.
📚 In This Guide
- What you need
- Instructions
- Tips and common mistakes
- Wrapping up and next steps
What you need
- ● Nigella seeds (Love-in-a-Mist, Poppy Seeds, or similar): Quantity: 1–2 grams per 10 square feet (about 50–100 seeds per foot for dense blooms).
- ● Type: Organic, untreated seeds (avoid pre-treated varieties for best germination).
- ● Well-draining potting mix or garden soil: Type: Light, sandy loam or a mix of 60% topsoil + 30% perlite/sand + 10% compost (nigella hates soggy roots!).
- ● pH: Slightly alkaline to neutral (6.5–7.5).
- ● Containers or garden bed: For direct sowing: A sunny spot with 6+ hours of sunlight and loose soil.
- ● For indoor starts: 2–3 inch deep trays with drainage holes (or biodegradable pots).
- ● Hand trowel or small rake (for scratching soil before planting).
- ● Watering can or spray bottle (gentle watering is key!).
- ○ Twine or stakes (optional) (if growing tall varieties like Nigella damascena).
- ○ Glove (optional) (to protect hands from prickly seed pods later).
- ● Warmth: Soil temp of 60–70°F (15–21°C) for germination (wait until after last frost for outdoor planting).
- ● Sunlight: Full sun (6+ hours/day)—nigella thrives in hot, dry conditions!
- ● Patience: Germination takes 10–21 days (don’t rush it!).
Step-by-step instructions for planting nigella seeds
Here's how to grow these cheerful annuals quickly and effortlessly for a pollinator-friendly garden.
🌱 Step 1: Choose the Right Planting Location
Nigella thrives in full sun with at least 6-8 hours of direct sunlight daily. Pick a spot with well-draining soil—these seeds hate soggy conditions. I always test drainage by digging a hole, filling it with water, and checking if it drains within an hour. If not, amend the soil with compost to improve texture.
These seeds self-seed prolifically, so avoid planting near areas you want to keep tidy. The delicate blue and white blooms will scatter seeds everywhere, creating a naturalized look over time. If you want to control spread, plant in containers or raised beds with borders.
🌱 Step 2: Direct Sow Seeds in Early Spring
Nigella seeds germinate best when sown directly in the garden after the last frost date. Scatter seeds ¼ inch deep—they're tiny, so I sprinkle them like confetti, spacing them about 12-18 inches apart for full blooms. Press lightly with your fingers to ensure good soil contact, but don't bury them deeper.
Keep the soil consistently moist but never waterlogged during germination. You'll see sprouts in 2-3 weeks—much faster than many annuals. Thin seedlings to 12 inches apart once they reach 2 inches tall, giving each plant room to mature. This prevents overcrowding and ensures stronger blooms.
☀️ Step 3: Provide Minimal Care for Fast Growth
Nigella is drought-tolerant once established, but young plants need regular watering. Water at the base 1-2 times per week until seedlings are 4-6 inches tall. The key is keeping soil evenly moist—not soggy, not bone-dry. You'll know moisture is right when the top inch of soil feels slightly damp to the touch.
Fertilizer isn't necessary—too much nitrogen produces leafy growth at the expense of flowers. Instead, side-dress with 1 inch of compost in early spring to feed roots naturally. Deadhead spent blooms to encourage continuous flowering, but leave some seed pods for pollinators and self-seeding.
✂️ Step 4: Enjoy Blooms and Encourage Self-Seeding
Nigella typically blooms 8-10 weeks after sowing, producing delicate, lacy flowers that attract bees and butterflies. The blooms last 4-6 weeks, and each plant produces hundreds of seeds. Let some flowers go to seed—birds and wind will scatter them, creating new plants next season.
If you want to collect seeds for next year, harvest pods when they turn brown and dry. Rub them between your fingers to release the tiny, jet-black seeds. Store them in a cool, dry place until spring planting. The more you let them self-seed, the more your garden will fill with these cheerful annuals over time.
🪴 Step 5: Overwintering and Container Options
Nigella is an annual, but its seeds germinate easily in fall. If you want winter color, sow a fresh batch in late summer or early fall—these plants will bloom through winter in mild climates. For containers, use pots at least 6 inches deep with drainage holes and plant 3-4 seeds per container.
In colder regions, protect containers with frost cloth or move them to a sheltered spot. The seeds will lie dormant until spring, then sprout when temperatures warm. This trick gives you an early start and extends your blooming season effortlessly.
Tips & tricks for planting nigella seeds
These simple tricks will help you grow vibrant nigella blooms faster and with less fuss—no green thumb required.
The Sunlight Secret: While nigella thrives in full sun, I've found that 6-8 hours of direct sunlight is the magic number for consistent blooms. If your garden gets less, place plants in the sunniest spot you have—even partial shade can delay flowering. I always check sunlight exposure by observing my garden from 10 AM to 4 PM to identify the sunniest patches.
Germination Hack: Those tiny nigella seeds need just ¼ inch of soil coverage—think of it like dusting them lightly. I use a fine mesh strainer to sprinkle seeds evenly without overcrowding. For faster germination, place a clear plastic dome or even a cut-open plastic bottle over the seeded area to create a mini greenhouse effect. Remove it once sprouts appear in 2-3 weeks.
Watering Wisdom: The key to keeping soil "evenly moist" is checking the top inch daily. I use my finger to test moisture—if it feels dry, water gently at the base. Overwatering is the biggest mistake with nigella, so let the top inch dry slightly between waterings once seedlings reach 4-6 inches tall. This drought tolerance is what makes them so low-maintenance!
Self-Seeding Strategy: Let nature do the work by leaving some seed pods to mature. I always leave at least 20% of my plants to go to seed—this creates a natural tapestry of blooms year after year. For controlled planting, collect seeds when pods turn brown and store them in paper envelopes in a cool, dark place until spring.
Pro Tips for Nigella Seeds Planting
- These simple tricks will help you grow vibrant nigella blooms faster and with less fuss—no green thumb required.
- The Sunlight Secret: While nigella thrives in full sun, I've found that 6-8 hours of direct sunlight is the magic number for consistent blooms.
- Germination Hack: Those tiny nigella seeds need just ¼ inch of soil coverage—think of it like dusting them lightly.
Frequently asked questions
Got questions about growing nigella seeds?
You’re not alone! Here are answers to the most common queries—from timing to troubleshooting—to help you cultivate a thriving pollinator garden with ease.
When is the best time to plant nigella seeds?
Nigella seeds thrive in cool weather—sow them 2–3 weeks before your last frost date in spring or directly in the garden in early fall for a winter display. Avoid planting in scorching heat, as seeds may struggle to germinate. For year-round blooms, stagger plantings every 3–4 weeks.
How long do nigella seeds take to germinate?
Patience pays off! Nigella seeds typically germinate in 14–21 days under ideal conditions (consistent moisture, 60–70°F soil temps). Keep the soil lightly moist but not soggy—overwatering can deter germination. Thin seedlings to 6–12 inches apart once they sprout.
Can I grow nigella seeds indoors before transplanting?
While possible, nigella seeds germinate better outdoors—they dislike being transplanted due to delicate roots. If you must start them indoors, use biodegradable pots and plant them outside as soon as soil warms (even if seedlings are small). Direct sowing in the garden is the foolproof method!
Why aren’t my nigella seeds germinating?
Common culprits include:
- Too much water: Seeds rot if soggy—water gently and keep soil barely damp.
- Poor soil contact: Press seeds lightly into soil (they need light to germinate, so don’t bury deeply).
- Heat stress: Seeds may refuse to sprout if soil temps exceed 75°F. Try fall planting or shade cloth.
- Old seeds: Store-bought seeds last 2–3 years; test viability by soaking a few in water overnight.
Are there any alternatives to nigella for pollinator gardens?
Try these low-maintenance, bee-friendly annuals:
- Bachelor’s buttons (Centaurea cyanus): Bright blue blooms, similar height.
- Calendula (Calendula officinalis): Edible petals, long-lasting flowers.
- Sweet alyssum (Lobularia maritima): Fragrant, fast-growing ground cover.
- Cosmos (Cosmos bipinnatus): Drought-tolerant with feathery foliage.
Wrapping up and next steps
Planting nigella seeds is a rewarding way to create a vibrant, pollinator-friendly garden with minimal effort—thanks to their fast germination and stunning blooms! Whether you’re a beginner or a seasoned gardener, these easy-to-grow annuals bring beauty and life to your outdoor space. 🌸
Now that you’re equipped with the right tips and tricks, it’s time to roll up your sleeves and get planting. Start small with a few packets, experiment with containers or flower beds, and watch your garden transform into a buzzing paradise. Happy gardening! 🌱