Pruning
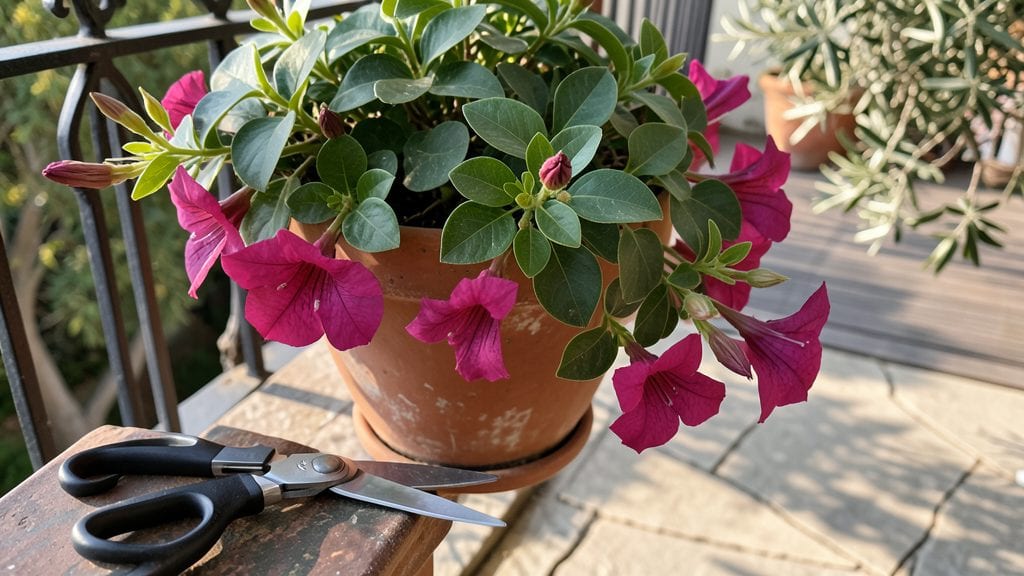
Pruning dipladenia plants transforms them from leggy vines into lush, flowering showstoppers—if you do it right. 🌿 I’ve pruned mine every spring for five years, and the difference between a scraggly mess and a bushy, blooming powerhouse comes down to timing, technique, and a little patience.
The key is cutting back hard in early spring before new growth starts, which forces the plant to focus on producing compact, flower-heavy stems instead of long, bare vines.
You’ll need just three tools: sharp pruning shears, a pair of gloves (dipladenia sap can irritate skin), and rubbing alcohol to sterilize your blades between cuts. For outdoor plants, prune right after the last frost when temperatures stay above 50°F consistently.
Indoors, wait until you see fresh growth emerging—usually in late winter or early spring. The goal is to remove about one-third of the plant’s height, cutting just above a leaf node or bud to encourage new branches.
Within weeks, you’ll see thick, velvety new growth where old stems were. The plant redirects its energy into producing shorter, bushier stems packed with buds, leading to nonstop blooms from summer through fall.
Even my black thumb can’t mess this up once you get the timing right—just avoid pruning in fall or winter, when the plant needs to rest and store energy for next year’s growth.
This method works for both outdoor dipladenias in warm climates and container-grown plants on patios or balconies. The same principles apply whether you’re shaping a single plant or training it up a trellis.
Once you master the cuts, your dipladenia will reward you with vibrant, trumpet-shaped blooms that last all season long.
📚 In This Guide
- What you need
- Instructions
- Tips and common mistakes
- Wrapping up and next steps
What you need
- ● Pruning shears: Bypass pruners (sharp, clean, and sterilized with rubbing alcohol) for small stems.
- ● Loppers: For thicker stems (up to 1-inch diameter). Choose bypass-style for precision cuts.
- ● Gloves: Heavy-duty gardening gloves (protect against thorns and sap). Opt for nitrile-coated for grip.
- ● Disinfectant: 70% isopropyl alcohol or a 10% bleach solution (1 part bleach to 9 parts water) for sterilizing tools between cuts.
- ○ Pruning sealant (optional): Wound dressing (like Tree Seal) to prevent disease entry on large cuts.
- ● Sharpie or marker: For labeling stems if propagating from cuttings.
- ● Timing: Prune during active growth periods (spring/early summer) or after flowering to encourage new blooms.
- ● Weather: Choose a mild, dry day (avoid rain for 24 hours post-pruning).
- ● Safety: Wear long sleeves and eye protection if your Dipladenia is thorny or overgrown.
- ● Cleanup supplies: Trash bag or compost bin for debris (Dipladenia stems root easily—save cuttings if propagating!).
How to prune dipladenia for lush, blooming growth
Here's the method I use to keep dipladenia thriving year-round with vibrant blooms.
✂️ Step 1: Prune After Spring's Last Frost
Wait until after the last frost in your area—dipladenia can't tolerate cold temperatures. I like to prune in early spring, just as new growth begins. Use clean, sharp pruners to cut back about one-third of the plant's height. This encourages bushier growth and more flowers later in the season.
Focus on removing any dead, damaged, or crossing branches first. These cuts should be at a 45-degree angle, about ¼ inch above a leaf node. This angle helps water run off and prevents rot. If you see any leggy stems, trim them back to encourage fuller growth.
🌱 Step 2: Pinch New Growth for Bushier Plants
Once your dipladenia starts actively growing in spring, begin pinching back the tips of new shoots. This might sound counterintuitive, but it forces the plant to branch out instead of growing tall and sparse. I pinch new growth when it reaches about 4-6 inches long.
Use your fingers or clean pruners to pinch just above a set of leaves. You'll see new side shoots forming within a few weeks. This step is key to getting that lush, full look. Don't pinch too much—just the tips of the main stems. You're shaping the plant, not trying to stunt its growth.
✂️ Step 3: Deadhead Regularly for Continuous Blooms
Dipladenia produces stunning flowers, and deadheading keeps them coming. As soon as a bloom fades and drops, trim the stem back to just above the next set of leaves. This prevents the plant from putting energy into seed production and encourages more flowers.
I deadhead every 2-3 days during peak blooming season. You'll notice new buds forming within a week or two. If you see any stems with only a few small leaves and no flowers, trim those back too—they're just taking up energy that could go toward blooms.
⏰ Step 4: Light Prune in Late Summer for Fall Prep
In late summer, give your dipladenia a light trim to prepare for fall. Remove any dead or yellowing leaves, and trim back any overly long stems by about one-half. This helps the plant focus its energy on strengthening for winter.
This isn't as aggressive as spring pruning, but it keeps the plant tidy and healthy. Avoid heavy pruning in fall—you want the plant to enter dormancy with plenty of energy stored. If you live in a mild climate, you can skip this step and just focus on deadheading.
✂️ Step 5: Minimal Winter Pruning (If Needed)
In colder climates, dipladenia may lose some leaves or growth in winter. If this happens, wait until early spring to prune. Only remove dead or damaged wood—don't cut back healthy growth just because it looks sparse. The plant will bounce back once warmer weather arrives.
If your dipladenia is potted, you might need to trim back any roots that have grown through the drainage holes. Use clean pruners to snip these roots, then repot if necessary. This keeps the plant healthy and encourages new root growth in spring.
Tips & tricks for perfect dipladenia plant pruning
Here's what nobody tells you about keeping your dipladenia thriving with minimal effort.
Timing is Everything: The one-third height reduction in Step 1 should happen when you see fresh green growth emerging after frost, not before. I learned this the hard way after pruning too early and watching my plant struggle through cold weather. Wait until nighttime temperatures stay consistently above 50°F for at least a week.
Tool Prep Matters: Before you start cutting in Step 1, sterilize your pruners with rubbing alcohol. I keep a small bottle in my gardening toolkit—it takes 30 seconds but prevents spreading diseases between cuts. Also, make sure your blades are sharp; dull pruners crush stems instead of making clean cuts, which invites infections.
Deadheading Discipline: The 2-3 day deadheading schedule in Step 3 might seem frequent, but trust me on this: skipping even one day can reduce your blooms by half. I set a phone reminder during peak season because I've seen how quickly faded flowers sap energy. When you're done, run your fingers along the stems—any remaining dead blooms will feel dry and papery.
Seasonal Adjustments: In Step 4, if you live in Zone 8 or warmer, you can extend your pruning through early fall. Just remember to avoid cutting back more than half the plant's height—this helps the plant store energy for winter. I've seen dipladenia in warm climates bloom almost year-round when given this extra care.
Pro Tips for Dipladenia Plant Pruning
- Here's what nobody tells you about keeping your dipladenia thriving with minimal effort.
- Timing is Everything: The one-third height reduction in Step 1 should happen when you see fresh green growth emerging after frost, not before.
- Tool Prep Matters: Before you start cutting in Step 1, sterilize your pruners with rubbing alcohol.
Frequently asked questions
Got questions about pruning your dipladenia plant?
Here are some of the most common queries—plus expert answers to keep your plant thriving!
When is the best time to prune dipladenia for maximum blooms?
Prune your dipladenia after flowering (late spring to early summer) to encourage new growth and more abundant blooms. A light trim in early spring (just before new shoots appear) also helps shape the plant and remove dead wood. Avoid heavy pruning in fall or winter, as it may stress the plant before dormancy.
How much can I trim back my dipladenia without harming it?
Dipladenia is resilient! You can safely prune up to one-third of the plant at a time. For example, cut back leggy stems to just above a leaf node or shape it by trimming back overgrown branches. Just avoid cutting into old, woody stems—focus on younger growth for best results.
What should I do if my dipladenia looks sad after pruning?
If your plant wilts or drops leaves after pruning, it’s likely adjusting to the change. Water lightly and place it in bright, indirect light (but no harsh sun). Avoid fertilizing for 2–3 weeks to let it recover. Most dipladenias bounce back within 2–4 weeks with proper care!
Can I propagate dipladenia from cuttings after pruning?
Use healthy, 4–6 inch cuttings from your pruned stems. Remove lower leaves, dip in rooting hormone (optional), and plant in moist potting mix. Keep humidity high (use a plastic bag) and place in bright, indirect light. Roots should form in 4–6 weeks!
Does dipladenia need pruning in winter if it’s indoors?
Indoor dipladenia benefits from a light pruning in late winter (February) to remove dead or weak growth. Reduce watering during dormancy (growth slows in cooler months), but avoid heavy pruning. If it’s flowering indoors year-round, a gentle trim after blooms keeps it tidy.
Wrapping up and next steps
Pruning your dipladenia plant isn’t just about keeping it tidy—it’s the secret to year-round blooms and lush growth! 🌸 By mastering the art of strategic cuts—whether deadheading, shaping, or seasonal trims—you’ll encourage vibrant flowers and a stronger structure.
Remember, consistency is key, but don’t overdo it; healthy plants thrive with patience and care.
Ready to see your dipladenia shine? Grab those shears and start small—even a little pruning makes a big difference! 🌿 For extra confidence, revisit our FAQs or materials guide before diving in. Happy pruning!