Pruning
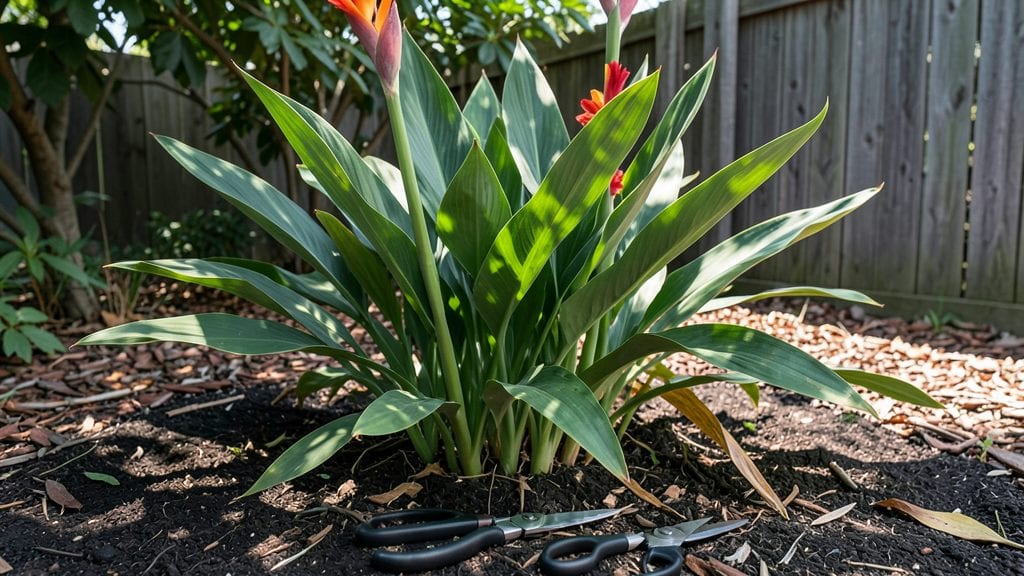
Pruning canna plants transforms them from one-season showstoppers into year-round bloomers—all it takes is three strategic cuts at the right times. I’ve watched my cannas go from flopping, spent stalks to thick, vibrant stalks covered in blooms by mid-summer, simply by following this foolproof method.
The key isn’t just cutting back—it’s understanding when to trim for regrowth, not just cleanup.
You’ll need sharp pruners (dull blades tear stems), a clean cutting surface to prevent disease, and a sunny spot where your cannas get at least 6 hours of light daily. The best time to prune is right after flowering, then again before dormancy—never in freezing temps.
Most gardeners skip the second cut, which is why their cannas struggle to rebound the next season. Think of it like giving your plant a fresh start twice a year.
After pruning, you’ll see new shoots emerge within 2-3 weeks, thicker and more vigorous than before. The foliage stays lush, the blooms come faster, and your plants look like they’re in their prime all season long.
It’s the difference between a garden center canna and one that steals the show every year.
Works for both tropical and hardy canna varieties, and even container-grown plants. The only rule? Never cut more than one-third of the plant at once—that’s how you trigger regrowth without stressing the roots. Let’s get those blooms coming back stronger than ever.
📚 In This Guide
- What you need
- Instructions
- Tips and common mistakes
- Wrapping up and next steps
What you need
- ● Pruning shears: Bypass shears (for clean cuts) or anvil shears (for thicker stems). Specs: 5-6 inch blades, stainless steel.
- ● Garden gloves: Heavy-duty, cut-resistant (e.g., Felco or Cruelty-Free brands). Quantity: 1 pair.
- ● Disinfectant solution: 70% isopropyl alcohol or diluted bleach (1 part bleach to 9 parts water). Purpose: Sterilize tools between cuts.
- ● Sharpie marker: Permanent, waterproof (for labeling cuttings if propagating).
- ○ Buckets or trays: 5-gallon capacity (for collecting clippings or compost). Optional: Add rooting hormone for cuttings.
- ● Hand pruners: For smaller, detailed cuts (e.g., Fiskars ergonomic pruners).
- ● Rubbing alcohol wipes: Quick tool sanitization on the go.
- ● Compost bin: For repurposing pruned foliage.
- ● Plant food: Balanced fertilizer (e.g., 10-10-10) to revive plants post-prune.
Instructions for canna plant pruning: year-round bloom revival
Revitalize your canna plants with just three straightforward cuts that encourage lush foliage and continuous flowers.
Identify and Remove Dead or Damaged Foliage
Start by examining your canna plant for any brown, yellow, or mushy leaves—these are clear signs of stress or disease. Use clean, sharp pruning shears to make a clean cut just above the next healthy leaf node. This isn’t just about aesthetics; removing dead growth redirects the plant’s energy to new, vibrant shoots.
I always work from the bottom up, so I can see the full structure of the plant as I go. If you spot stems that are hollow or oozing sap, cut those back immediately. Healthy canna stems should feel firm and solid when you gently squeeze them. Never leave stubs longer than ½ inch—this prevents rot and keeps the plant looking tidy.
Trim Back Overgrown or Leggy Stems
Cannas grow tall and bushy, but if stems stretch too far without leaves, they’re called "leggy." These thin, sparse stems won’t produce many blooms and can flop over in wind or rain. To fix this, look for stems that have fewer than 3-4 leaves along their length—these are prime candidates for trimming.
Make your cut just above a leaf node where at least two healthy leaves are visible. Avoid cutting into the main crown (the thick base where all stems originate), as this can harm the plant’s ability to store energy. If you’re unsure which stems to cut, focus on the oldest growth first—these stems are less likely to regenerate.
Encourage Bushier Growth with Strategic Cuts
To promote a fuller, more compact plant, trim back the tallest stems by about ⅓ of their height. This might sound drastic, but cannnas are resilient and will respond by branching out at the nodes below the cut. Aim to leave 2-3 strong stems per clump to maintain balance and airflow.
After cutting, step back and assess the plant’s shape. If one side looks sparser, focus your next cuts there. Cannas thrive on pruning because they store energy in their rhizomes (thick underground stems), so they’ll quickly bounce back with fresh growth. Water the plant deeply after pruning to help it recover and reduce stress.
Bonus: Year-Round Maintenance Tips
Prune your cannas in early spring to kickstart growth, then repeat every 4-6 weeks during the growing season. In fall, cut back stems to 6 inches above the ground once foliage yellows, but leave the rhizomes in the soil—they’ll regrow next year. Mulch around the base with 2-3 inches of organic matter to protect the rhizomes from freezing temperatures.
If you notice new shoots emerging from the rhizome but no flowers, don’t worry—cannas often take 4-6 weeks after pruning to rebloom. Keep the soil consistently moist (but not soggy) and provide full sun to partial shade for best results. With these simple cuts, your cannas will reward you with bold, vibrant blooms all season long.
Tips & tricks for perfect canna plant pruning
These simple strategies will help you keep your cannas thriving with minimal effort and maximum impact.
Pruning Tool Prep: Before you start, sterilize your pruning shears with rubbing alcohol to prevent spreading disease between cuts. I also recommend sharpening the blades—dull shears crush stems instead of making clean cuts, which can damage the plant. Healthy cuts heal faster and look better, so take the extra 2 minutes to prepare your tools properly.
Visual Cues for Healthy Growth: In Step 1, when you're looking for healthy leaf nodes to cut above, focus on leaves that are deep green and firm to the touch. The nodes should be slightly raised and have a small bump where new growth emerges. If you're unsure, look for stems with at least two leaves that are spaced about 4-6 inches apart—these are strong indicators of healthy growth points.
Strategic Stem Selection: When trimming leggy stems in Step 2, prioritize stems that are growing away from the center of the plant. These outer stems often get less sunlight and produce fewer blooms. Cutting them back encourages the plant to focus its energy on the stronger central stems, which will give you more vibrant flowers and better overall structure.
Post-Pruning Care: After your cuts, avoid heavy watering for the first 24 hours. This gives the plant time to seal the cut surfaces naturally. Instead, lightly mist the foliage and keep the soil slightly moist. The deep watering mentioned in Step 3 should happen after this initial 24-hour period to help the plant recover without overwhelming it right after pruning.
Pro Tips for Canna Plant Pruning
- These simple strategies will help you keep your cannas thriving with minimal effort and maximum impact.
- Pruning Tool Prep: Before you start, sterilize your pruning shears with rubbing alcohol to prevent spreading disease between cuts.
- Visual Cues for Healthy Growth: In Step 1, when you're looking for healthy leaf nodes to cut above, focus on leaves that are deep green and firm to the touch.
Frequently asked questions
Got questions about canna plant pruning?
You’re not alone! Here are answers to the most common queries to keep your plants thriving—no guesswork required.
When is the best time to prune canna plants?
Prune canna plants in early spring (before new growth) or after flowering in late summer/fall to encourage fresh blooms. Avoid heavy pruning during winter dormancy—just trim dead foliage. For year-round blooms, light pruning every 4–6 weeks works wonders!
How do I know if I’m pruning too much?
If your canna plant looks bare or stops producing leaves, you’ve likely over-pruned. Aim to remove no more than 1/3 of the plant at a time. Healthy cannas bounce back fast—just leave a few lower leaves for energy. Think of it like a haircut: less is more!
Can I propagate canna plants from pruned cuttings?
Snip healthy stems (3–4 inches long) with at least one node, dip in rooting hormone, and plant in moist soil or water. Keep them warm and humid (70–75°F) for best results. You’ll have new cannas in 4–6 weeks—free plants for friends or your garden!
Why are my canna leaves turning yellow after pruning?
Yellowing leaves post-pruning usually mean stress or overwatering. Ensure your plant gets bright, indirect light and well-draining soil. If the problem persists, check for pests (like spider mites) or root rot. A balanced fertilizer can also help revive them!
Should I prune cannas in cold climates?
In chilly zones (USDA 7 and below), prune cannas after the first frost—cut back to the ground and store tubers indoors. Wait until spring to replant. If you’re in a milder zone, light pruning in winter keeps them tidy without stressing the plant.
Wrapping up and next steps
Mastering canna plant pruning is your secret weapon for lush, vibrant blooms all year long! With just three simple cuts—deadheading, shaping, and seasonal trimming—you’ll keep your cannas thriving and full of energy. Remember, consistency is key, and a little effort now means big rewards later.
Ready to transform your garden? Grab your pruners and get started—your cannas (and future blooms!) will thank you. Need a refresher? Bookmark this guide and revisit it before your next pruning session!